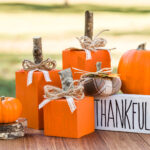
DIY Wooden Pumpkins
Creating wooden pumpkins for fall, Halloween, and Thanksgiving is easy, fun, and super budget-friendly.
Materials
- 1 4x4 board
- 1 Raffia
- 1 chalk paint
- 1 sandpaper
- 1 leaf pattern (printout)
Instructions
- To create my pumpkins, I used 4x4; however, you could use a 2x4 as well. The heights I liked the best are 3", 6" and 9". You can cut your piece of wood to your desired height.
- I like to give my unfinished wooden pieces a quick sanding before painting.
- Paint the wood pumpkins with chalk (or paint of your choice). It is fun to make your pumpkins in non-traditional colors, and you could add polka dots, stripes for a unique look.
- You can make some of my favorite leaves using the leaf pattern and book pages, or you could use silk leaves or ribbon.
- Choosing a stem for my pumpkins was as easy as stepping out of the backdoor. I decided to use stems from a tree since it gave my pumpkins a fun rustic wood style for the stem. Choosing a purchased or handmade stem are also a great choice.
- To attach the stem apply a generous dot of hot glue to the center of the top of your painted wood pumpkins and hold the stem in place until the glue dries. Next, attach your leaves. Note: Before I attach paper leaves, I like to fold them to make creases where the vines would be in a real leaf.
- I chose the tendril or curly vine to coordinate with the other elements I used for each trio of pumpkins. Such as I used raffia for the white, for the orange ones, I used raffia and lace, and the teal pumpkins got a buffalo check ribbon.
Notes
Creating adorable wooden pumpkins for fall is easy, and budget-friendly. They make the perfect addition to your Halloween and fall decor.
I used scrap wood from building our garden trellis, paint on hand, and sticks off a tree in my yard.
