Welcome back if you have been following along, however, if you are new to our One Room Challenge please take a look at where this makeover began with week one, week two, week three, and week four.
Please note, week five with canceled out of respect for #Blacklivesmatter. Our bedroom makeover is a little different while trying to source materials and decor we have found that items are out of stock and the companies have no idea when or if the item will ever be available again. Okay, that means being creative is that much for valuable during this challenge. Please visit all the participants in the ORC and hosts so you don’t miss any inspiration.
Better Homes and Garden


One Room Challenge
I wanted, to begin week 6, with a look back (photo below) to where we left off last time. You can see the room’s before photos HERE. The shiplap was installed, painted, and windows (see the how-to video here) were replaced.


Master bedroom painted and ready for gorgeous window trim
This post contains affiliate links. This means that if you purchase from one of these links I will make a small commission, but rest assured you will not pay more for any products.
How to Install Vinyl Flooring
Our master bedroom’s existing floor was what I would call vintage carpet circa 1980, so it was past time to replace the flooring. We wanted the look of hardwood flooring, but we wanted the ease of care that vinyl flooring offers. For these reasons, we chose luxury vinyl plank (LVP) flooring offering us the best of both of our wishes. My husband has been building and creating over 40 years so he has professionally completed all the rehab work on this makeover.
If you would like to save this tutorial for later please use this pin for your Pinterest board.
Supplies and Tools
- Vinyl Flooring (LVP)
- Threshold
- Rubber mallet
- Pull bar
- Tapping block
- Utility knife
- Undercut saw
- Skilsaw
- Measuring tape
- Chalk line
- Pry bar
- Chopsaw
- Speed square
How to Install Vinyl Plank Flooring
Unlike older sheet vinyl flooring that was purchased off a roll in huge cumbersome vinyl sheets, thus not need heavy floor rollers and adhesive trowels those are a thing of the past. In contrast, new style vinyl plank flooring is easy to install.
The first thing you will want to do is to determine your floor’s square feet. When purchasing your flooring it is best to purchase ten percent more than needed. The vinyl we chose has an attached foam pad, it is 100% waterproof and scratch-resistant. These planks lock together, thus no fasteners were required for installation.


Luxury Vinyl Plank Flooring
Preparing Floor for Installing Vinyl Plank Flooring
Storing your flooring inside your home for 24 hours prior to installation so it has time to acclimate.
If you are replacing old flooring remove the old flooring first, then inspect the floor for imperfections such as high spots. Make any repairs and level if needed. Scrape and clean your subfloor to achieve a smooth surface. Our floor has concrete subfloors and it required some patches where we removed the carpet’s tack strip.
Tip:
Next, measure your room to determine how many full rows of the vinyl plank will be needed for your install.
Follow manufacturer’s requirements for partial rows and cut your starter row to width. You will want to have even rows on both sides if possible.
Divide the remaining space by 2 which will be the width of the starter row and the last row. Measure and mark off your starter wall at both ends the width plus .25 inches. Use a chalk line to make a reference line.
Assemble your starter row and aline it with your reference line. Add .25 inches spacers along the wall to prevent it from shifting when you install the rest of your rows. This will give you a .25 inch expansion gap.


Undercutting door jamb
To make install the flooring under the door trim you will need to use a piece of the floor to use for a spacer to undercut the door jambs and trim.


Marking cutouts on vinyl
Using a marker to mark where you need to make your cuts to fit the flooring in the doorway. Fitting the LVP under the door jambs will give your flooring a professional finish.


Cutting the vinyl plank flooring
Cutting Vinyl Plank Flooring
To make small cuts you can use a handsaw, for long cuts use a Skilsaw and for cross cuts, you use a chop saw.


Installing the custom plank
After making your cuts you will slide the flooring under the door jamb.


Use a rubber mallet to install flooring under the door jamb
Using a tapping block (I used a small piece of the flooring) and rubber mallet to lock the planks together. You will use this same method during your entire vinyl flooring installation.


Using a rubber mallet lock the planks in place
Installing vinyl plank flooring is the easiest flooring we have ever installed. There are only a few tools and rules (tips and tricks) and you are going to have affordable gorgeous flooring.
Tip: Stagger your joints per the manufacturer’s requirements.


Using a tapping tool to pull the planks together
To finish the last row of flooring you will need to use a pull bar to lock the planks together since a tapping block will not fit in this space.


Fitting the final row of planks
Tip: Periodically during install inspect your vinyl planks to be sure all the joints are locked together.
Final Step in VLP Flooring Installation
Using the pull bar to install the vinyl floor to fit in the corner and it is a wrap.


Adding the final piece of vinyl using a rubber mallet and pull bar
Tip: We made our simple custom baseboards using 1 x 6 x 16 pine lumber see how in these videos Part One and Part Two (these were taken on my phone while my photographer was filming) new video coming soon.


Installing DIY baseboards


Finished master bedroom rehab
I have to confess that this type of flooring is my new favorite flooring!
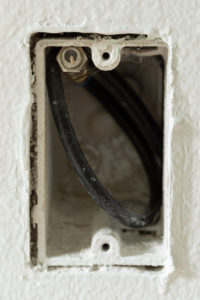
Outlets For Modern Homes
Replacing the outlets and removing the cable and phone jacks made our master bedroom rehab complete.
Supplies
-
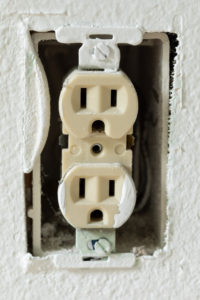
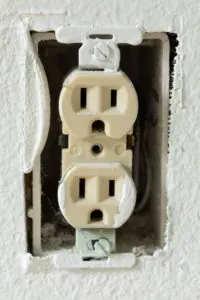
- Out-of-date (old school) electrical outlets
-
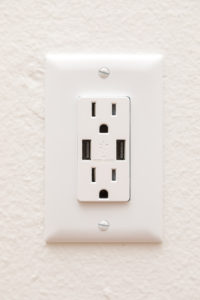
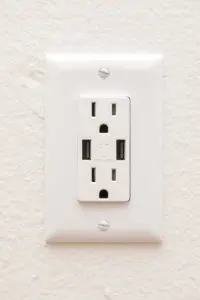
- USB and electric outlets
-

- Cable and old school phone jacks
-
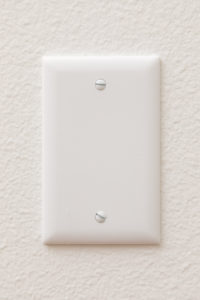
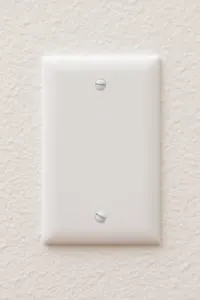
- Outlet cover
Our new modern light bulbs are here and wow they are the most amazing addition thus far. With 16 million light settings to choose from, we will be able to turn a gray day into a sunny day at the beach. Did I mention that they can be controlled with voice commands to Alexa?
Supplies


Modern light bulbs
Our bedroom has been updated into a “new” modern space ready for years of relaxing and enjoying.
Now for the fun part DECORATING!
I was so excited to cross off a few more items from my to-do list this week.
To-Do List
Add shiplap to the wall with windowsPaint the ceiling and wallsReplace windowsReplace all trim and baseboardsInstall recessed lightingRemoved the old carpet and install new flooringOrder woven-wood Roman shadesWindow treatment hardware orderOrder pillow inserts- Purchase plants
Have artwork and antique photos framedOrder bedding fabrics- Make bed skirt and pillow
- Hang Artwork
- Make upholstered headboard
- Install wall sconce
- Paint nightstands
- Install woven wood (bamboo) shades
You might also enjoy these posts:

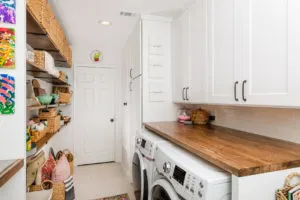
Laundry Room Makeover Reveal – Laundry Room After Photo
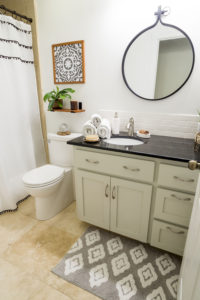
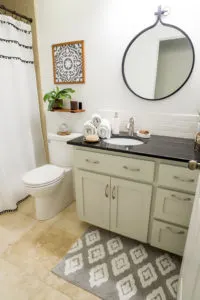
Bathroom remodel reveal
Thank you so much for your visit today.
See you next week with our room makeover updates. Please join me as I update my master bedroom and turn it into a relaxing modern retreat sign up HEREto get all the updates, freebies, and makeover design guides.
Have a great week,
Kippi
Greg
Sunday 24th of July 2022
You don't show how you install the second piece of plank in the doorway. That is the hard part.
Jill
Wednesday 7th of July 2021
Hey curious what colour stain you used in your laundry?
Jenna Pilant of Room Bloom Design
Sunday 21st of June 2020
It’s been so fun following along on this space !
Barbara at Mantel and Table
Monday 15th of June 2020
That's so exciting Kippi! The floors look wonderful! I love your updated list - it's always so satisfying to cross things off! :) Looking forward to the next steps!
Jayne
Friday 12th of June 2020
Wow! You've come so far already Kippi and it's looking fab. Loved your tips on how to get around those tricky corners and doors, I'm terrible at things like that but now I have a reference guide so thanks for that. Can't wait to see the finished room!