My upholstery restoration journey began over 20 years ago. I wanted to reupholster a pair of chairs while I was 8 months pregnant with our second child. However, I did not feel confident doing them by myself.
After years of doing small upholstery projects, I felt that this one was a “real” upholstery job. So I either had to pay someone a ton of money or learn to do it myself.
Saving furniture from the dump and updating it to fit my style has been my passion since I purchased my first antique at 17 years old.
Before I married my husband, we went on weekend dates of antiquing and junking.
Good thing I found out before we got married that he loved it too. Our children are passionate about creating and restoring too. We are a DIY family of four! All four of us worked on the chairs in this post.
After Upholstery Restoration Journey

Upholstering Antique Chairs
I signed up for an upholstery class in Jacksonville, FL, while my husband was aboard a ship in the navy. It was a juggle with living in a new city, husband out of the country, 8 months pregnant, and a 2-year-old, but I was determined I could do this. The rest is history!
The catalyst for this project was the need for a great educational how-to upholster video.
I saw a new trend with many younger clients wanting their family heirlooms and vintage finds updated, but their budget would not hire an expert to upholster.
Therefore, they are willing and able to do it themselves. So why not teach them how?
Furniture Upholstery Materials and Supplies
Foam and/or cotton
Dacron
Upholstery Fabric
Staples
Hot glue sticks
5/32 welt cord
Hog rings
Burlap
Muslin
Paint
Tools needed:
Stapler
Pliers/wire cutter
Utility knife
Hot glue gun
Sewing machine
Pneumatic staple gun and compressor
Hog ring pliers
Electric knife
Paint sprayer
Before photos of the front and back views, these chairs were upholstered in mauve velvet. Remember mauve? Well, I guess they got tired of that color too and painted over the velvet. Not a good look or feel.
Note the broken leg on the front right of the chair on the right, but I only paid $30.00 for the pair.


Before upholstery
Choosing the Fabric
Now for the fun part! Details make the project your own custom masterpiece. First, what fabric? Then what color paint?
Upholster like it was done originally, or go for a modern take on a classic Victorian antique?
Painting the Chair Frames
The decision for the fabric was easy, but the paint color was a wee bit more difficult. I chose natural linen for the fabric, and then it hit me to chose two paints, one as the base and one I would make a glaze to highlight the beautiful carvings.
So I pulled out the darkest fiber and the lightest fiber from the linen fabric and had paint color matched made. I purchased a can of glaze medium, and I was on a roll.
I also decided to update the upholstery style because this new look fits in with the modern family much better than the original style.


Painting the first coat of paint
Frame painted and drying. Next to add the glaze to the carvings.


Painted chair


The original fabric placed over the painted chair
After the paint dried, I placed the original seat back fabric on the chair. Notice the original velvet and the painted parts. You can see how the paint is cracking all over the fabric.
Painted fabric is not a beautiful look. Why paint when you can upholster with new clean fabric?


Closeup view of glazing and fabric
In this photo, you can see the glaze on the carving and the fabric weave. Also, behind the chair is a Victrola that is in perfect condition. We did the photoshoot in a historical home that belongs to friends of mine.


Chair after update
Sneak Peek:
Take a peek inside this historical beauty—Ready for the fourth of July.
-

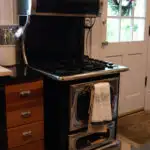
- Vintage style stove
-


- Antique farmhouse sink
-


- Antique chandelier
-
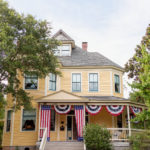

- Ready for the 4th of July
-
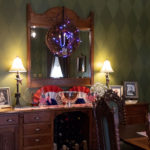

- Antique buffet ready for the 4th
-

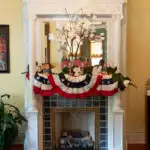
- Antique fireplace
Learning to upholster has changed my family’s life, in so much as we have a steady source of extra income from clients in need of our upholstery services. We can also update our furniture on a whim, purchase furniture and restore them and sell them.
As long as fabric-covered furniture exists, upholsterers will have a job; therefore, learning to upholster is always a good idea.
Upholstery 101 Video Start Your Upholstery Restoration Journey:
Are you ready to start your Upholstery Restoration Journey? The video just a click away is available to our readers at a 20% discount; however, it is a limited-time offer. So get your home ready for the holidays and save money while you DIY
Join the Better Than New Project today!!!
Please pin for later:


Upholstery video
You might also enjoy:
Easy vintage chair upholstery.
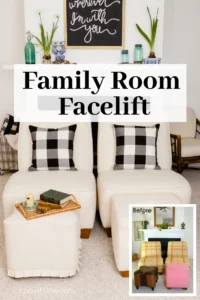
Chair Upholstery and UpdateFamily Room Facelift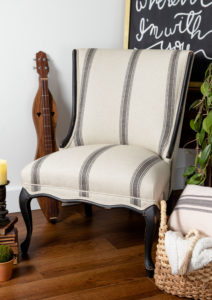


I love meeting new friends and visiting with old ones. So please leave me a comment and say hello.
Happy Fall,
Kippi