During our mudroom/laundry room makeover, we decided that we needed a place to hang our belongings, so we built a hall tree. The bench area needed a bench cushion.
Mudroom Hall Tree – Storage and Bench

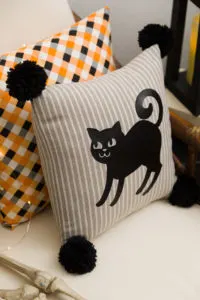
The photo below shows the view down the laundry room/mudroom. The Hall tree is on the right just before the door. As you can see the room is small, but packed with organized storage. The pillow covers I made using my envelope method you can read more about it HERE.


Laundry Room Window Valance – Cornice Board
This post contains affiliate links. This means that if you purchase from one of these links I will make a small commission, but rest assured you will not pay more for any products
How to Make a Cushion Cover
Making your own cushions and cushion covers is an easy sewing project. The same method is used for seat cushions and outdoor cushions.
Supplies
- Fabric
- Cording
- Zipper
- Foam
- Measuring tape
- Electric knife
- Sewing machine
- Thread
- Stapler with staples
- Staple lifter
- Fabric marker
- Pins
- Ruler
- Scissors
- T-square
The first thing I do is measure the bench seat or chair to determine the finished size of the cushions. I like to use medium density foam one-inch higher, wider, and longer than the finished size.
Using a sharpie I trace my cut lines on the foam. Then using an electric knife I cut out my foam.


Measure your cushion foam
When using foam for your cushion insert there are several ways to sew a cushion cover. My favorite way to sew a cushion cover is a box cushion cover.


Square fabric
Before cutting out your cushion cover square your fabric. I like to use a T-square placed along the selvage then using a fabric marker I mark the cut edge and trim to make a straight edge.
Cut a box gusset (sides) for three sides the deep of the cushion and the length of 2 sides and the front.


Cut one layer at a time
If your fabric has a repeat (pattern) then you will need to decide what design in the fabric you want to be in the center.
Note: I pattern matched the top, the boxing, and bottom.
After you have cut out all your pieces of fabric for the cushion (including a zipper gusset) then you can cut your bias strips to cover the cording.
Cutting Bias For Cord
Measure to determine the total circumference of your cushion and double that and add 6 inches this number is the total length of bias tape you will need to cover your cord.


Mark a cutline for bias tape
The bias strips need to be wide enough to cover your cord and have a 1/2″ seam allowance.


Use a yardstick to mark your bias tape cuts


Bias strips
Once you have enough strips cut you will need to sew them together using an angled seam.


Cut bias strips end at a 45-degree angle
Using a 1/4″ seam stitch the ends together.


With right sides together pin bias strips


Sew bias strips together
Place your cord in the center of your bias strip and sew.


Place cording – piping in the center of the bias strip
Using a cord walking foot makes this step so easy.


Sewing cording – piping
Sewing The Zipper in a Cushion Cover
To make a sturdy zipper gusset I cut both of the zipper pieces the deep of the foam by the length of the foam and then fold it in half with the wrongs sides touching then iron.


Ironing the zipper boxing
Place your first zipper gusset in the center of your zipper and stitch about 1/2″ away from the fabric edge. You might need to change your foot to a zipper foot.


Sew the zipper into the first side
Repeat for the second zipper gusset.


Sewing the second side of the zipper


Sewing the ends of the zipper closed
To keep your zipper pulls from coming off stitch both ends of your zipper gusset closed.


Mark the centers on the front and back edges of the cushion top and bottom
Mark (fabric marker) the center front and back on all cushion pieces.
How to Sew a Cushion Cover
If you plan to launder your cushion cover be sure to finish off all the cut edges with a serger or zig-zag stitch.
Starting in the center back with the wrong side up place your cording under the cushion pieces and sew all the way around.


Sew the cord to the right side of the top and bottom pieces starting and stopping in the center back
When you reach the center back you will flip the cushion with the right side up. Using a seam ripper remove the bias tape and cut the cord inside it to length.


Use a seam ripper to remove a few inches of the stitching


Cut off the cord at the center back
Fold over the bias tape and stitch.


Fold over the bias strip and sew
I like to sew the zipper gusset on first and leave a little extra fabric so I can turn it back over itself.
Sewing the box gusset (the sides) using a solid fabric you would match centers and sew.
However, if you need to pattern match your gusset to top and bottom pieces you will get the best results stapling the fabric in place aligning the patterns.


Pattern matching cushion pieces


Staple the center of the cushion and boxing


Continue stapling pieces together


Check pattern match as you go
If you are happy with the stapled fabric then you’re ready to sew it in place. Once stitched use a staple lifter and remove all staples.


Using a staple lifter remove staples
Finish stitching and stuff your foam into your cushion cover.


Mudroom Bench Cushion and Pillows
You might also enjoy these posts:
Learn to make a super easy envelope pillow in minutes read more HERE.

Envelope pillow covers
I have been working on some easy gorgeous fall decorating projects you are going to love so if you don’t want to miss any inspiration join The Fall Inspiration Newsletter and get it delivered to your inbox.
See you soon,
Kippi
Marilyn
Sunday 2nd of August 2020
******************************************************** Thank you for sharing at #OverTheMoon. Pinned and shared. Have a lovely week. I hope to see you at next week’s party too! Please stay safe and healthy. Come party with us at Over The Moon! Catapult your content Over The Moon! @marilyn_lesniak @EclecticRedBarn ********************************************************