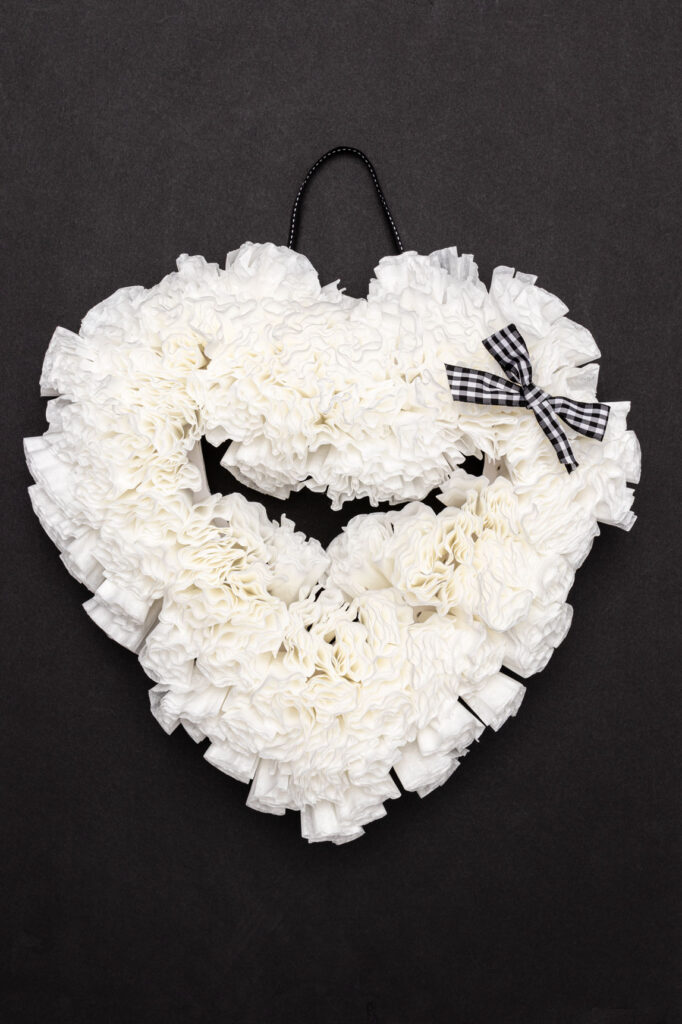
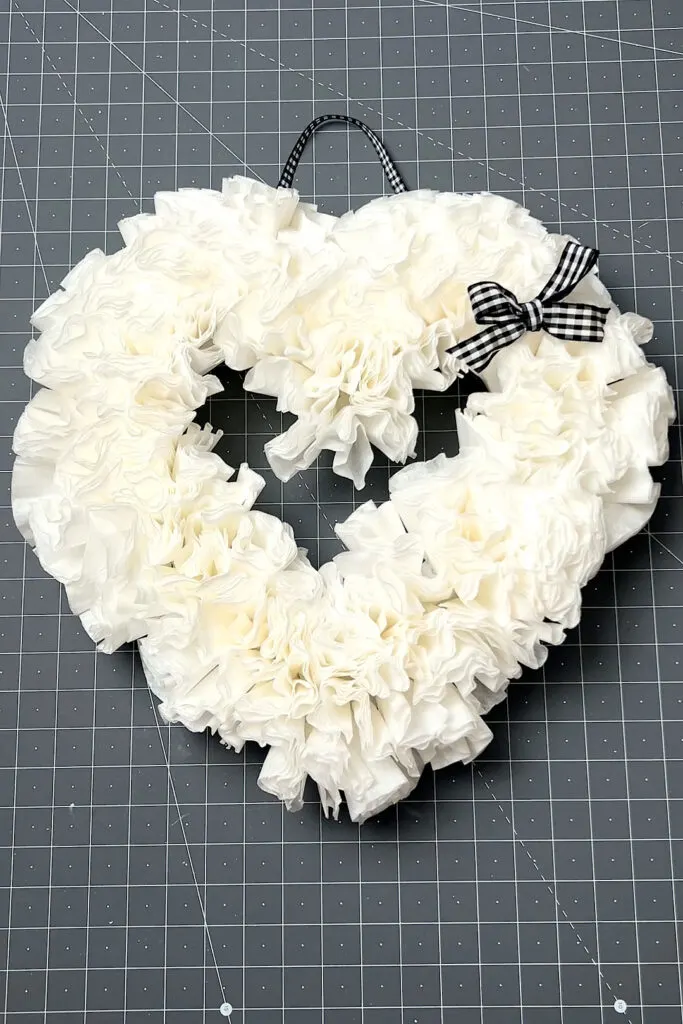
Make this gorgeous coffee filter heart wall decor that is too pretty to put away after Valentine’s Day.
You might also like this heart craft, too.

This post contains affiliate links. If you purchase from one of these links, I will make a small commission.
How to Make a Coffee Filter Heart
Learn how to make a farmhouse-inspired heart wall hanger with coffee filters. The best part about this lightweight decor is that it will not damage furniture, walls, or cabinets.
Supplies
- Foam board
- Coffee filters
- Pencil
- Heart pattern
- Xacto knife
- Ribbon
- Hot glue gun and glue
- Skewer
- Ice pick
- Cutting mat
Trace Heart
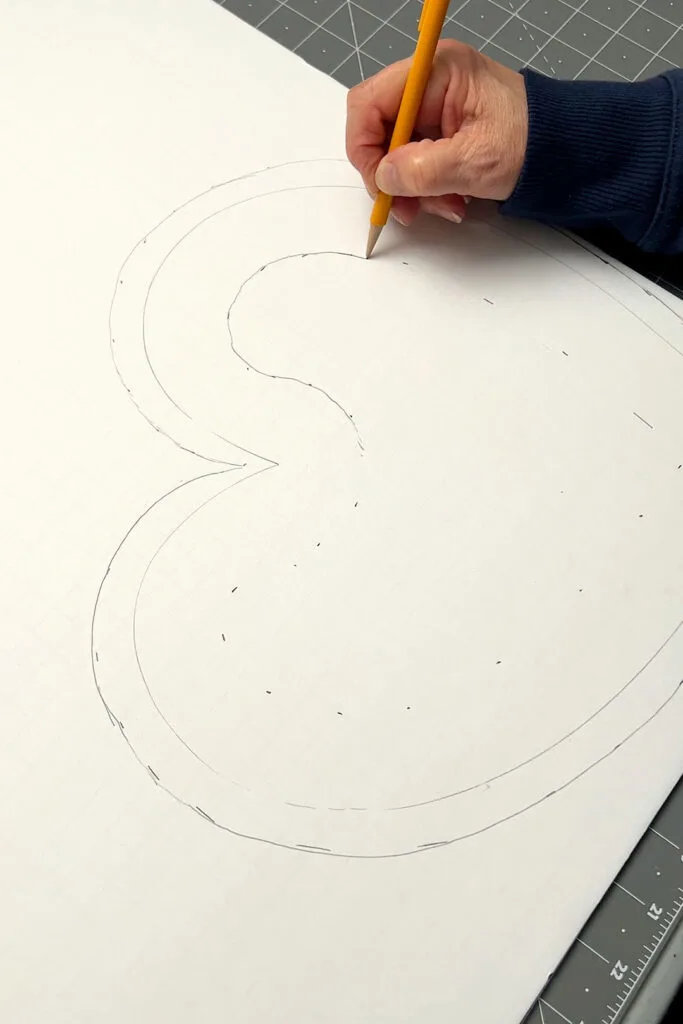
Trace a heart shape onto your foam board with a pencil.
You can use any heart pattern you have or download one from this earlier post.
I used a wooden heart from Dollar Tree, but I wanted it larger, so I added a half inch around it.


Next, trace an inner heart two inches from the outside traced lines.

Cut Out Heart
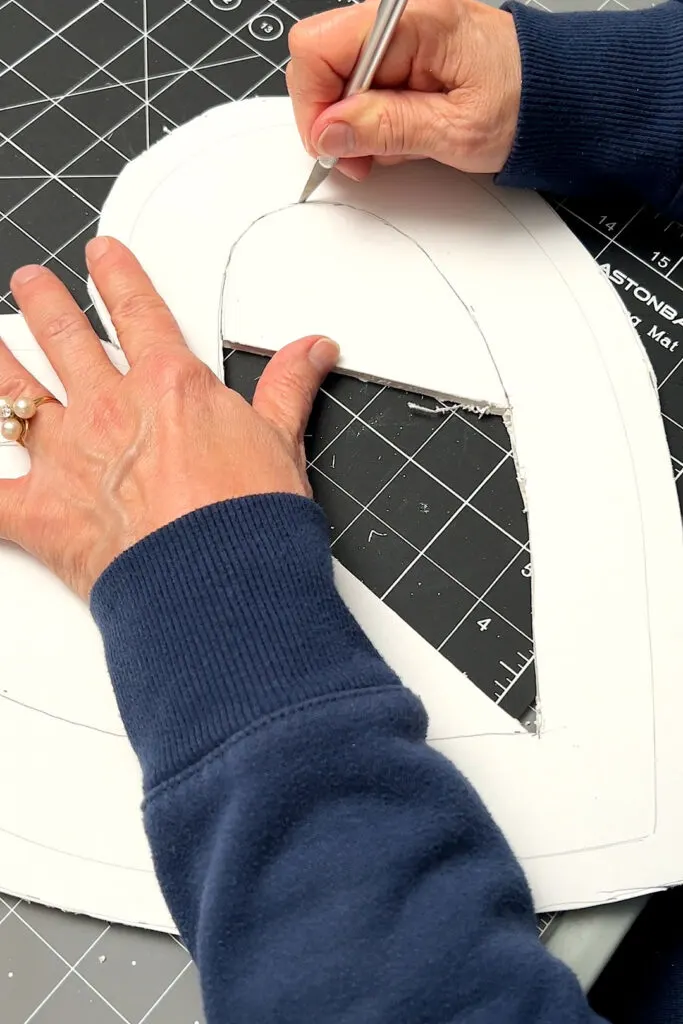
You must cut along the outermost and innermost lines to make a heart form for the wall hanging.
Tip: Remove the foam board in sections to make this step easier.

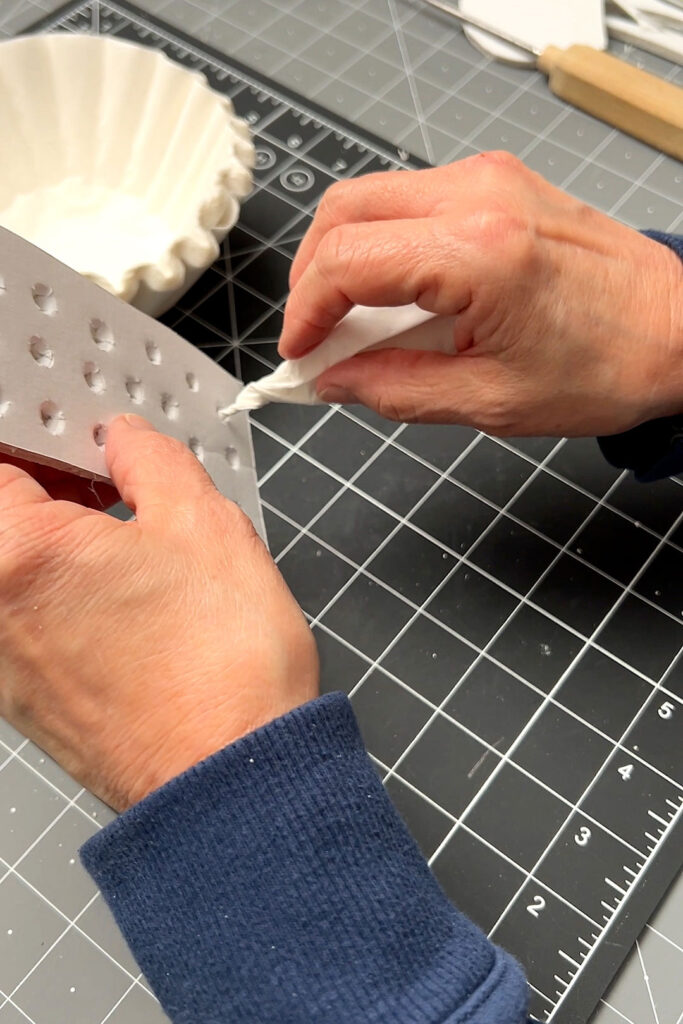
Punch Holes in Heart Form
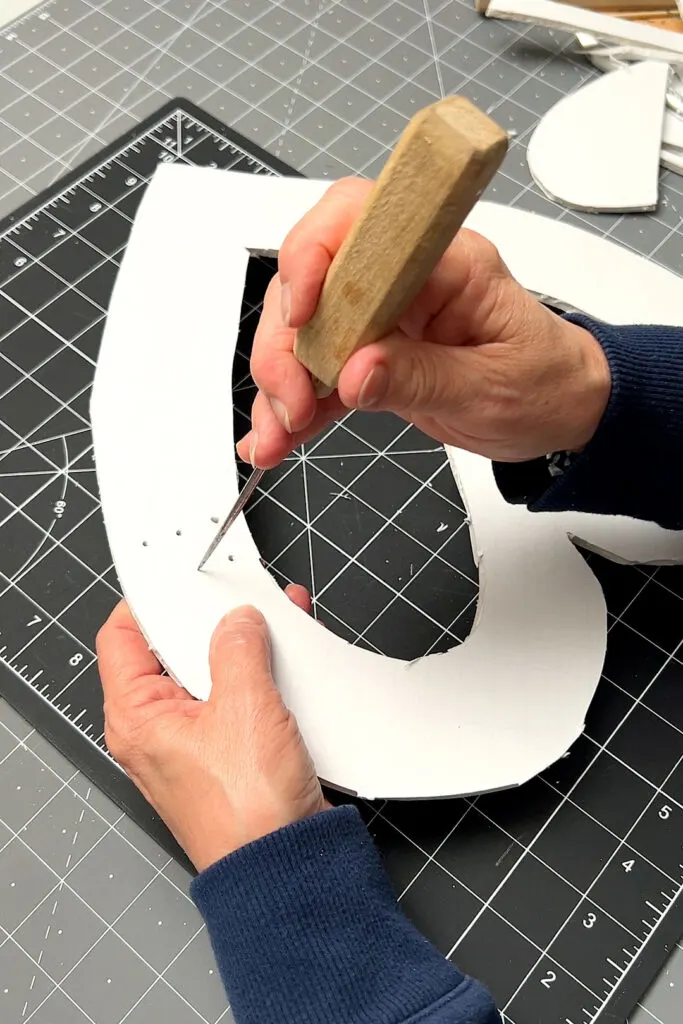
Use an ice pick or similar tool to punch holes in the heart form.
I punched around three holes across the two-inch width of the form.

Coffee Filters
Fold coffee filters in half and then half two more times.
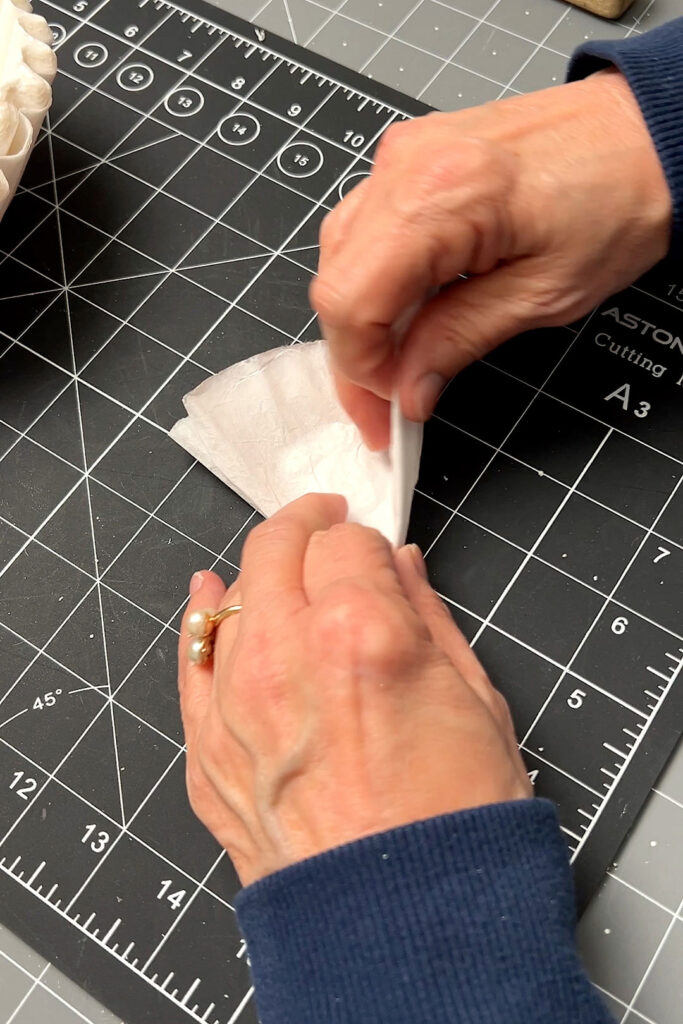
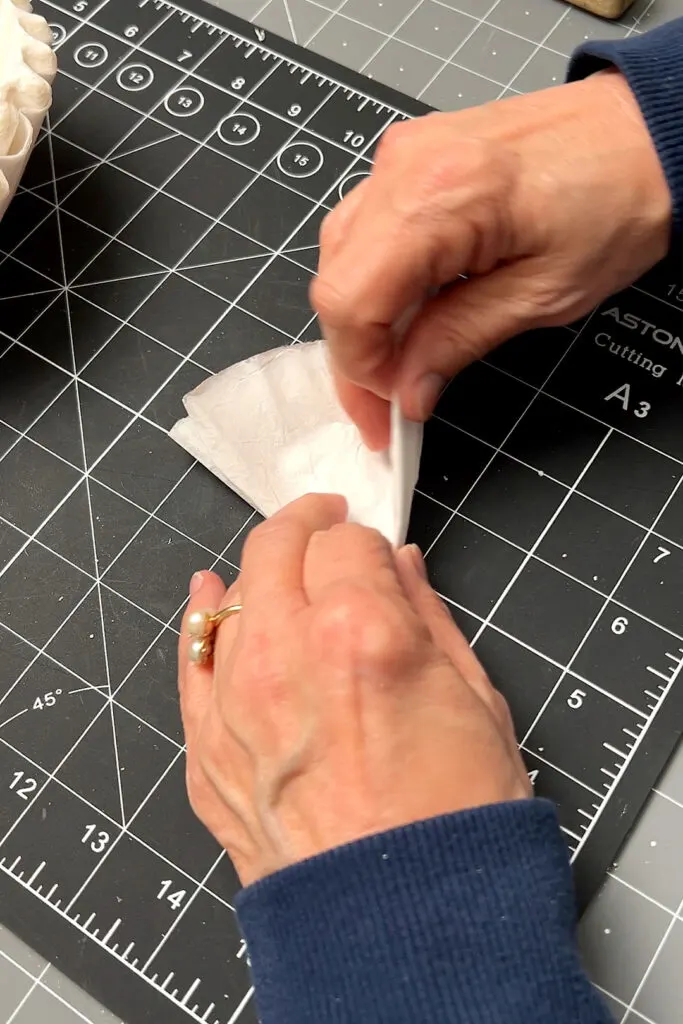
Then, twist the pointed end of each coffee filter.
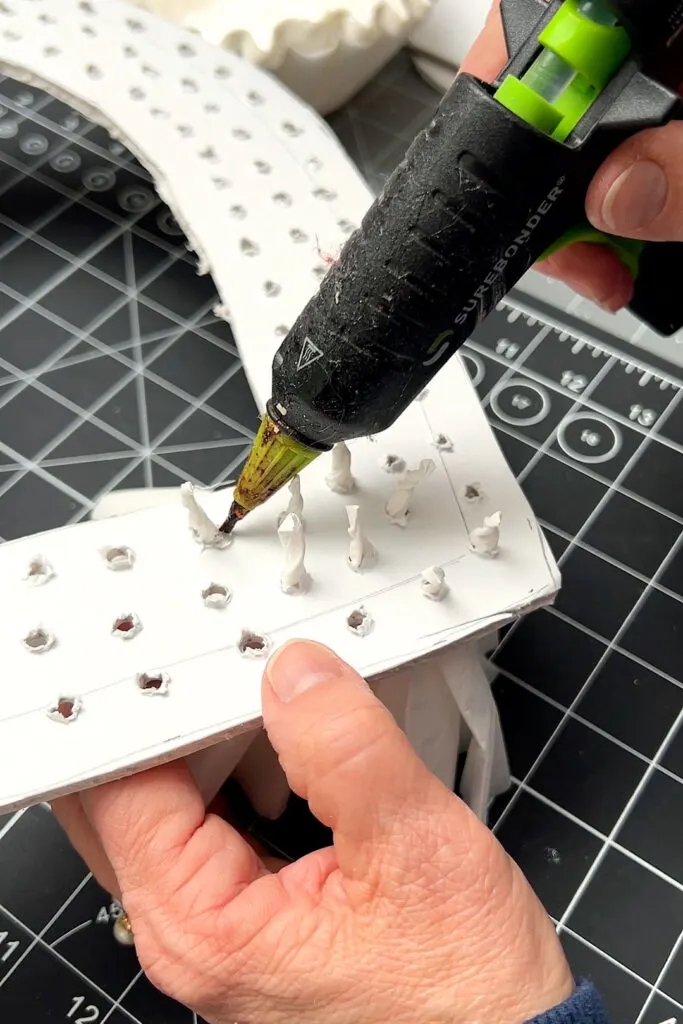
Next, push the twisted end of the coffee filters into the prepared holes.

After you have a few coffee filters pushed into the form, turn it over and place a dot of hot glue at the point where the filter and the form meet.

Ribbon
To create a hanger, you can use ribbon, twine, fabric, etc.
Use a dot of hot glue to attach the hanger.
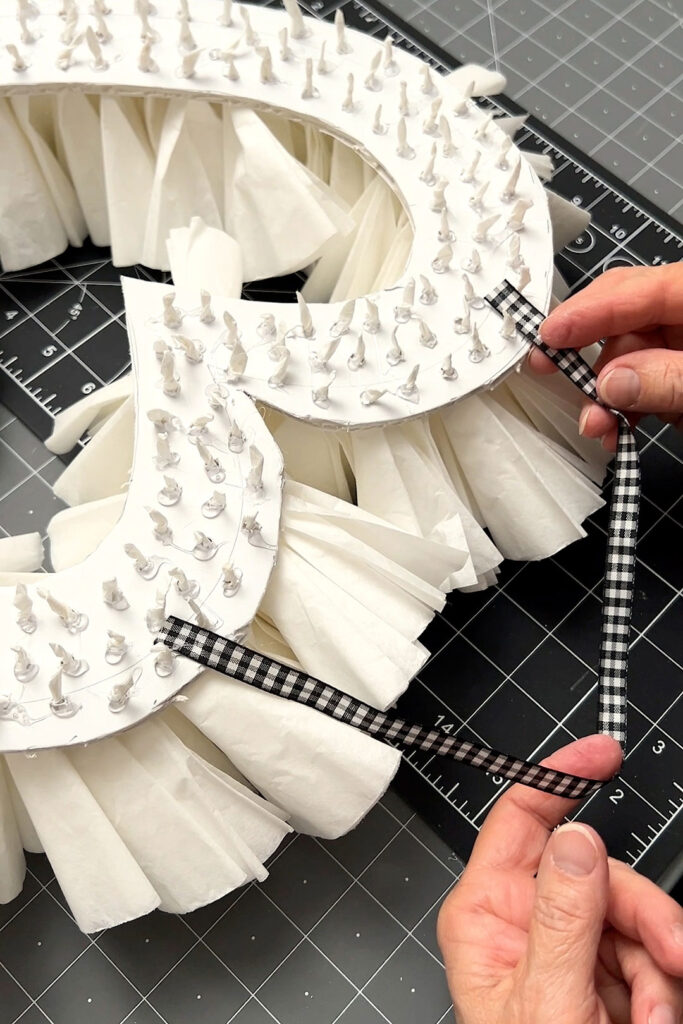
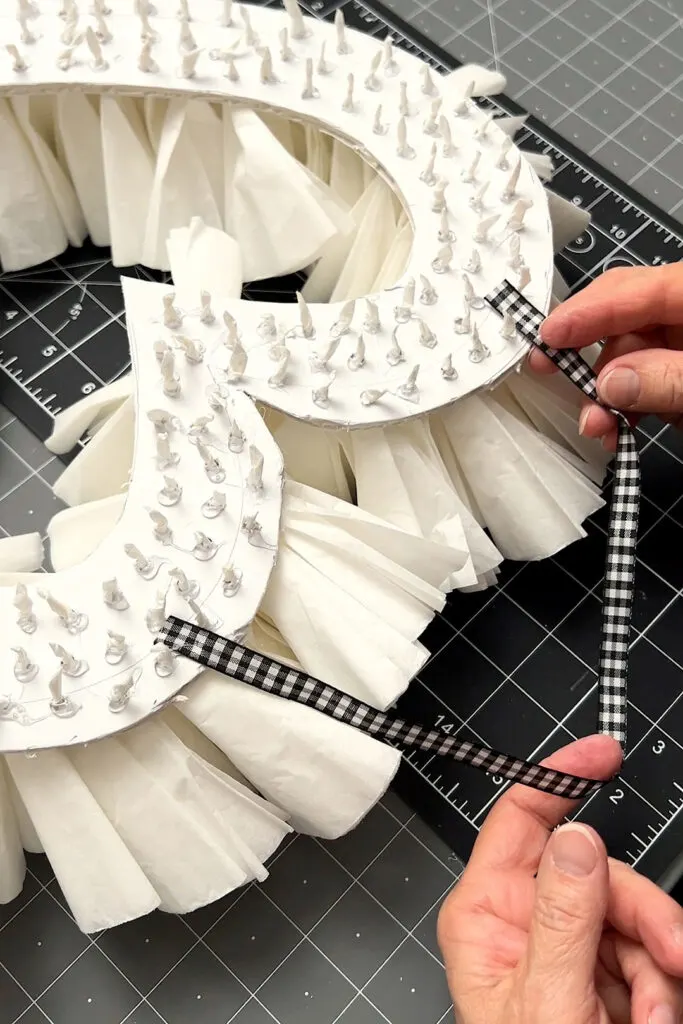
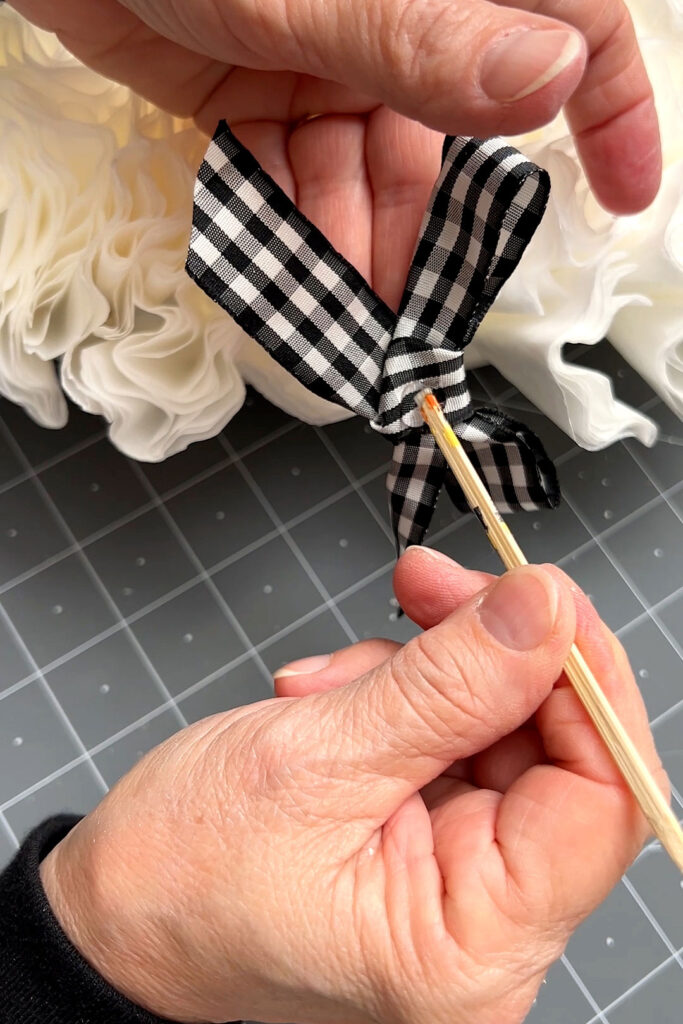
Make a simple ribbon bow. Use a skewer or toothpick glued to the back of the bow to attach the bow to the heart. Push the skewer or toothpick into the foam board, trim it off flush, and glue it in place.


DIY Coffee Filter Heart
Materials
- Coffee Filters
- Foam board
- Ribbon
- Heart form
Tools
- Scissors
- Xacto knife
- Hot glue gun and glue sticks
- Ice pick
Instructions
Trace Heart
Trace a heart shape onto your foam board with a pencil.
You can use any heart pattern you have or download one from this earlier post.
I used a wooden heart from Dollar Tree, but I wanted it larger, so I added a half inch around it.
Next, trace an inner heart two inches from the outside traced lines.
Cut Out Heart
You must cut along the outermost and innermost lines to make a heart form for the wall hanging.
Tip: Remove the foam board in sections to make this step easier.
Punch Holes in Heart Form
Use an ice pick or similar tool to punch holes in the heart form.
I punched around three holes across the two-inch width of the form.
Coffee Filters
Fold coffee filters in half and then half two more times.
Then, twist the pointed end of each coffee filter.
Next, push the twisted end of the coffee filters into the prepared holes.
After you have a few coffee filters pushed into the form, turn it over and place a dot of hot glue at the point where the filter and the form meet.
Ribbon
To create a hanger, you can use ribbon, twine, fabric, etc.
Use a dot of hot glue to attach the hanger.
Make a simple ribbon bow. Use a skewer or toothpick glued to the back of the bow to attach the bow to the heart. Push the skewer or toothpick into the foam board, trim it off flush, and glue it in place.
See you soon,
Kippi
Ps. This post was shared on Between Naps on The Porch.
Beth
Friday 2nd of February 2024
LOVE how you created this GORGEOUS wreath with a few simple household supplies!! Don't forget to join us over at the Creatively Crafty Linky Party every Wednesday through Sunday https://creativelybeth.com/creative-crafts-linky-party/ Followed and Pinned! Creatively, Beth
Rachel- The Antiqued Journey
Friday 2nd of February 2024
This is so cute and super easy!! I love the minimal look of it, too!