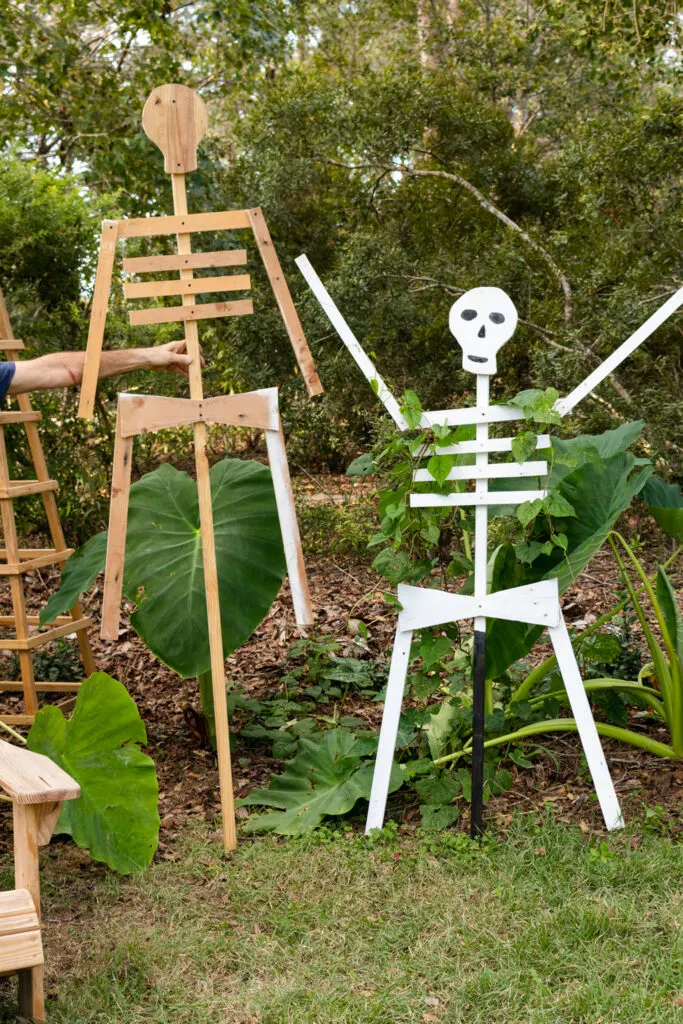
Fun handmade yard skeletons are perfect to decorate for Halloween. These are easy and budget-friendly DIY projects you can make with pallet wood, pressure, or pressure-treated lumber. My friend, Amy, from 1905 Farmhouse blog made one last year and I have been dreaming of making some too. See the night view here.
How to Make a Wooden Skeleton

This post may contain affiliate links. That means that if you purchase from one of these links, I will make a small commission.
How to Build a Wood Skeleton
What you need to make a wooden yard skeleton:
Lumber
- 1 x 8 x 8 pine board
- 2 x 2 x 8 pressure treated
Tools and Supplies
- Skeleton Pattern
- Bandsaw or Jigsaw
- Tablesaw
- Chopsaw
- Cordless drill
- Countersink bit
- Measuring tape
- Paintbrush
- 14 each 1.25″ screws
- Exterior Paint (white)
- Black paint marker
- Grafite paper
Cutting your lumber


Wood for Halloween Skeleton
Begin by cutting the head in a 1″ x 8″ x 10″ rectangle using a chop saw.
Cut a 1 x 5 x 18 for the hip bone using a chop saw.
Note the rest of the board will be ripped into strips using a table saw.
Next, cut 2 leg pieces at 1 x 2 x 28″ using a chop saw.
Cut a shoulder piece at 1 x 2 18″ with a chop saw.
For the arms cut 2 pieces at 1 x 1.5 x 22″ using a chop saw.
Using a chop saw cut three rib pieces at 1 x 1.5 x 14″.
The center pole (backbone) can be cut to your desired length we cut ours at 2 x 2 x 85″.


Head and Hip pattern


Skeleton head traced on the wood


Cutting out the hip pattern


Cutting the Halloween Skeleton arms


Lumber cuts for skeleton


Using a bandsaw to cut out the head


Cutting the head with a band saw


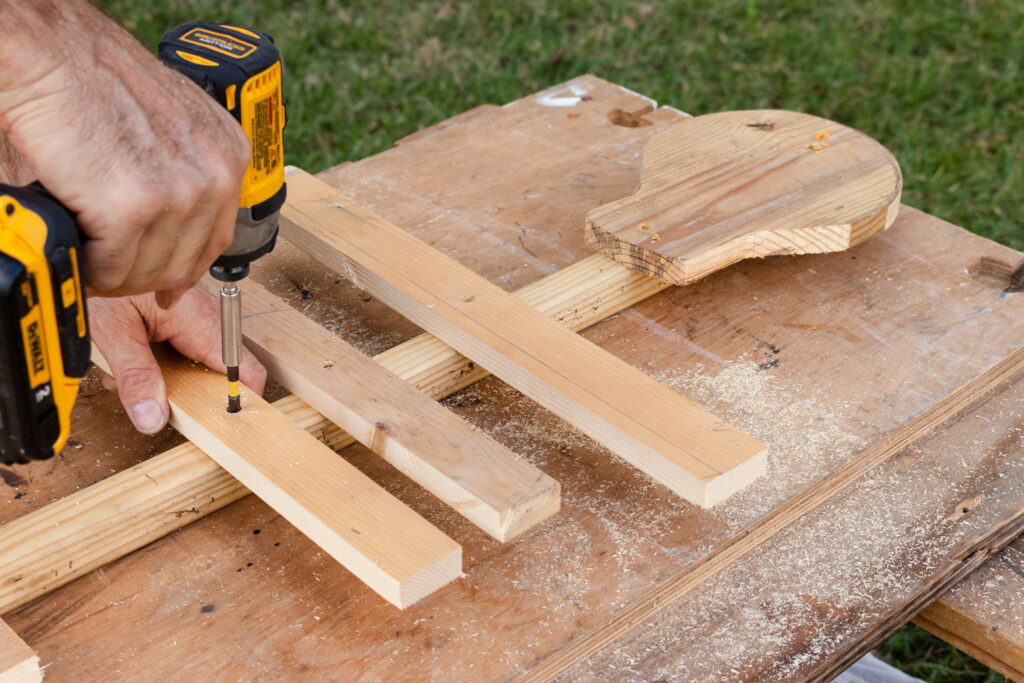
Pre-drill with a countersink bit

Assembly guide
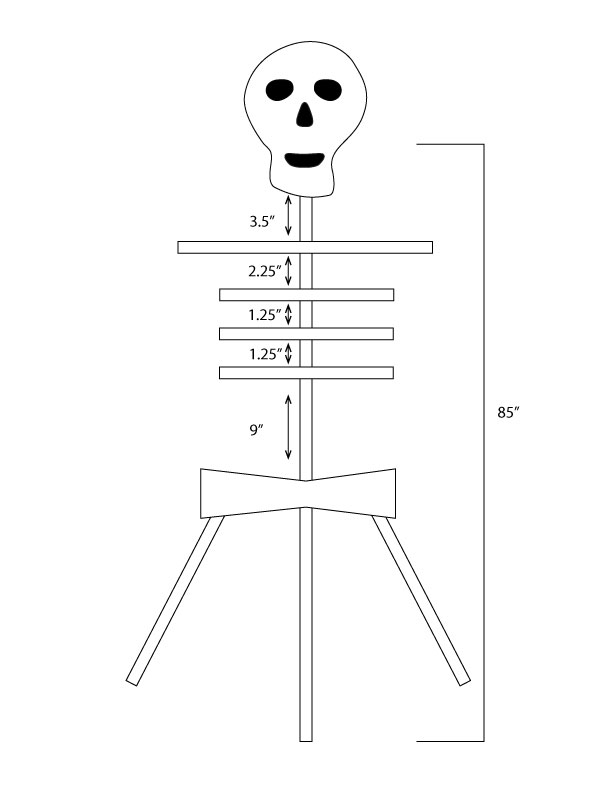
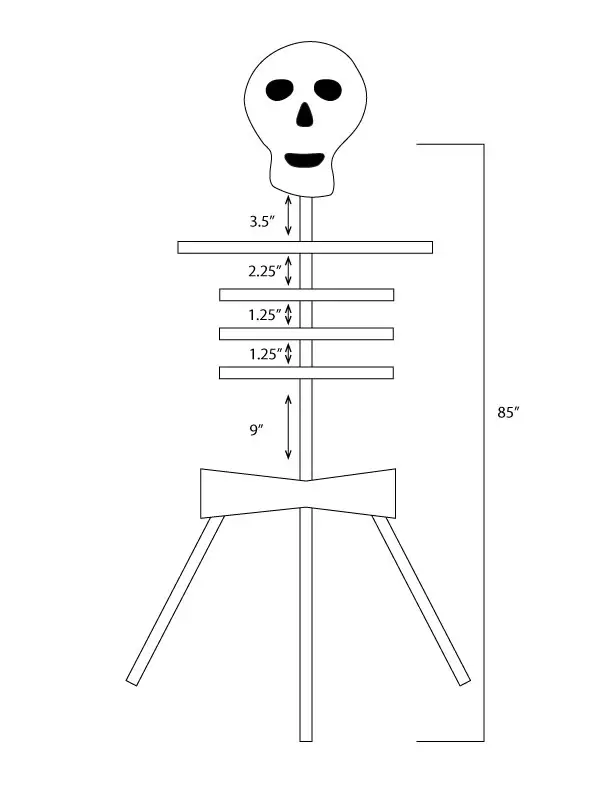
Assembly guide


Countersink the head


Screw the should piece onto the backbone

Install the ribs


Countersink hipbone


Pre-drill countersink for both arms and attack to shoulder


Countersink the legs


Add a second screw to attach each leg


Painting the Halloween Skeleton
Use the printout to trace on the face features. I made a little video on how to trace on the face.


Skeleton head


This is the area where we will install one skeleton
The obelisks were made in an earlier DIY project read more about it HERE.
You might also like these Halloween DIY ideas too:
This adorable Halloween Boo Bag was created by my sweet daughter, Olivia. She includes everything you need to make a cute bag and candy wrappers. We made a how-to video HERE.


Halloween Boo bag
I have been working on some easy gorgeous fall decorating projects you are going to love so if you don’t want to miss any inspiration join The Fall Inspiration Newsletter and get it delivered to your inbox.
See you soon,
Kippi
Julie
Wednesday 21st of October 2020
These are very cool! I think halloween is going to be a pretty low key affair round here this year but I'm pinning for another year!
Chas Greener
Monday 19th of October 2020
These are super cute Kippi! Thanks for sharing
Kim | Shiplap and Shells
Monday 19th of October 2020
This is so cute Kippi! I definitely need to make one next year. Pinned for reference!
Kippi
Monday 19th of October 2020
Thank you so much for your visit today. I hope you will make one too. Hugs, Kippi
Marie-Interior Frugalista
Wednesday 14th of October 2020
Your wooden Halloween skeletons are so cute! They have so much more character than store bought.
Kippi
Monday 19th of October 2020
Thank you so much for your visit today. I hope you have a great week. Hugs, Kippi