A Garden Obelisk adds beauty and height to your garden and landscape, in addition to being plant support. I have been swooning over them for years, and since we had a little extra time on our hands this summer, I thought, why not make a few.
A friend gave me an ivy plant with a small powder-coated wrought iron trellis, and I have enjoyed it for years.
Wooden Garden Obelisk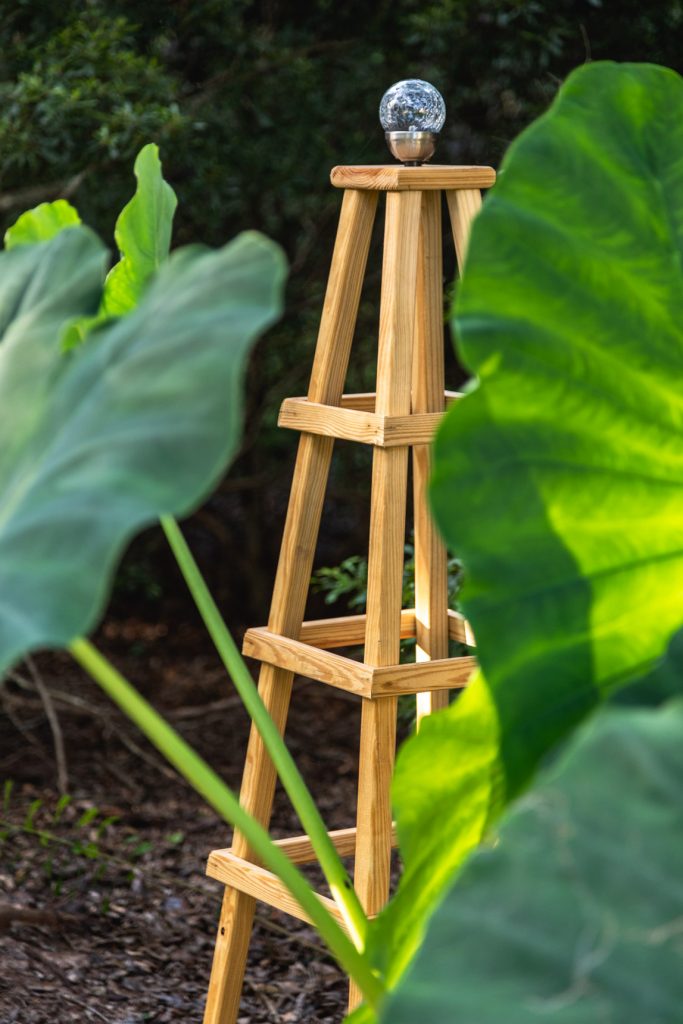

We enjoy our garden and yard all year since we live in Florida. I decided to top my obelisk with solar lights since it starts getting dark too early in the fall.
Last year we built a garden trellis, DIY wooden lanterns, Window flower boxes, Shutters, a hose holder, and DIY Raised garden beds, and we wanted these obelisks to coordinate with the other outdoor projects.
I have enjoyed them every day of the year. You can find how to make a garden trellis in this earlier post.
This post contains affiliate links. This means that if you purchase from one of these links, I will make a small commission, but rest assured, you will not pay more for any products.


Garden Obelisks with solar lights and solar fairy lights
We added some mood lighting for the night in the garden with solar lighting. The glass globe lights I found here and these amazing solar fairy lights are my favorite.


Solar lights for Obelisk and garden


Nighttime view of the DIY obelisk with solar lights
How to Build Obelisks
My first consideration was making the obelisk coordinate with the other items in the garden, such as our trellis, lanterns, and the flower box and shutters. We built the gorgeous brackets from a leftover fence post.
Next, we built a floating deck and garden hose holder that all coordinate as well.


DIY Garden Trellis with easy DIY solar lanterns
Building the obelisk with the same type of wood and in the same style was my goal. So I set to find the same solar lights as I used in the lanterns for last year.
The globe is crackled glass, and they cast an amazing dreamy patterned glow.


DIY solar lanterns at night
To begin building your own super easy obelisk, gather your tools and materials.
Materials to Build an Obelisk
- 5/4″ (5.5″ by 5.5″) Deck board PT (Pressure Treated Lumber)
- 2 each of 1 x 2 x 8 PT
- 2 each of 2 x 2 x 8 PT
- 4 each of 2.5″ Deck Screws
- 1 3/4″ Galvanized Nails
- Outdoor Wood Glue
- Sandpaper 120 Grit
- Solar Light
- Measuring Tape
- Clamps
Tools
➡️ Before you begin I recommend you watch this how-to build an obelisk video.
Building Instructions
Cut top to make a square.
Router edges top and bottom.
Mark the center for installing the solar light.
Then mark the corner ½” from the outer edges for leg placement.
Drill pilot holes ¾” from outer edges at the corners and countersink.
Next, drill a ⅞” hole for the solar light.
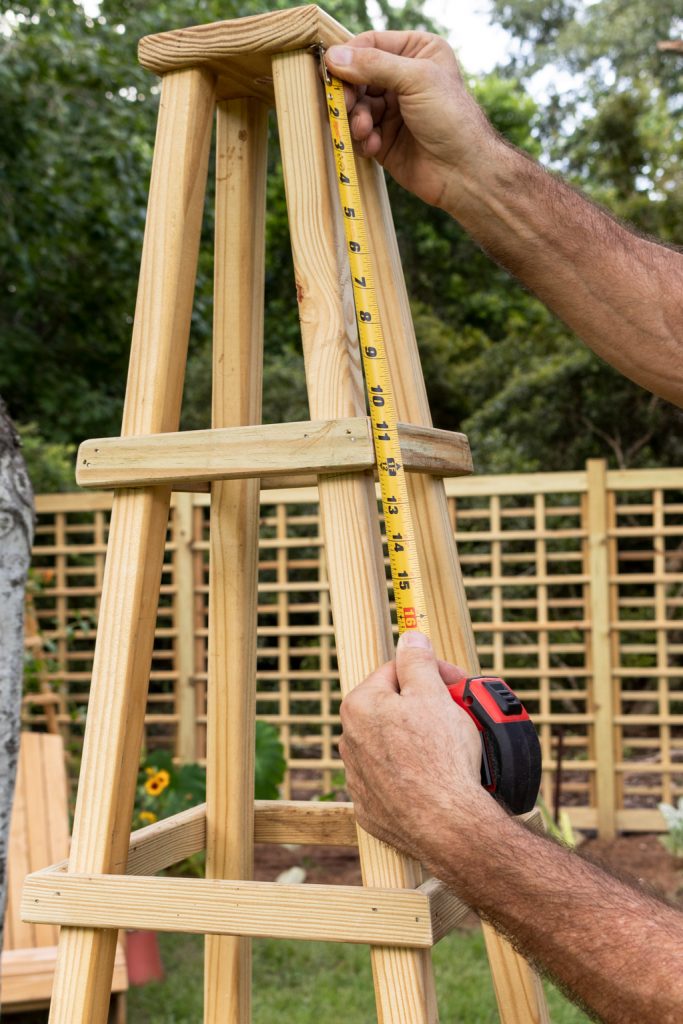
Cutting the Legs (this will make an obelisk approximately 48′” tall)
Cut legs at a 7-degree angle and 7-degree bevel at both ends
Make the first cut and slide the piece through; do not turn the board and make a second cut to length.
Use the first leg as your template to cut the other 3 legs.
Clamp the top facing down to a steady surface with access to a pre-drilled hole.
Position a leg on the bottom side of the top wooden square lining it with the marks you made ½’” from the corner.
Hold the leg in place, and drill through the pilot hole into the leg about ⅛ to ¼” for the alignment hole.
Repeat this process for the other three legs.
The leg is just over 47”, so I divided it into 4 equal spaces to determine the rung placement and marked those places with a pencil.
Tip: Cut a scrap board as a guide for marking the rung placement.
Building the Rungs
Measure across the legs at the marks to determine the length of the rung at the miter.
Set the compound miter to 45 degrees and a 7-degree bevel and make your first cut.
Turn the board 180 degrees and mark the length for the second cut
Make the cut and check it against the marks on the legs to ensure it is the correct length
Place the rung back on the miter saw using it as a guide to set the length stop.
Cut the remaining three rungs.
Assembling the Rungs
Tip: Use clamps to hold the rungs on the legs to check for fit.
Once you are happy with the fit, you are ready to assemble the rungs.
Add wood glue to both corner pieces to be joined and nail the corners forming an angle. Continue this process until you have a square frame.
Repeat for the remaining rungs by measuring at each rung mark.
Use sandpaper for sanding the corners until smooth.
Install rungs at your pencil marks and clamp them in place, then nail the rungs to your legs.
Repeat for each rung.
Finish with a water seal.
Place solar light in the opening at the top.


Lumber and tools to build an obelisk


Router edges of the obelisk top piece of wood


Mark the center for the solar light hole


Drill solar light hole
🌸Do you enjoy a beautiful garden and yard? Please join me HERE for everything you will need to create a beautiful garden/yard one project at a time.


Marking the leg placement


Using a pencil, mark the pilot holes


Cutting legs to length


Placing legs on the bottom of the top


Leg pilot hole


Measuring to determine rung placement


Finding the length of the rungs


Rung angled cut


Setting the length stop block


Rung pieces ready to assemble


Apply wood glue corners of rung square


Use nailing the corners of the rung square


Rungs squares for the obelisk


Using clamps to hold the rungs in place to nail

Checking the placement of the rungs


Finished Obelisk


Adding the solar light to the obelisk
Displaying Obelisk
I could not have just one, so I ended up making three. They are so pretty just the way they are, but I really want to grow some climbing roses, flowering vines, and green climbing vines. Another idea for display is to incorporate the obelisk into my fall outdoor decorations. The adorable handmade pillow and mini fabric pumpkin I made can easily make some too. See how in this earlier post about fall decorating.
🌸 I have gathered all my outdoor must-haves HERE (I think you will enjoy them too).
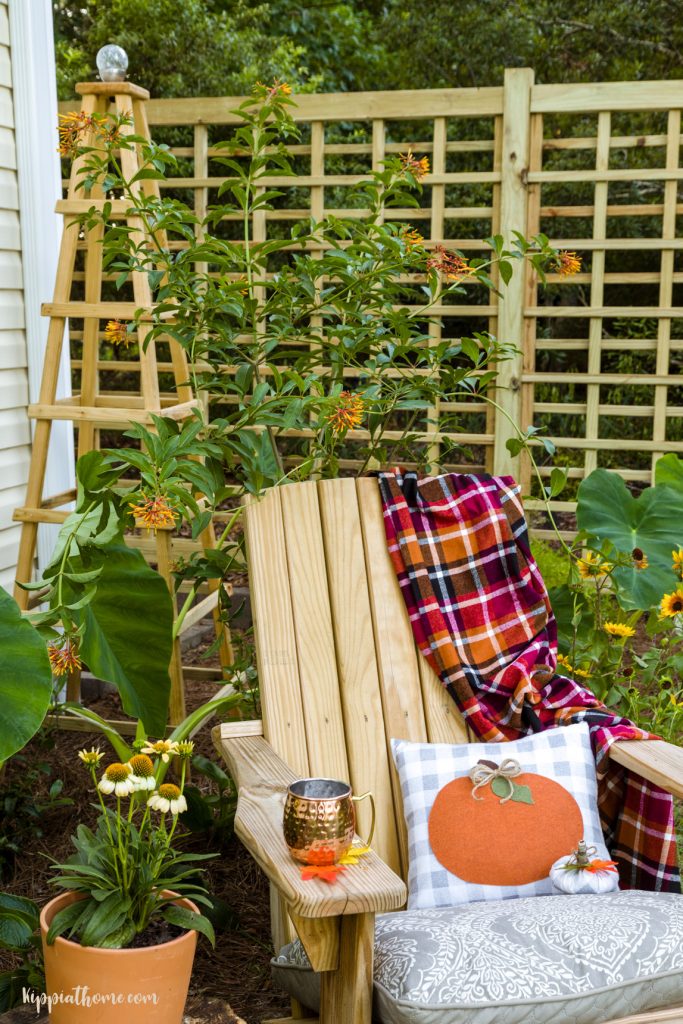

Chair with pumpkin pillow, trellis, and obelisk
While you have out your woodworking tools, why not make some Halloween decorations?
It is an adorable DIY wooden yard skeleton. It is now in my obelisk garden until the end of the month.
Halloween garden decorations you might enjoy are these adorable Halloween Yard Skeletons. They are straightforward and fast to build. I just built another one so I can have one in the front yard too. I will use solar fairy lights to wrap around him, and a solar flood light pointed at him. I think the kids will love him. See how to make one too HERE.


DIY Skeleton


Cutting out the hip pattern
If you are ready to plan your outdoor dream space, please join me to create the “Best Life Now” in our gardens (join HERE).
More Outdoor DIY Projects
Over on the farm or Grandmas House DIY, my friend Tarah has set up an outdoor lunch bar to enjoy the breathtaking view of her home and farm. She has been fixing up her Grandmas’s house too.
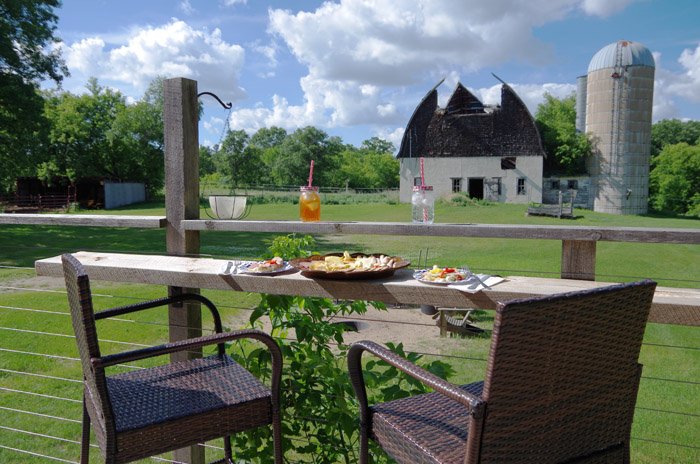
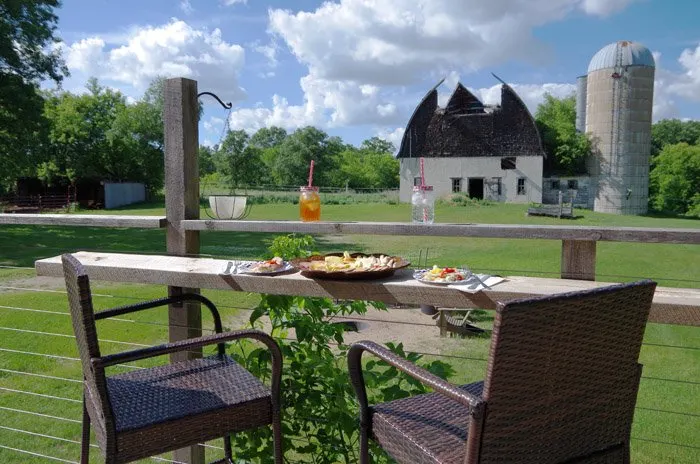
Farm Yard Bar
Since we have so much extra time on our hands, we have been dreaming about refinishing our dining room chairs. Andrea inspires me from Design Morsels teak furniture makeover.
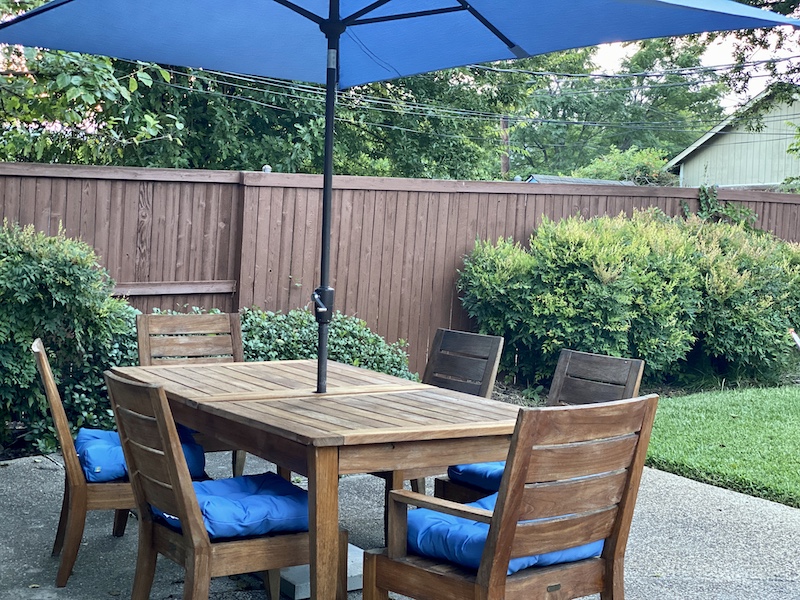

teak table after refinishing
I have been thinking about adding a water fountain since they are so relaxing. You are going to enjoy Mary’s from Life at Bella Terra’s water fountain. I am green with envy. Mary shares how to renovate a water fountain, so you don’t want to miss it.

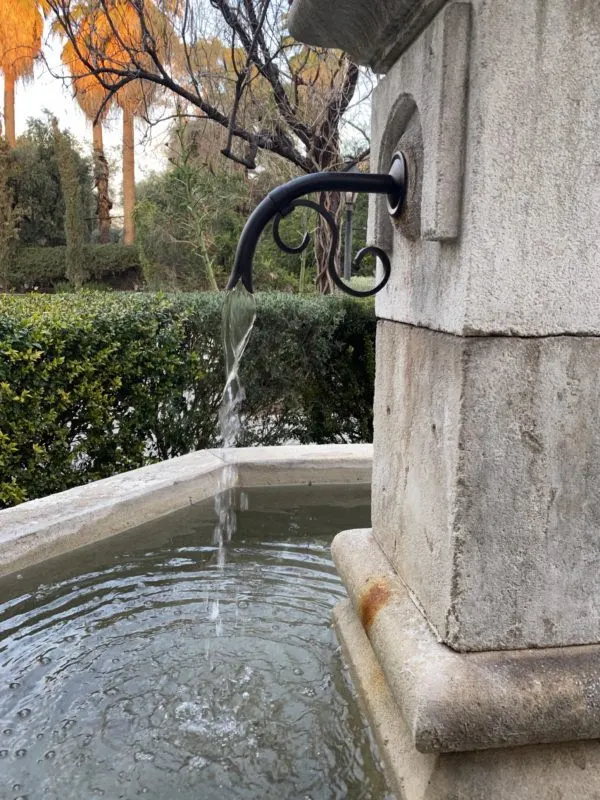
Fountain Renovation
As a bonus, I wanted to share this amazing outdoor space perfect for the fall. From White Arrows Home, Kristin shares how she and her family enjoy their lakeside home and glorious yard.


Cozy fire pit perfect outdoor space
If you are ready to plan your outdoor dream space, please join me to create the “Best Life Now” in our gardens (join HERE).
See you soon,
Kippi
Ps. This post was shared on Between Naps on The Porch
rob
Thursday 25th of April 2024
very nice finished work . will tackle the angles
Saturday 30th of March 2024
Great project. I would flip the top square so the curves in growth rings face down. Over time the board will cup upwards otherwise. Nice plans.
Pat
Monday 14th of March 2022
I'd like to make the taller obelisk that is in your pictures (with four cross pieces). Did you do anything different other making the legs longer and making another square?
Laura Connor
Saturday 8th of May 2021
Please consider the problems outdoor lighting causes migratory birds.
https://theconversation.com/want-to-save-millions-of-migratory-birds-turn-off-your-outdoor-lights-in-spring-and-fall-114476
Debra Oliver
Sunday 11th of April 2021
Hi Kippi, I just love your obelisks; and thanks so much for sharing your great DIY with us! Thanks for linking up at All About Home. I'm featuring your post Monday evening.