While updating our bedroom I decided it needed something more than four plain walls hence I decided to add a DIY shiplap accent wall.
Welcome back if you have been following along, however, if you are new to our One Room Challenge please take a look at where this makeover began with week one, week two, and week three.
Our bedroom makeover is no different while trying to source materials and decor we have found that items are out of stock and the companies have no idea when or if the item will ever be available again. Okay, that means being creative is that much for valuable during this challenge. Please visit all the participants in the ORC and hosts so you don’t miss any inspiration.
One Room Challenge


Better Homes and Garden
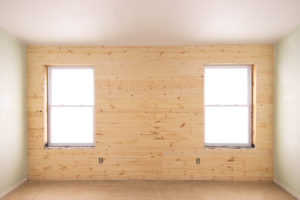
Taking a look back to last week (this photo was taken before the windows were replaced) you can see the circa 1980 bedroom look.


Bed with side tables
This post contains affiliate links. This means that if you purchase from one of these links I will make a small commission, but rest assured you will not pay more for any products.
DIY Shiplap Accent Wall
Before installing the shiplap wall I gathered all my supplies and tools. I set up a cutting station where I could access it through the open bedroom thus saving time and creating less mess.
Supplies:
- White Wood Reversible Plank Paneling
- Brad Nailer
- Utility Knife
- Back Tenon Saw
- Sandpaper
- Measuring Tape
- Chop Saw
- Saw Horses


Installing the DIY shiplap accent wall


Joining the shiplap boards


Nailing the shiplap around the window


Adding the short shiplap boards to the outsides of windows
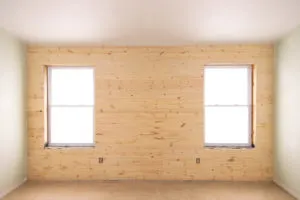
Finished shiplap accent wall


My favorite painting supplies
Paint Supplies:
- Handy Paint Tray, liners and Cup
- Paint Roller
- Paint Brush
- Kilz


Painting the shiplap accent wall


Painting the walls the same color as the shiplap accent wall


Master bedroom painted and ready for gorgeous window trim
Modern Master Bedroom Lighting and Smart Outlets
Our master bedroom was a time capsule from the 1980’s complete with telephone, cable jacks, out-of-date outlets, and switches. All that is changing this coming week as we add layers of lighting for the ultimate relaxing experience. Mood lighting, task lighting, ceiling lighting with smart lighting and outlets.


Installing modern lighting and switches
 electrical outlets")
 electrical outlets")
Out-of-date (old school) electrical outlets


Cable and old school phone jacks
Lighting:
Lighting has changed so much since 1980.


I selected lamps using this bedroom lighting guide.
I was so excited to cross off a few more items from my to-do list this week.
To-Do List
Add shiplap to the wall with windowsPaint the ceiling and wallsReplace windows- Replace all trim and baseboards
Install recessed lighting- Removed the old carpet and install new flooring
- Order woven-wood Roman shades
- Window treatment hardware order
Order pillow inserts- Purchase plants
Have artwork and antique photos framedOrder bedding fabrics- Make bed skirt and pillow
Thank you so much for your visit today.
See you next week with our room makeover updates. Please join me as I update my master bedroom and turn it into a relaxing modern retreat sign up HEREto get all the updates, freebies, and makeover design guides.
Have a great week,
Kippi
Pamela @ DIY Vibes
Monday 22nd of June 2020
I can't wait to see the finished product. A master bedroom refresh is on my list of "to-do's" so I love seeing all the inspiration!
Allyson
Tuesday 2nd of June 2020
I'm following each week ~ the shiplap is looking good! You're making me want a shiplap wall, too, but I don't have anywhere it would look right.
Jenna Pilant of Room Bloom Design
Sunday 31st of May 2020
It’s been so fun following along on this space !
Jayne
Friday 29th of May 2020
This is looking fantastic Kippi, I love how the shiplap and new paint make the room look so much brighter and bigger - looking forward to seeing the next instalment!