Simple ways to update furniture for under $20 came about when I got overly excited and purchased an old cabinet before I had a chance to examine the piece closely.
Yikes! It was a tremendous job; if I had seen it in the light of day, I would have never purchased it, but then I would not have had the joy of giving it a face-lift.
It turns out I had fun with the planning and refinishing of this piece. In that small way, it was the best deal for me. I needed the cabinet for storage and display, so I made a plan and started.
I have included some other significant furniture updates by some amazing DIY bloggers at the end of this post for a special treat.
How to Chalk Paint Furniture
Hutch Makeover


Cabinet at the time of purchase
This post contains affiliate links. If you purchase from one of these links, I will make a small commission, but rest assured, you will not pay more for any products.
After removing the owner’s items, it became clear this piece would need more than a paint coat.
**Special invitation to join me to get organized in 30 days. It’s easy to join; fill out the form below, and you are on your way to an organized home.


Cabinet empty
Not just in need of a cleaning, but the surface area was particle board, had been wet, and had awful scars from wet items. So I knew I had my work cut out for this updated furniture project.


Surface area before
This post contains affiliate links for your convenience. Purchases made with these links may earn me a small commission at no additional cost to you.
My option is solely my own, not based on any commissions.
Supplies
- Gel Stain (this is a similar one)
- Chalk paint (this is a matching white)
- Chalk paint (this is a matching blue)
- Poly-acrylic
- Patina (this is a similar product)
- Glaze
- Beadboard
- SandinBeadboard
- Paintbrush for chalk paint
- Tack cloth
- Clear Sealing Wax
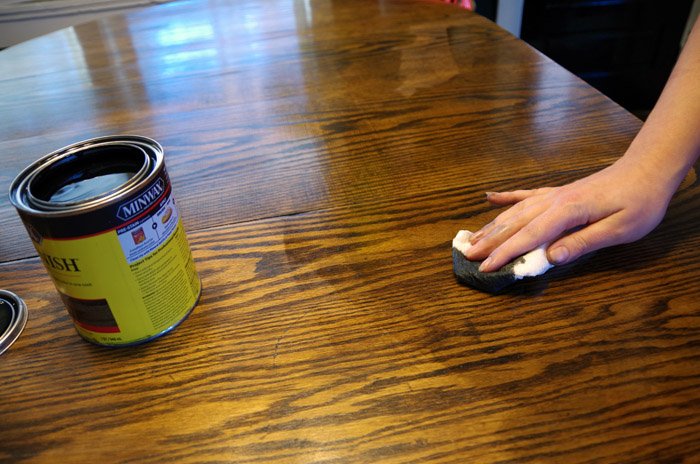
Replacing the cabinet top – Gel Stain
Once I saw the damage to the original bottom cabinet’s top, I knew I had to replace it with new wood. So I cut some boards left over from other projects, nailed them together, and then used a dark stain (similar to this one). It was looking much better already.


Before and after Stain
Painting
I washed it down with mild soap and water to prepare to paint the cabinet. First, I had to ring out my cleaning cloth to remove as much water as possible. Then I repeated that step with clean water without any soap. Then allowed, it to dry.
I painted two coats of white chalk paint and lightly sanded between coats (using these sanding sponges).
The back of the display area on the top half of the cabinet had a fake wood plastic picture glued to the particleboard. I was going to paint it, but it started to bow out of shape, so again, I replaced it.
Thankfully I had some beadboard left over from another project because I had already paid too much for this piece.
The beadboard was primed, so it only needed a coat of paint. My paint choice was light blue paint. Next, I removed all the cabinet hardware to paint. I planned to purchase all new hardware since the original hardware was dated and not my style, but then I remembered I could not spend any more on this piece.
Patina to Update Furniture Hardware


Hardware before the patina update
These pulls had both metal and plastic on them. So I had to update them.
Patina was my easy-peasy answer to solve this problem. First, look at this quick tutorial video to see how to use Patina. Then, check out the Patina HERE.
I was not kidding; it is quick and so much fun to watch the Patina spray dry, and the miracle of that aged patina look comes to life as you watch it dry. Now I am looking to update furniture and hardware to use this product.


Hardware after Patina dried.
Now on to the next area that needed some TLC. At this point, I noticed the bottom of the lower cabinet was in poor condition, so now I had to repair another area, but I did not want to spend any more on this piece. What to do?
Decoupage Book Pages
Looking through my crafting supplies, I found a book that used some of the pages for papier-mache eggs. Then it hit me, why not use the book pages to cover the discolored cabinet bottom? I then tore out pages from the book and randomly arranged them on the cabinet’s button. See how to decoupage in this post. Since we will use this piece of furniture every day, I decided to use poly-acrylic instead of Mode Podge. After the first one dried, I applied three more coats to ensure it would last for years.


Cabinet painted furniture update almost complete.
Glaze and Wax
I used a brown glaze to add some depth. After the glaze dried, I applied this clear wax to seal all the chalk-painted areas. Next, I used an old white tee-shirt to apply the glaze and wax. After a few hours, I used another clean piece of the tee shirt to buff the waxed areas.
Adding Lights
I almost completed this project, but the one thing that I wanted but would break my budget on the project were lights. I had these lights leftover from another project; however, there were only enough lights to put in the middle of each shelf, so I added them.


Vintage sewing display
I wanted to try out a few storage/display cabinet options, such as sewing supplies, books, collectibles, Etc. The possibilities are endless.
I staged a few ideas: some of my favorite things. You can see the basket’s pattern on the top shelf that I used to make my son this button-on shorts outfit almost 20 years ago. The hemming tool was my Grandmother’s (1899-1979). I am not sure of its age, but it is ancient.


My favorite things
Vintage sewing meets the furniture update.


My Grandmother’s sewing supplies
Then I moved things around and decided I would use this piece for art.


Art cabinet


tools
I am storing some art tools and displaying some artwork by my family!


Bovinae, Saint Mullins by Olivia O’Hern
Another thing I have to add to every display is something vintage. Books and cameras are vintage items on display.


Closeup of art and display items
More Amazing Furniture Updates


DIY Blog Hop
My friend Tarah from Grandma’s House DIY shares her secrets for updating furniture finishes.

Buff and Stain Wood Furniture
Mary from Life at Bella Terra shares her best restoration techniques for an antique table.


Antique table restoration
My friend Kim from Shiplap and Shells shares how to give garage sale furniture an upscale makeover.


Side table makeover
Kristin from White Arrows Home decorates her gorgeous log cabin style home with rare vintage finds. In addition, she shares some of her favorite ways to decorate using found objects for end tables.


Creative end table ideas
The short days after Christmas seems to drag on, so adding some pretty winter decor can brighten the darkest days. Niky from the House on Silverado shares her entryway decorated for winter.


Winter Entryway Table
Please Join Our Craft Group HERE. It is a place to share and be inspired by other amazing crafters. I cannot wait to meet you.
You might also enjoy these posts:
How to Choose the right paint for your furniture makeover; to see more, click HERE


Painted Wardrobe
Thank you so much for your visit today. I hope you found some inspiration.
Happy Up-cycling,
Kippi
Ramona
Tuesday 5th of January 2021
What a wonderful job on this project. I am curious to know if the cabinet was 2 separate pieces. When you stained the top of the bottom part of the cabinet did you completely remove the old wood and replace it with new wood or did you just sand it down and stain it? TIA Looking forward to all your posts.
Amy
Monday 4th of January 2021
Oh, my goodness. What a fabulous transformation! I love everything about it - the book pages at the bottom, the addition of the lights, the bead board. :D I've never heard of that patina spray before, but it looks amazing! Now I want to find something to try it out on. Thanks so much for sharing!
Andrea
Sunday 3rd of January 2021
What a transformation! I love the book pages in the bottom. What a fun and unique idea. This turned out great. Happy to be hopping with you today.
Kippi
Sunday 3rd of January 2021
Happy New Year