Sweaters are warm and cozy, making the perfect up-cycle knit sweater Christmas stocking. A few years ago, I purchased a ton of used sweaters from the thrift store to make sweater pumpkins, but I only used a few, so I used some sweaters for no-knit Christmas stockings.
This adorable sweater stocking shows my daughter’s romantic Christmas bedroom.
Sweater stocking


DIY Christmas stocking
This post contains affiliate links. That means that if you purchase from one of these links, I will make a small commission, but rest assured, you will not pay more for any products.
How to Make a Sweater Christmas Stocking
You can make a sweater Christmas stocking without knitting since you can use old sweaters to make them. I used my stocking pattern from an earlier post to cut them out of my sweater.
Stocking Supplies
- Sweater
- Fusible interlining
- Stocking Pattern
- Waters soluble maker
- Pins
- Sewing machine
- Scissors
- Thread
- Quilt ruler
- Iron (I used this mini iron)
- Pressing mat
- Fuse tape
After I gathered my sewing supplies, I began making my stocking.
Step One: Cutting out the Stocking
To cut out the stocking, I aligned the stocking pattern’s top edge with the sweater’s bottom edge, pinned it in place, and cut out the sides and bottom of the stocking.


Pattern Placement
Note: Since this stocking will not have a sewn-in lining or cuff, do not leave open the area to turn.
Step Two: Interfacing
I decided to use fusible interfacing to give the stocking some shape and prevent it from stretching out of shape. However, if you want a relaxed stocking, you can omit this step.
Using the stocking pieces, I cut out two pieces of fusible interfacing.
Note: Fold your interfacing in half before cutting it out.
Place your stocking sweater piece over the stocking pattern and mark with a pencil where the ribbing starts.
Using the ribbing mark, cut out the interfacing from the fold interfacing fabric to be a little shorter than the rib marks. Next, trim 3/8 inch off the sides and bottom of the interfacing.


Stocking interfacing
Follow the manufacturers’ directions for fusing the interfacing to the insides of the sweater pieces.
I used my mini steam iron and a pressing mat.
Step Four: Lining


lining supplies
To cut out the lining, I used the sweater piece as my guide. Next, I placed the sweater piece on the folded lining fabric, pinned it in place. Then using a fabric marker, I marked 1/2 inch above the interfacing on my lining fabric.


Marking the lining
Next, I cut out the lining.


Cutting out the lining
Using a quilting ruler and the markings I made earlier as a guide, I drew the cutting line for the top of the lining.


Marking the Lining upper edge
To form a 1/4 inch hem on the top edge of the stocking, I turned down 1/2″ and pressed it flat. Next, I turned under 1/4″ to form a rolled hem and pressed it flat.


Lining hem
Step Three: Sewing
Pin and stitch around the top hem of the lining.


Sewing lining hem
Iron fuse tape over the inside of the lining hem, leaving a small gap at the top.


Iron on fuse tape
Pin the lining pieces together, then stitch the sides and bottom together using a 1/2″ seam allowance.


Stitch the lining


Clip lining curves


Remove fuse tape paper
Sweater Stocking Sewing
Pin the sweater pieces together with the right sides facing.


Pinned stocking pieces
Sew a 1/2″ seam around the sides and bottom of the sweater stocking.


Stitch the sweater pieces together
Then to finish the seam, I used a serger to lock the cut edge. However, you can use a zig-zag stitch around the edge.
Next, I made relief cuts around the curves, being careful not to cut through the stitches.


Clip curves
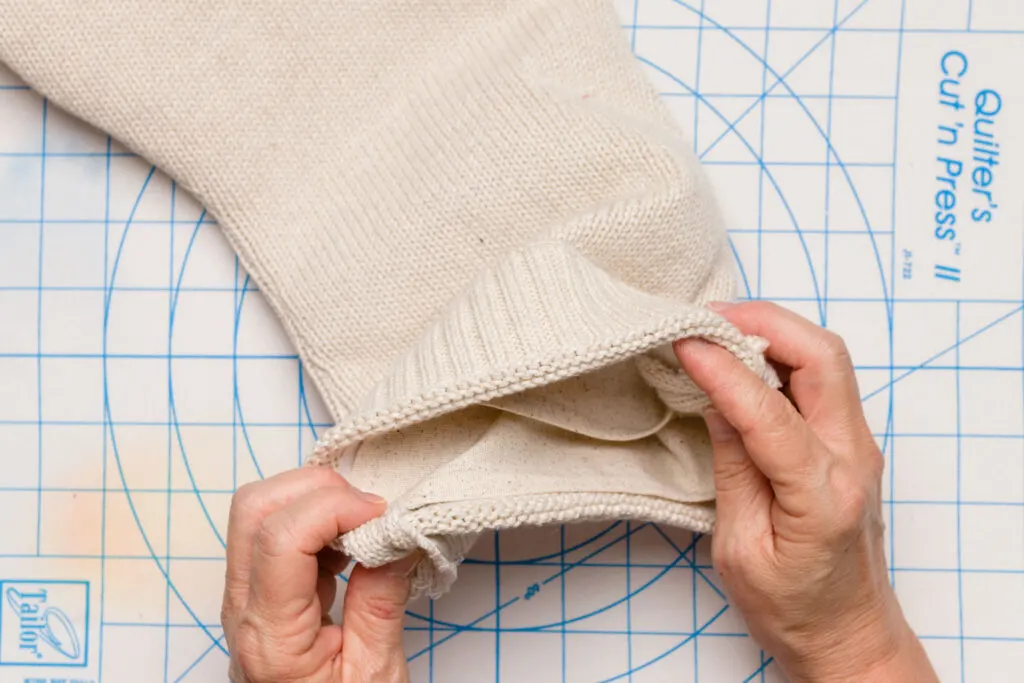
Step Five: Attaching the Lining
Turn stocking right side out and place the lining into the stocking with wrong sides facing.


insert the lining into the sweater stocking
Next, align the side seams with the lining hem placed over the interfacing.


Matching seams
Note: You can use glass head pins to hold the lining in place while you iron the fusible glue strip.

Attach lining
Next, I used a mini iron to adhere to the lining.


Iron lining in place
Step Six: DIY Sweater Stocking Hanger
When I make stockings, I usually use the stocking fabric to fashion a hanger. However, that was not an option using a sweater. Therefore I used a piece of ribbon with a pom pom and tag as my stocking hanger.


Stocking hanger


Christmas room decor
More sewing projects you might like:
How to build a headboard.
DIY pillow shams with tassels.
Want a Stress-Free Holiday???
Do you want to enjoy all the holiday season has to offer? Are you feeling overwhelmed when you think of the holidays?
Join me as we enjoy a stress-free holiday season. I will send you emails loaded with inspiration, money-saving ideas for decorating and gift-giving, and so much more.
Please join me for a ton of inspiration and ideas! And have the best of everything this holiday.
Merry Christmas,