We wanted to add a classic accent wall; therefore, we chose to create a board and batten wall.
DIY Board and Batten Wall
Our guest bedroom needed a fresh update, but we needed to keep it neutral since we plan to sell our house soon. Hence, board and batten will go with any decor or color combination.
However, I really love the shiplap accent wall in our bedroom, but it tends to look vintage or farmhouse. You can see the shiplap accent wall in our bedroom in this earlier post.
Board and Batten
This post contains affiliate links. In other words, if you purchase from one of these links, I will make a small commission, but rest assured, you will not pay more for any products.
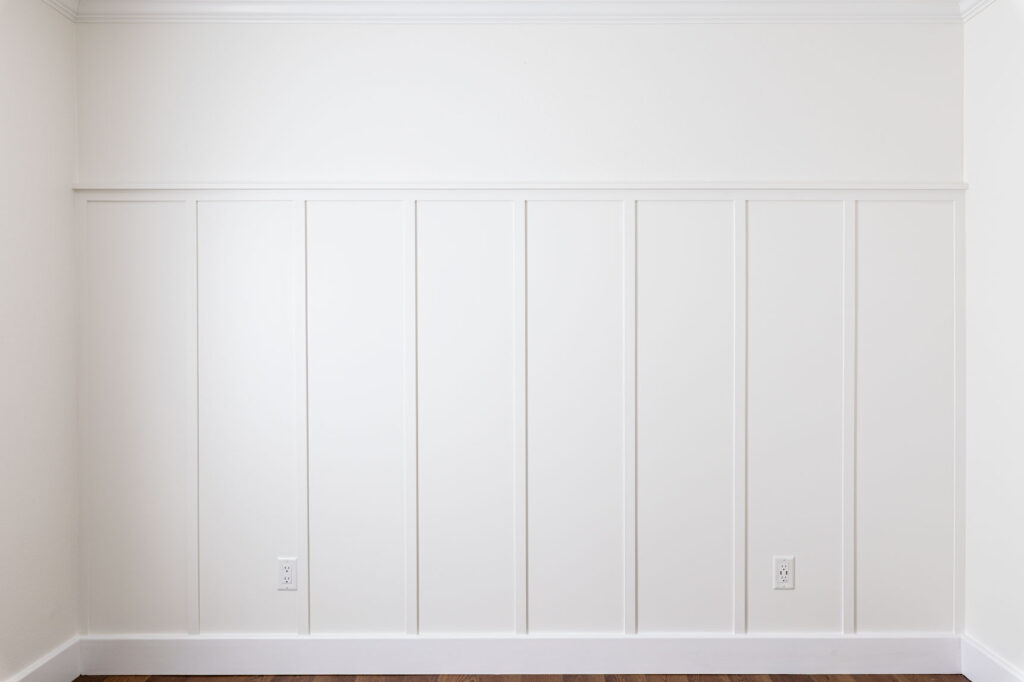
The below photo shows the area where we wanted to add the accent wall.


Before
Since the floating shelf over the bed was a good height, we used it as the top board for our planning purposes.
Note: We used printer paper and taped it to the wall to determine the batten placements on the wall.


Board placement template
Before we built the board and batten wall, we replaced the flooring so it would match the rest of the house. You see how we installed the floor in our bedroom.
Tools Needed
Brad Nailer (nail gun)
Cordless drill with counter sink bit and driver tip
Screwdriver
Prybar
Hammer
Oscillating saw
Paint brush and roller with tray
Caulk gun
Materials Needed
1X6X12 baseboard
1X2X8 6 battens
Hardboard Tempered Panel
1x2x12 1 top rail
Construction adhesive (Liquid Nails)
Nails 1.5 and 2 inch
Trim screws 2.5 inch
Putty knife
Wood filler
Paintable caulk
Primer
Paint
Sandpaper 120 grit
Note: Before you begin I recommend you watch this video on how to place the battens.
1. Remove Existing Baseboard
Before removing the baseboards, I like to score the top edge with a utility knife to cut through the paint and caulk.
Note: This step is vital to prevent damaging the sheetrock.
Next, use a pry bar and hammer to loosen and remove the baseboard.
Then remove electrical outlet covers and any other obstructions from the wall.
Textured Wall
Since we have textured walls, we covered the board and batten area with Hardboard Tempered Panels.
However, if your walls are smooth, omit this step.
2. Determine Batten Spacing
Measure your wall to determine the layout for seams in the panels and batten placement.
Note: Things to consider while planning your layout are where the seams for the Hardboard Tempered Panel will be and the electrical outlets. It is optimal to not have electrical outlets in the battens and the battens to be placed to cover all seams.
For example, we chose nine battens that equal eight spaces.
The math to determine batten spacing:
Wall length 127.75 -13.5 (the width of 9 battens)=114.25.
Then 114.25/8 (number of spaces)=14.28(the spacing between each batten).
3. Cut and install smooth brown panels
Next, use a level to mark the panel installation line.


Mark panel install line
Then, use a stud finder to locate the studs, then mark the top and bottom where you will install the smooth panels onto the stud.
Cut the brown panel with a circular saw to width as determined by batten placement and length (69 inches).


Cut smooth brown panel.
Our first panel was 48 by 69, the second 37.5 by 69, and the third 31 by 69.
Mark the locations of electrical outlets on the panel and cut them out with an oscillating saw.


Cut holes for electrical outlets
Use a stud finder to locate the studs and mark the wall at the top and bottom with reference marks to aid installation.
Nail panel to wall spacing nails 8 to 12 inches apart into the stud, top and bottom. Some nails might be required along the top that will be nailed into just the drywall.
4. Install baseboard
Cut baseboard to length using a miter saw. If you did not remove the adjacent wall baseboards, you might need to trim them with an oscillating saw to Install the new baseboard.
Position the baseboard and use 2-inch nails or trim screws to fasten it to the wall.


Pre-drill baseboards
5. Cutting Battens
Using a table saw, we cut down our 1x2x8 boards to 5/16″ thickness.
For our accent wall, six 1x2x8s produced enough battens and the top horizontal boards (nine cuts total).
6. Attach the middle board
Next, you will need to measure the wall to determine the middle board length.
Cut the middle board to length, then attach it with construction adhesive and 1.5-inch nails even with the top edge of the smooth wall panels.


Attach Middle board
7. Attach battens (vertical) to the wall
Next, measure the vertical battens and cut them to length. Measure each location before cutting.
They may vary slightly. I cut a spacer board to 14.28 inches to keep my spacing even.
Attach battens with construction adhesive and 1.5-inch nails. Start in one corner and attach the first batten. Use a level to check that it is plumb.
Now use the spacer to make the location of the next batten and attach it. Continue this for each batten. If needed, make cutouts in the battens to go around outlets or other obstacles with an oscillating saw.


Mark batten placement
8. Attach the top board
Cut 1×2 top board to the length of the wall. Position the top board on the top of the horizontal band and attach it to the wall with 2.5-inch trim screws into the studs.
Pre-drilling these holes prevents splitting and easier installations.


Positioning top board


Pre-drill screw holes
9. Filling holes, caulking, priming, and painting
Next, I applied wood filler with a putty knife to the nail holes. Then I caulked the seams and corners using paintable caulk.
I used a wet finger to smooth the caulk lines to create an even finish. Let the caulk and wood filler dry. Sand out any rough spots with 120 grit sandpaper.
Prime the wood filler and caulk. Then apply a final coat of paint over the board and batten wall.


apply wood filler


Applying caulk


Apply paint


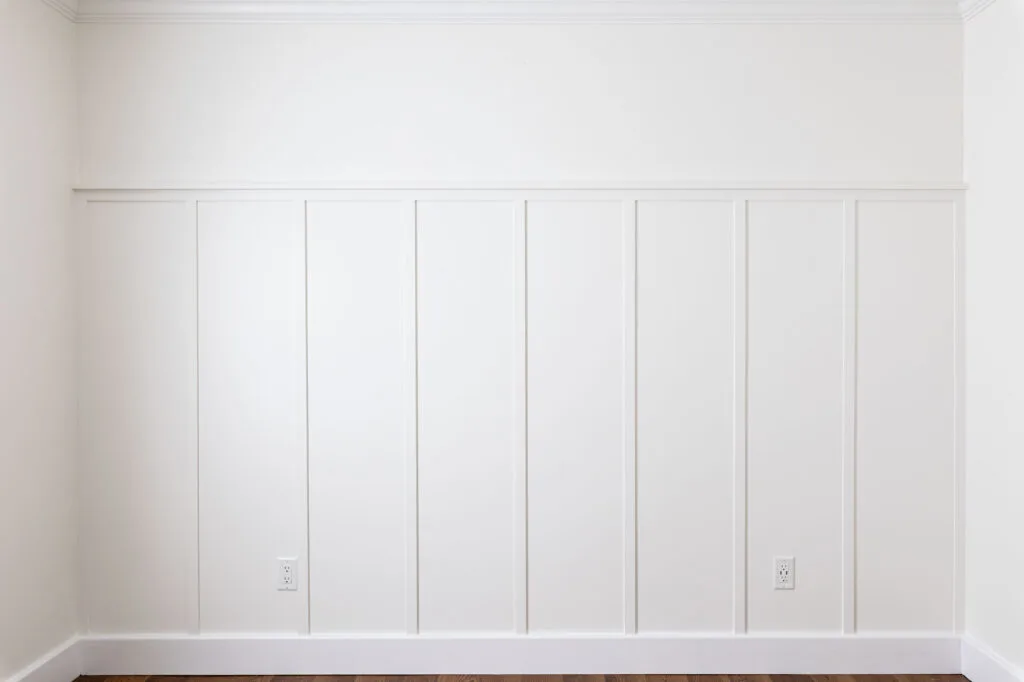
DIY Board and batten
The board and batten wall was an easy and budget-friendly update and I absolutely love how it turned out.
Our guest room is ready for company.
See you soon,
Kippi
Ps. This post was shared on Between Naps on The Porch
Sue at Blu
Tuesday 2nd of August 2022
Great tutorial! You covered it all! pinned
Cat Michaels
Monday 1st of August 2022
Wow....Looks amazing! I'd have to brush up on my math to attempt all that spacing and measuring -:D,
Michelle
Monday 1st of August 2022
It makes the room look so classy and chic. I've always loved the look of board and batten, even if it's just on a focal wall.
rosemary palmer
Monday 1st of August 2022
I think this is such a great way to make an accent wall or headboard. If I wasn't in an apartment with textured walls, I would do this.
Meagan
Tuesday 5th of July 2022
It came out wonderful. Thanks for sharing. I want to do this in my living room and this got me so excited to get started soon! Love it. Meagan - Decorative Inspirations