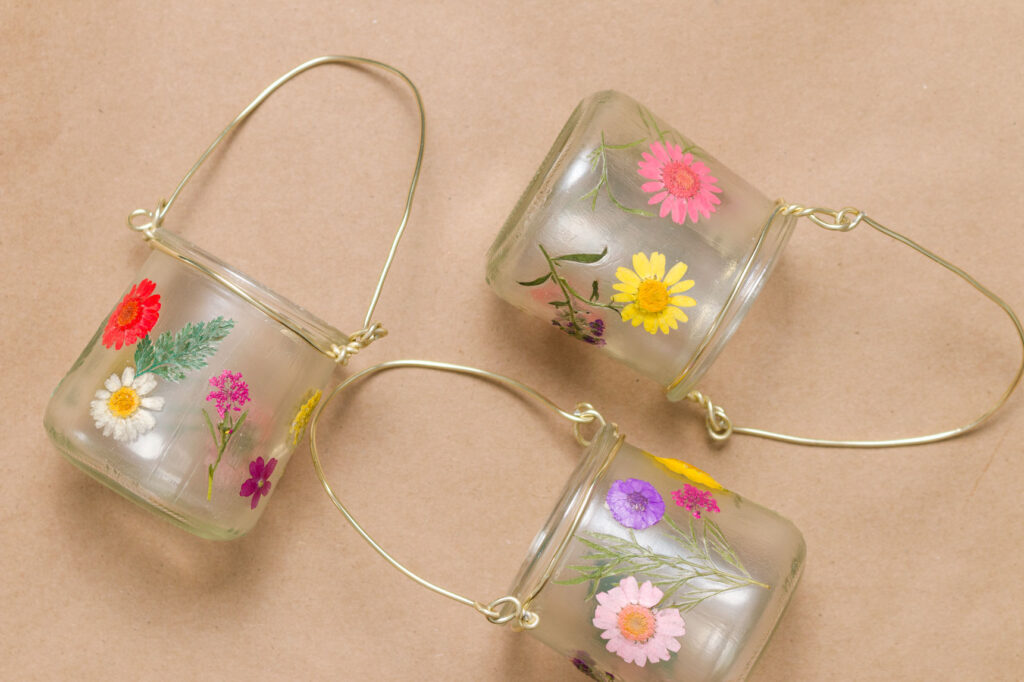
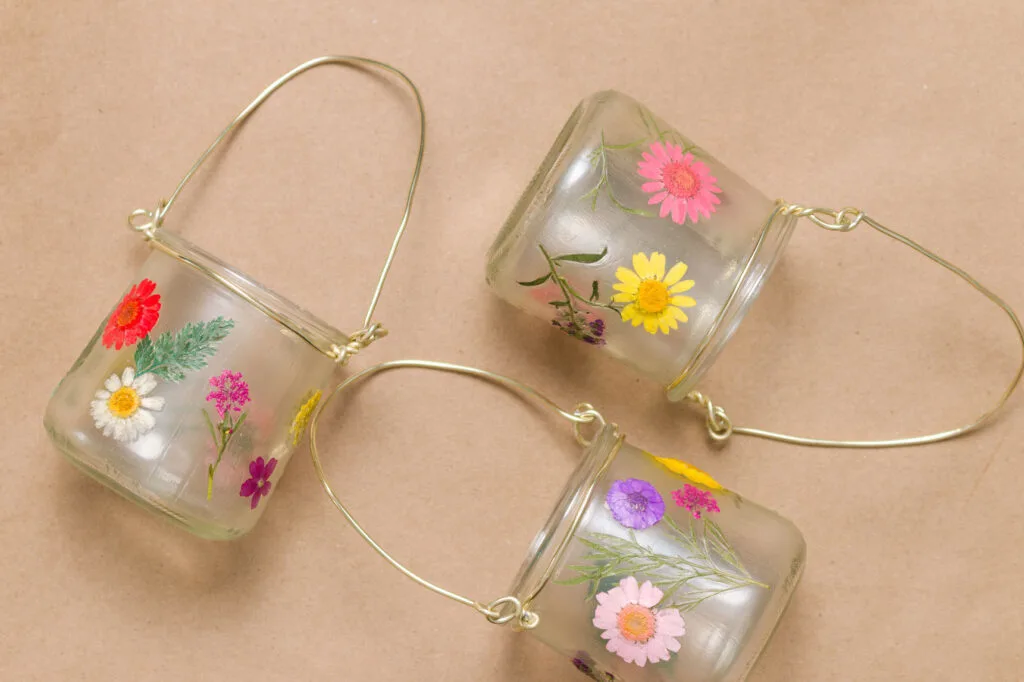
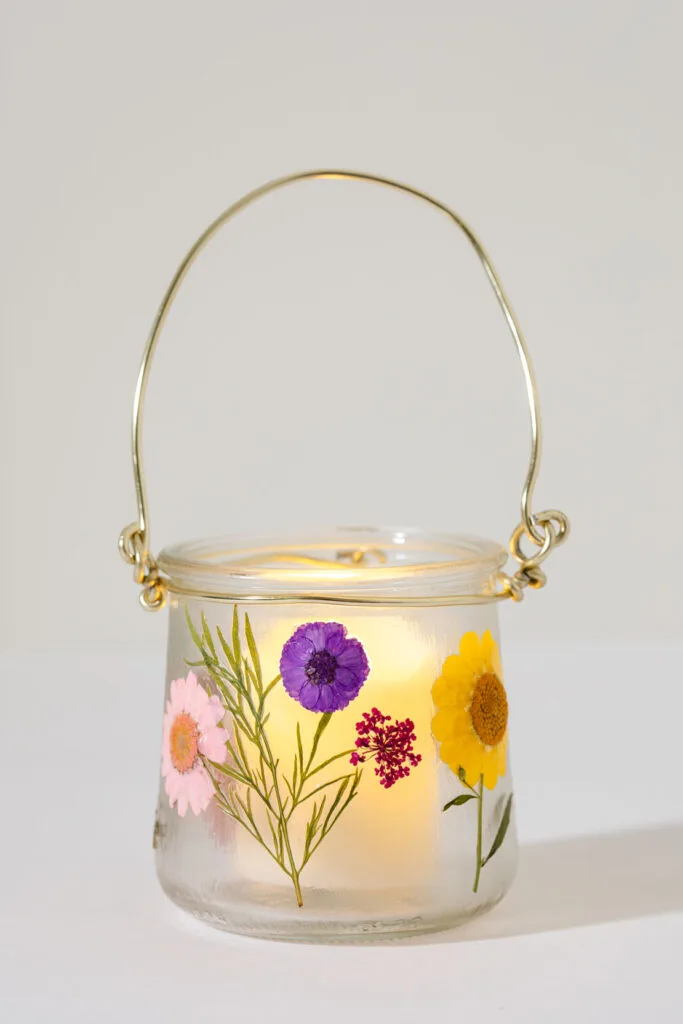
DIY pressed flower jar lanterns are the perfect way to add a romantic ambience to your garden and yard.
You can also use tissue paper, Epsom salt, or napkins to create unique jar lanterns.


You could use flowers you pressed from your garden to enjoy your garden for years. If you are using flowers you dried between heavy books, be sure to check that they have dried completely before using them.
This post contains affiliate links. If you purchase from one of these links, I will make a small commission.
Pressed Flower Jar Lantern Supplies
- Glass jars
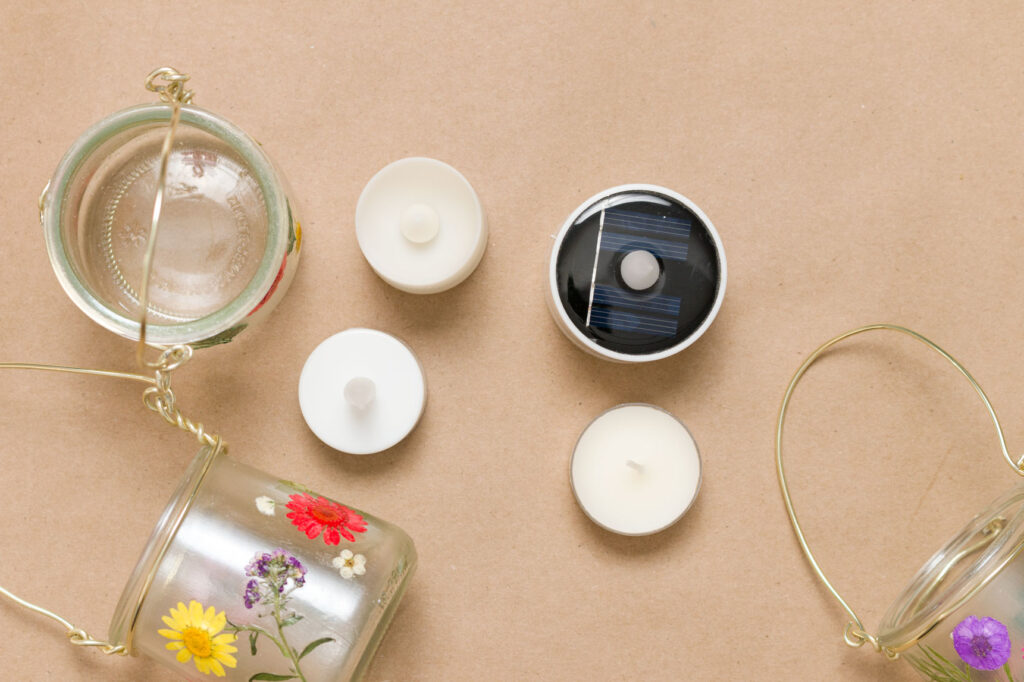
- Tea Light Candles (LED with remote, solar, battery operated, wax)
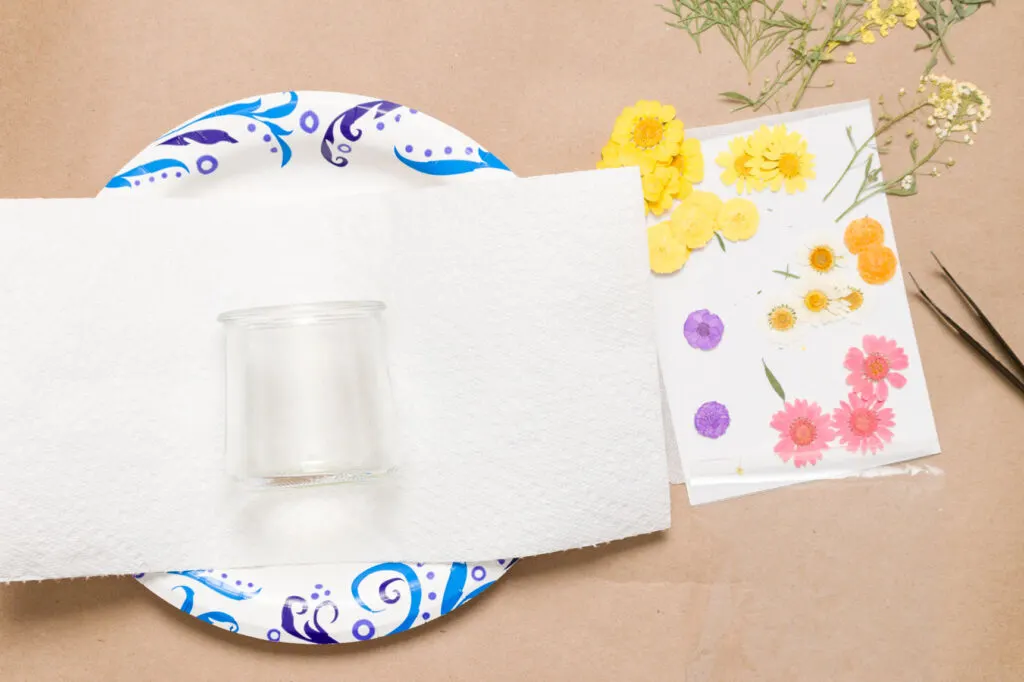
- Pressed dried flowers (these are the ones I used)
- Mod Podge
- Wire
- Wire cutters
- Paintbrush


How to Make Pressed Flower Jar Lanterns
Making pressed flower lanterns with jars makes it so easy for both kids and adults to create them.
Prepare Jars
You must remove the labels and adhesive residue if you use upcycled jars like the yogurt jars I used.
Instructions
You will want to put your jar on a plate with something on either side to keep it from rolling. I used small rolls of ribbon on either side and then placed a paper towel over them.
Next, I placed the jar in the center.

Decorating Jar with Mod Podge and Pressed Flowers
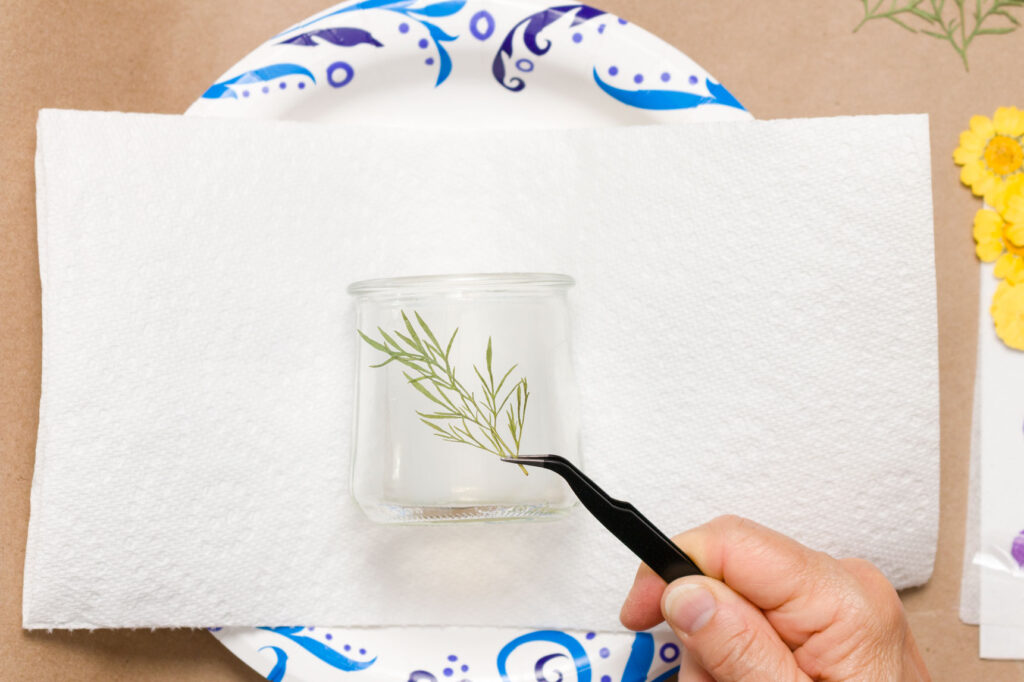
I used the tweezers that came with the pressed flowers I used to attach the pressed flowers. First, I planned my design and then painted Mod Podge over the area on the jar where I planned to place my flowers.
Working on a small area, then allowing the Mod Podge to dry for 15 minutes and moving to the next area.

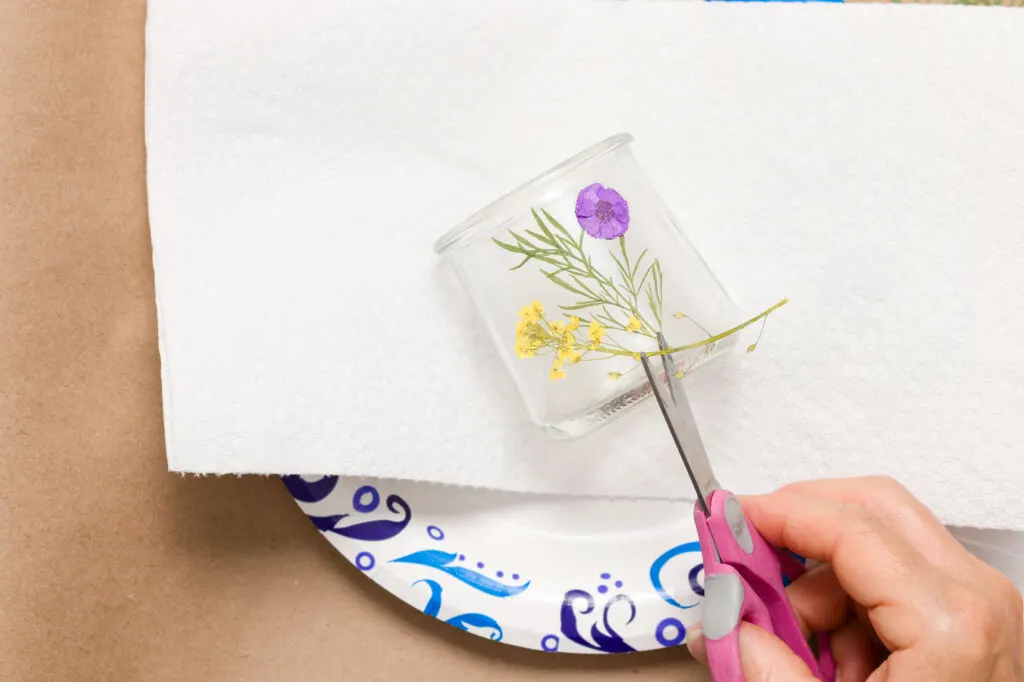
Next, you can layer your flowers and stems. I used scissors to trim stems, etc.
Pressed flowers with layered petals need extra care to attach. I used the tweezers to lift the upper layer of petals so I could add some Mod Podge to them then I used a piece of plastic wrap to press them down.

Sealing Pressed Flowers
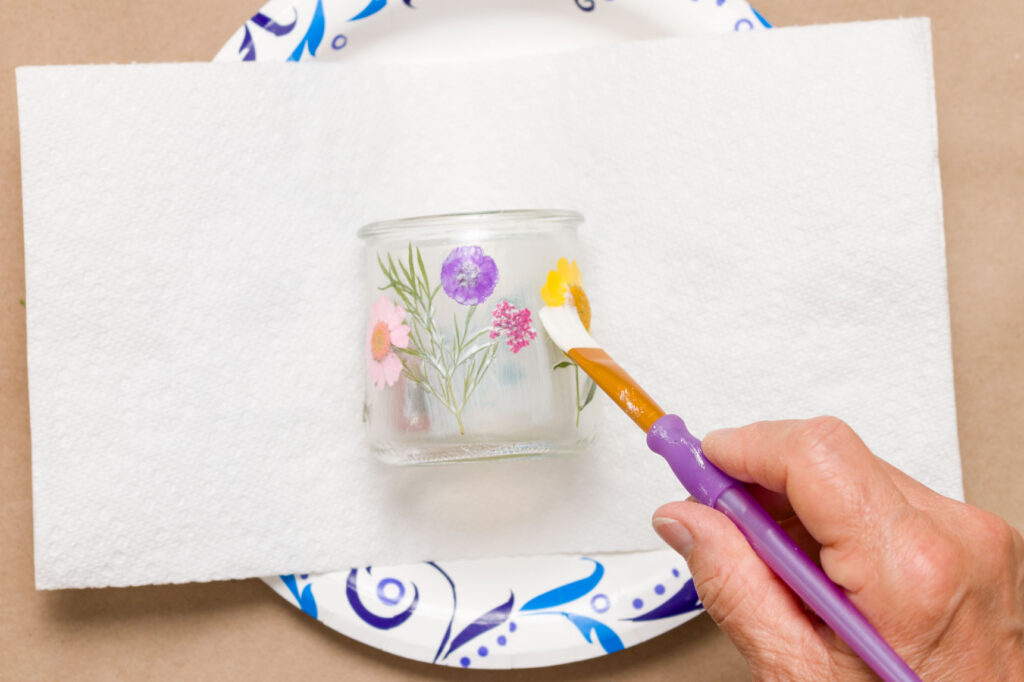
To seal your pressed flower designs, you can paint on a coat of Mod Podge. Note: the Mod Podge will look milky, but not to worry, it dries clear.

Jar Lantern Handles
To be able to hang the pressed flower jar lanterns in the garden, I make handles for them using the same method I used in my hanging jar lights post.
I decided to use the pretty gold wire with these lanterns; however, you can choose the wire color that works best for your design.
How to Choose the Best Tea Light Candle
There are so many great choices for tea-light candles.
There are pros and cons to each type of candle.
Solar candle: The solar tea light is the least attractive, with its solar panel (cell) on the top. However, it is perfect for daily outdoor use. You can see how I used them in this earlier post.
Battery-operated candle: I remember when the battery-operated tea light was the “new” thing, and I purchased a case. They do not have an attractive appearance, and replacement batteries are expensive. On the plus side, they produce a nice glow and are safe.
Wax candle: The wax candle produces the prettiest glow, and the scented ones add a nice fragrance. On the flip side, they are the most dangerous (fire threat). They don’t last as long as other types of candles, and the melted wax is a mess to clean.
LED with remote control: The LED candle with the remote control is a game changer for me. You can recharge all the candles at the same time. You can control them with a remote. The remote controls the timer, brightness, and flickering. They have a nice appearance. However, they are the most expensive choice.


Decorating with DIY Pressed Flower Jar Lanterns
I am hooked on pressed flower crafts, so I made some rocks to add to the garden with pressed flowers and Mod Podge.


How to Make Pressed Flowers Jar Lanterns
Tools
- Jars
- Mod Podge
- Paintbrush
- Pressed flowers
- Wire
- Wire cutters
Instructions
- If you use upcycle jars, you must remove the labels and adhesive residue. If you use upcycled jars like the yogurt jars I used, you will want to put your jar on a plate with something on either side to keep it from rolling. I used small rolls of ribbon on either side and then placed a paper towel over them.
- Next, I placed the jar in the center.
- I used the tweezers that came with the pressed flowers I used to attach the pressed flowers. First, I planned my design and then painted Mod Podge over the area on the jar where I planned to place my flowers.
- Working on a small area, then allowing the Mod Podge to dry for 15 minutes and moving to the next area.
- Next, you can layer your flowers and stems. I used scissors to trim stems, etc.
- Pressed flowers with layered petals need extra care to attach. I used the tweezers to lift the upper layer of petals so I could add some Mod Podge to them then I used a piece of plastic wrap to press them down.
- To seal your pressed flower designs, you can paint on a coat of Mod Podge. Note: the Mod Podge will look milky, but not to worry, it dries clear.
- To be able to hang the pressed flower jar lanterns in the garden, I make handles for them using the same method I used in my hanging jar lights post.
- I decided to use the pretty gold wire with these lanterns; however, you can choose the wire color that works best for your design.
- There are so many great choices for tea-light candles.


More Garden Lighting Ideas


Dear Casa has a gorgeous yard and garden. You will love all her secrets about installing lights on a pergola.

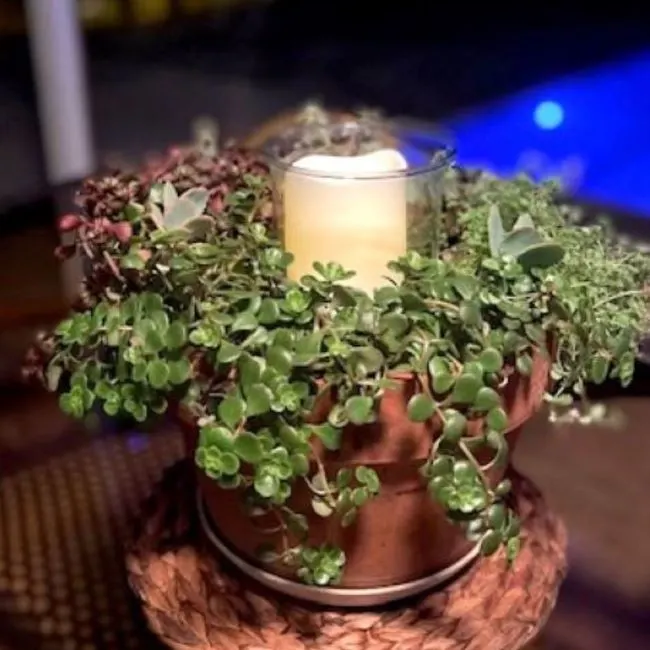
Kimberly from Farmhouse to Florida is a retired florist who shares amazing floral ideas. You will want to check out her latest succulent creation.
See you soon,
Kippi
Ps. This post was shared on Between Naps on The Porch.
debbie-dabble
Friday 13th of October 2023
Kippi, Really cute!! Thanks so much for sharing and thanks so much fro stopping by!! Hugs, Deb
Chrismus
Wednesday 28th of June 2023
Pressing dried flowers and clamping them into books and notebooks are things I used to do when I was a kid. It's nostalgic. Thank you for your helpful sharing. Please enjoy: avatar game
Marie
Thursday 22nd of June 2023
These are so sweet! I tried to make wire handles once and they looked awful! I will need to check out your tutorial.