Since our scrap woodpile is growing, I decided to build a decor display riser with some of our wood scraps. Decor risers are wonderful for decorating and displaying.
I was so excited about all the possibilities I could create with my scrap woodpile.
Rustic display stands and DIY mirror

Also, I wanted to make a frosted mirror after seeing how amazing my friend Rebecca’s from Zucchini Sisters frosted mirror turned out.
How to Build a Wood Riser
This post may contain affiliate links. This means that if you purchase from one of these links, I will make a small commission, but rest assured, you will not pay more for any products.
You can save this inspiration on Pinterest for later.
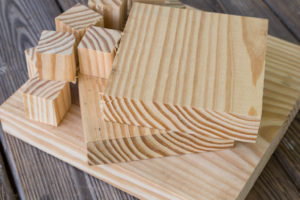
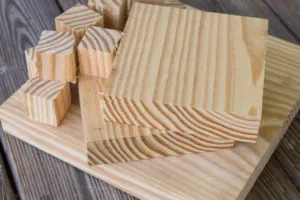
After selecting my wood, I gathered my supplies.
Supplies and tools
- Circular saw
- Framing square
- Measuring tape
- Pencil
- Hearing and eye protection
- 2″ x 12″ lumbar
- Table saw
- Glue
- Screws 2.5″
- Drill, drill bits, and countersink
- Sander and sandpaper 150
- Clamps
- Spray chalk paints
How to build a scrap wood display riser video:


Gathering tools
We made 2 sizes of wood risers to stack the smaller ones on the large ones.
Wood Cuts
Small riser top 6″ x 6.”
Large riser top 11″ x 11″
Legs 1.5″ x 1.5″ x 1.5
Using the measuring tape and square, mark your cut lines with a pencil.
I used the circular saw to cut the riser tops.


Cutting the riser tops with a circular saw
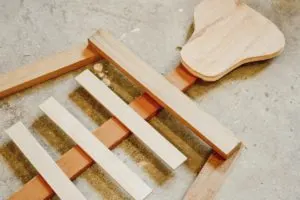
Then I used the table saw to cut the legs.


Cutting the legs
Using the table saw to cut the scrap board to 1.5″ to make the legs.
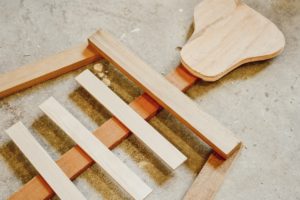
Sanding
Everything is cut and ready to be sanded!


Sanding all the cuts
Using a hand sander, I sanded all sides.


Everything is sanded and ready to build the risers
Assembling Risers
The legs can be glued on or screwed in place. I decided to try both and see which I liked better.
Gluing


Everything needed to glue on the legs


Applying glue
Clamping

the leg in place


All the legs clamped and drying
Screw Assembly
I used a countersink drill bit to drill the holes in the legs.


Countersink drill bit


Drilling countersinking in legs
To install the legs, I lined them up to the corner of the top. Then, I drilled a pilot hole through the countersunk hole in the leg into top about a 1/2″.
Screwing

the legs on the riser


Drilling through the leg to the riser top


I finished attaching the legs with screws


Now to attach the legs to the large wood stand


Risers are ready for painting
Painting


Spray chalk paint and risers


Painting the decor display riser
Finished Riser
I wanted to note that I feel that the legs attached with screws worked better.
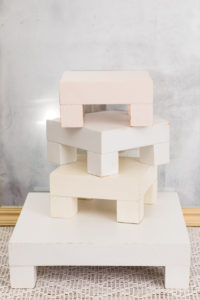
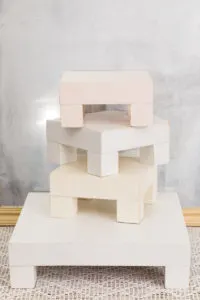
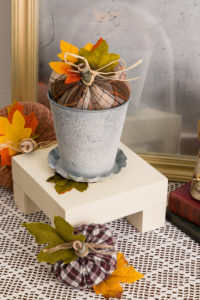
Farmhouse style rustic risers
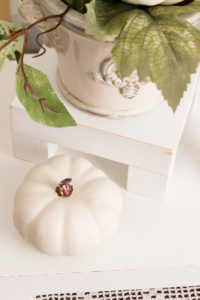

Display pedestal with plant and pumpkin
In the photo below, I have a few of my fabric pumpkins. I made them with cozy shirts from Goodwill. In addition, I wrote a post about how to make fabric pumpkins.

Display pedestal with plant and pumpkin

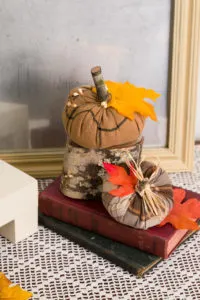
Cozy rustic decor with wood antique books and Goodwill skirt pumpkins
More scrap wood projects:
I have been working on some easy, gorgeous fall decorating projects you will love, so if you don’t want to miss any inspiration, join The Fall Inspiration Newsletter and get it delivered to your inbox.
Scrap Wood Challenge Projects
The Scrap Wood DIY Tour’s first stop is Olivia from Olivia Ohern has made an amazing exotic wood and resin charcuterie board. Olivia is my daughter, and I am so excited and proud of her for starting her blog. Wow! Her creative eye really shows in her first challenge project!
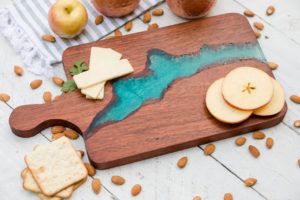

Handmade Charcuterie Board


Exotic wood cheese board with resin
Lia from Southern Yankee DIY is the next stop on tour, and she has hit it out of the park again with her fall sign. I am definitely making one of these too.
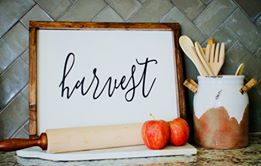
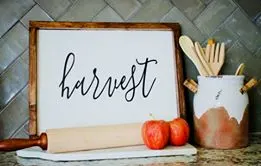
Harvest wood sign
The third stop is Erin from The DIY Nuts, with her industrial-style corner shelf.

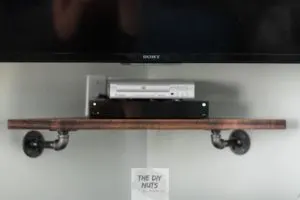
Corner shelf
Amy from 1905 Farmhouse is getting ahead of the game with her Halloween crafting. She is sharing her outdoor wooden skeletons, sure to please her trick or treaters.
Scrap wood skeleton
Kerri made this rustic centerpiece box from Mama DIY.

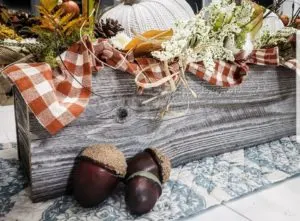
Rustic Farmhouse Centerpiece Box
Want a Stress-Free Holiday?
Want to enjoy all the holiday season has to offer, but it all seems overwhelming? Join me as we enjoy a stress-free holiday season with a ton of inspiration, money-saving ideas for decorating, gift-giving, and so much more. Join HERE! And have the best of everything this holiday.
Thank you for your visit today; I hope you found some sweet inspiration.
Merry Christmas,
Kippi
Meagan Trento
Wednesday 17th of August 2022
super cute table risers. Perfect for vignettes.
Virginia
Monday 15th of August 2022
Love the risers. I'll attempt to make them as well with glue since I don't have many tools!
Friday 4th of October 2019
Great project and thanks for the detailed tutorial. Thank you for entering your project over at Creativ Fusion Arts & Crafts Blog challenge. Angela DT https://creativfusion.blogspot.com/2019/09/challenge-14-autumn.html
Our Hopeful Home
Monday 9th of September 2019
I always use risers as well -- for both decor and photo shoots. Yours are great. Also love those plaid pumpkins. Thanks for sharing at Vintage Charm.
Michelle
Sunday 8th of September 2019
Such a simple and easy solution! Well done! Thank you for linking up tomCreative Compulsions!