We needed budget-friendly outdoor mood lighting, so we created DIY wood lanterns for this purpose.

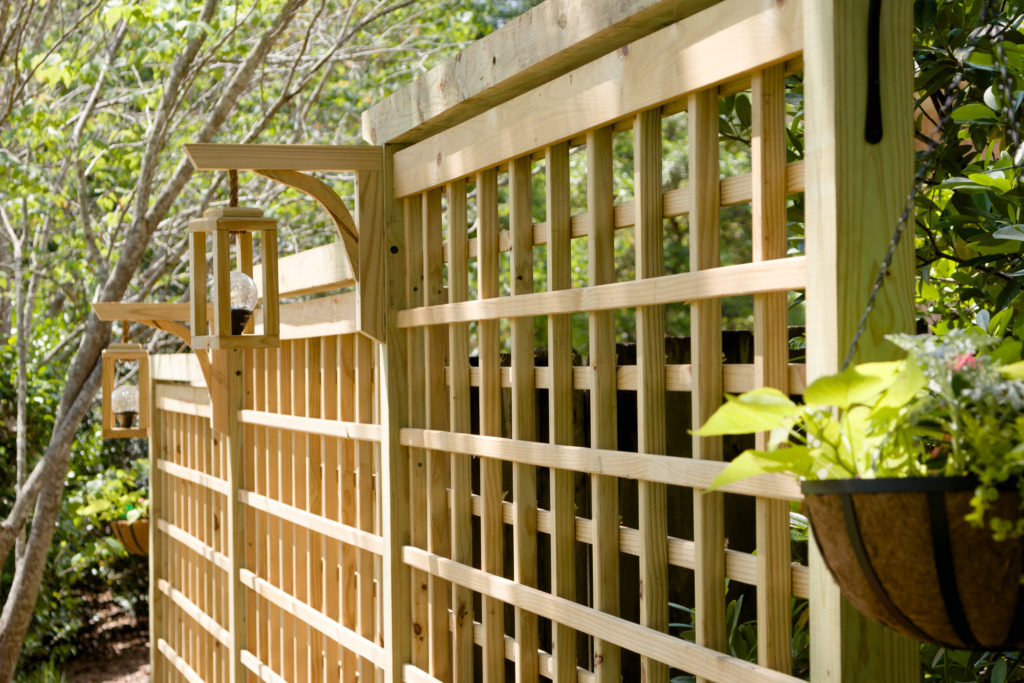
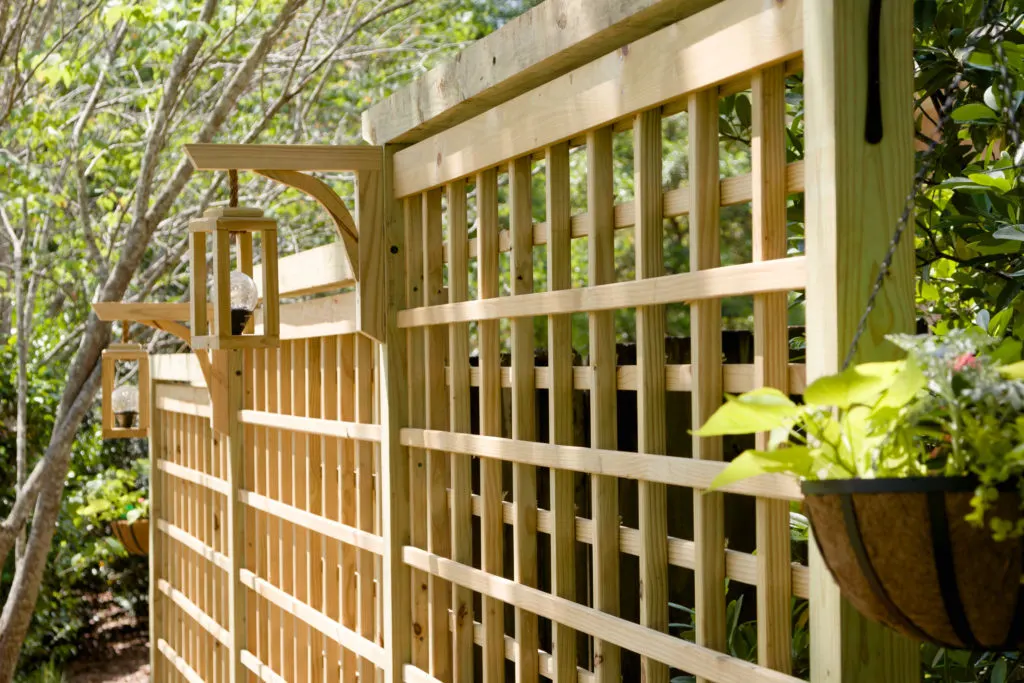
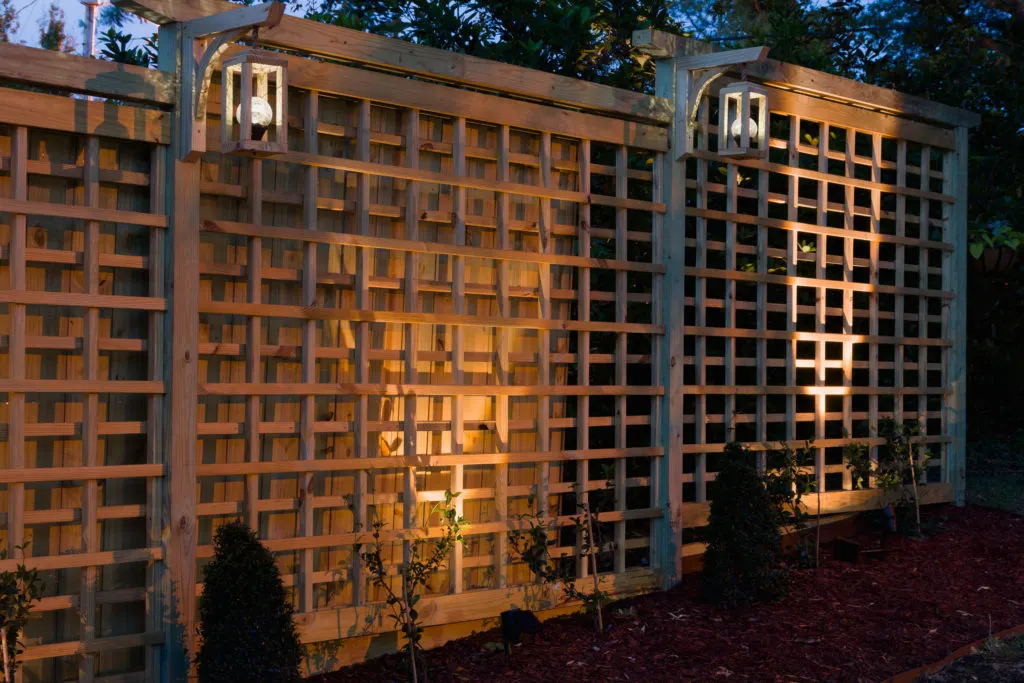
After my sweet hubby built these beautiful garden trellises that I designed, I felt something was missing, but what? Then it hits me they needed something that added depth to them, and why not add his famous wooden lanterns?
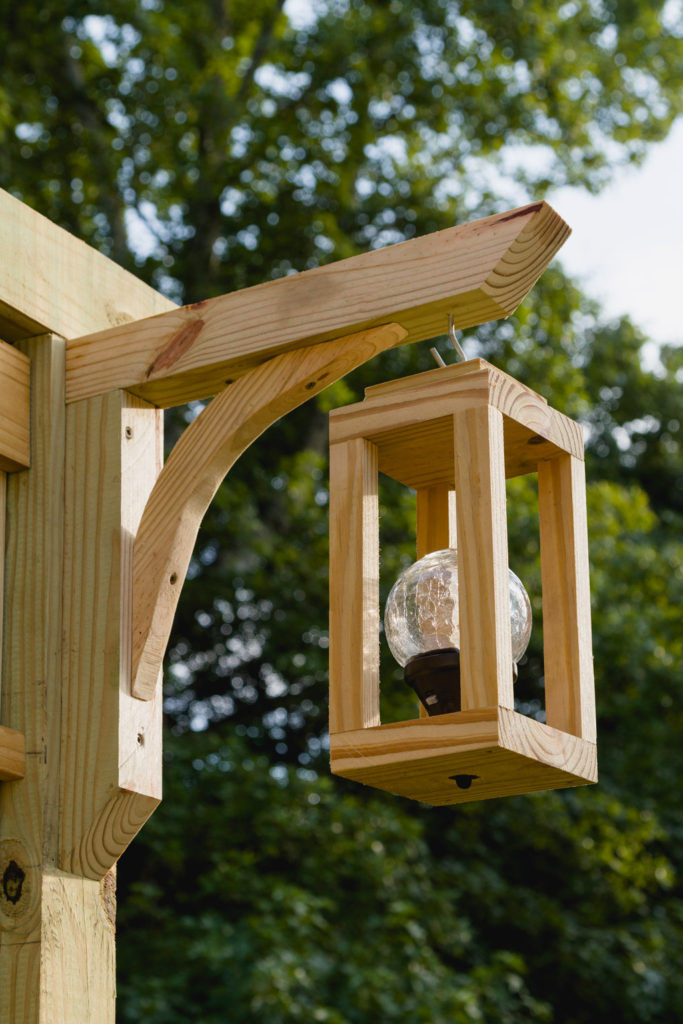
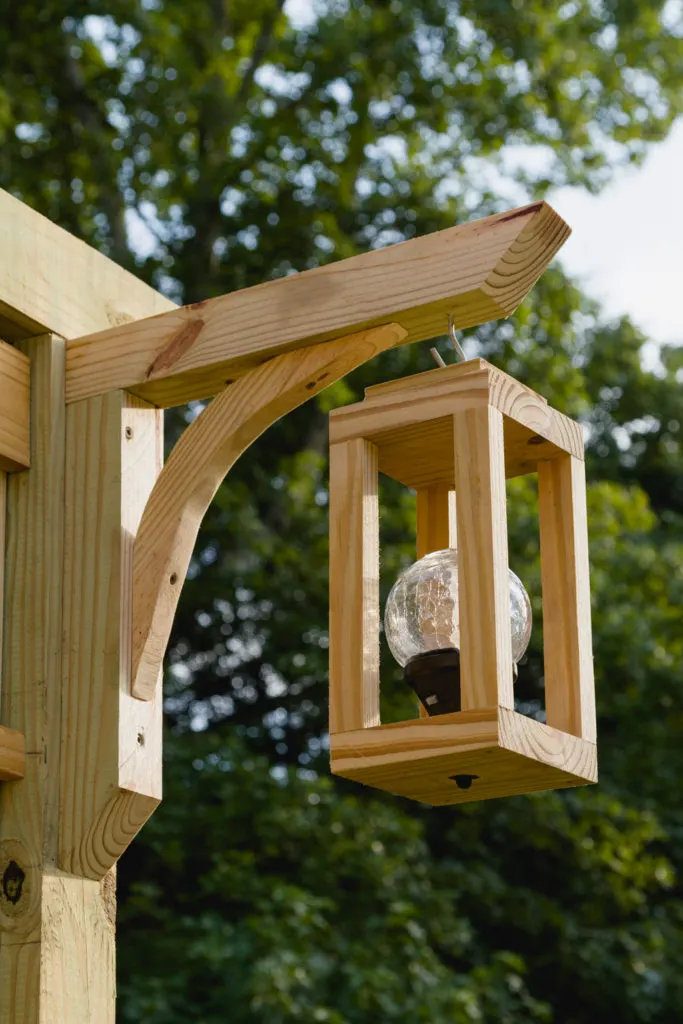
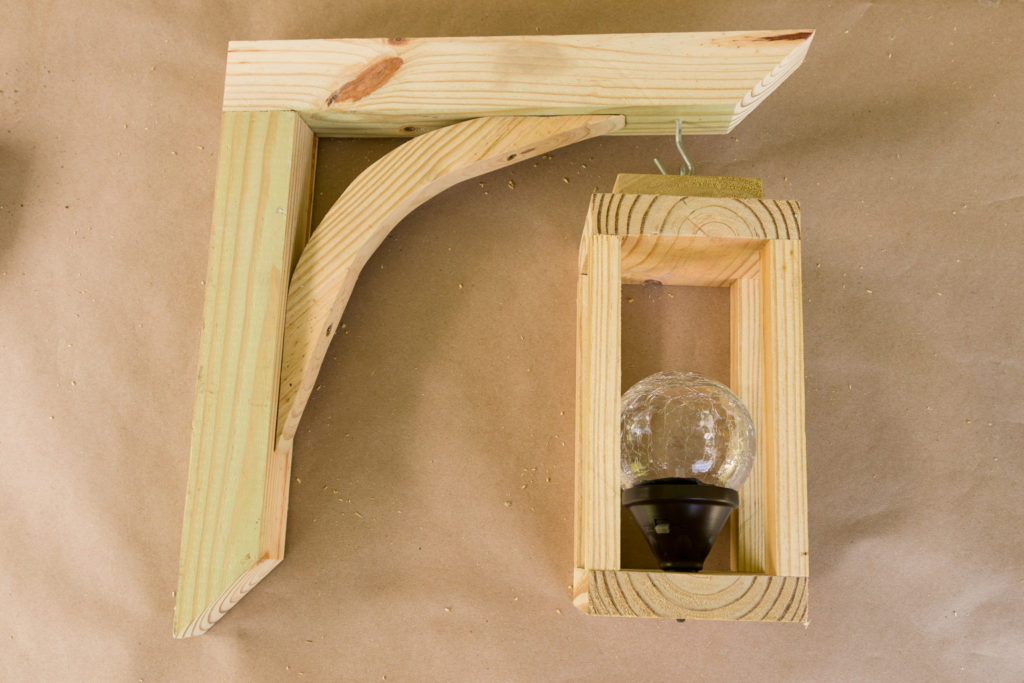
These wooden lanterns had to be different from any we had made before since they are hung outside, and a candle would not work. They needed solar lights.
We have been working on a backyard makeover. In addition, we have finished a few other projects that needed to coordinate with the DIY lanterns such as, window flower boxes, DIY birdhouses, garden trellis, garden obelisk, floating deck, and the garden hose storage.
This post may contain affiliate links. This means that if you purchase from one of these links, I will make a small commission, but rest assured, you will not pay more for any products.
The trellis pictured below is the second one he built, and this one has a planter box at the bottom.
DIY Wood Lanterns With Solar Lights
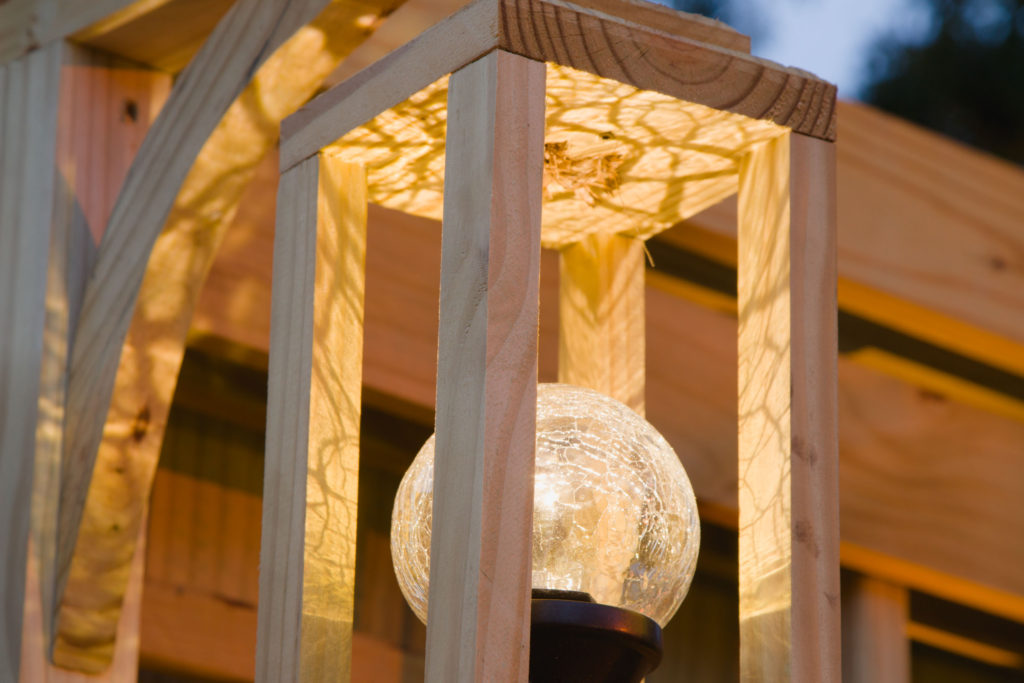
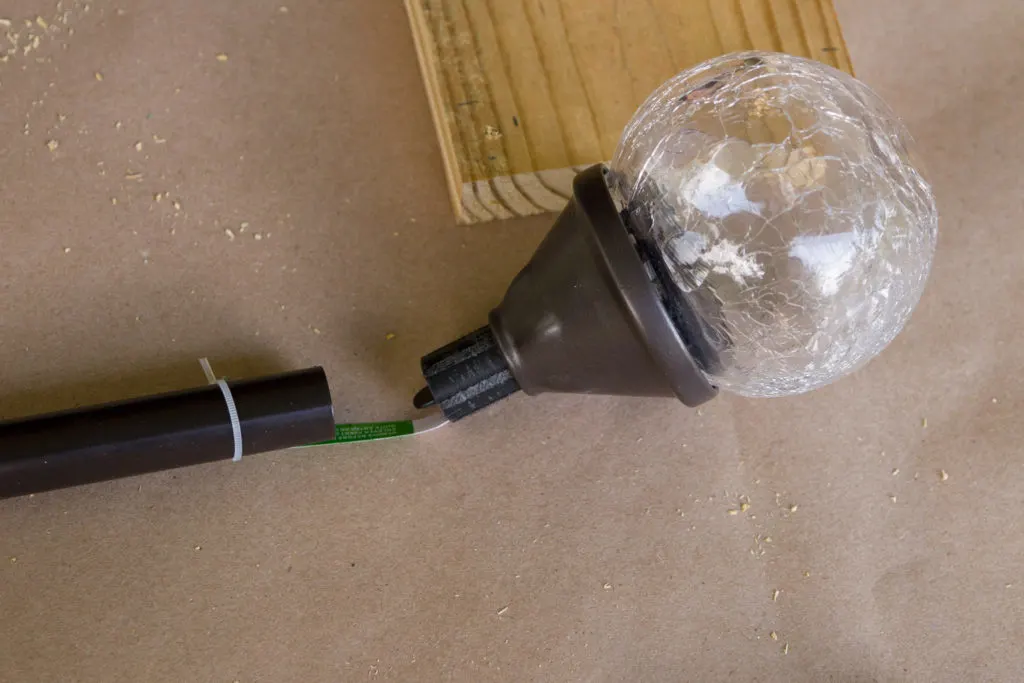
After deciding to make some solar wooden lanterns, I was on a mission to find the perfect solar light. First, I searched multiple stores but could find one I love, then I found this one and fell in love with the glass globe, and then that evening, I was dazzled by the shadow it casts.
How to Build Scrap Wood Lanterns
Gather your supplies
- Drill (with drill bits)
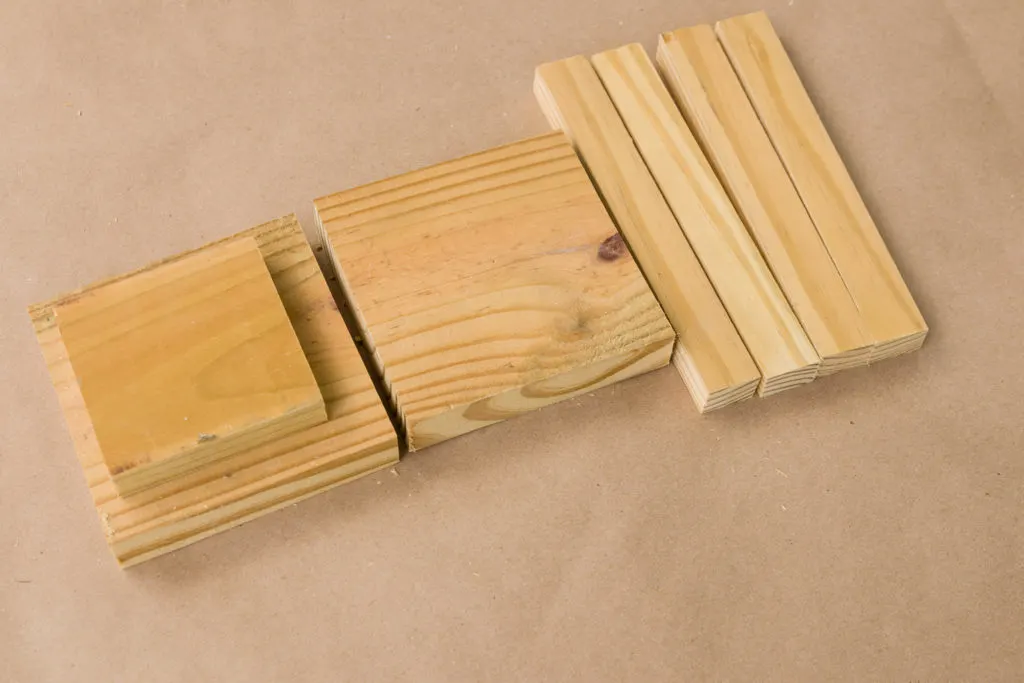
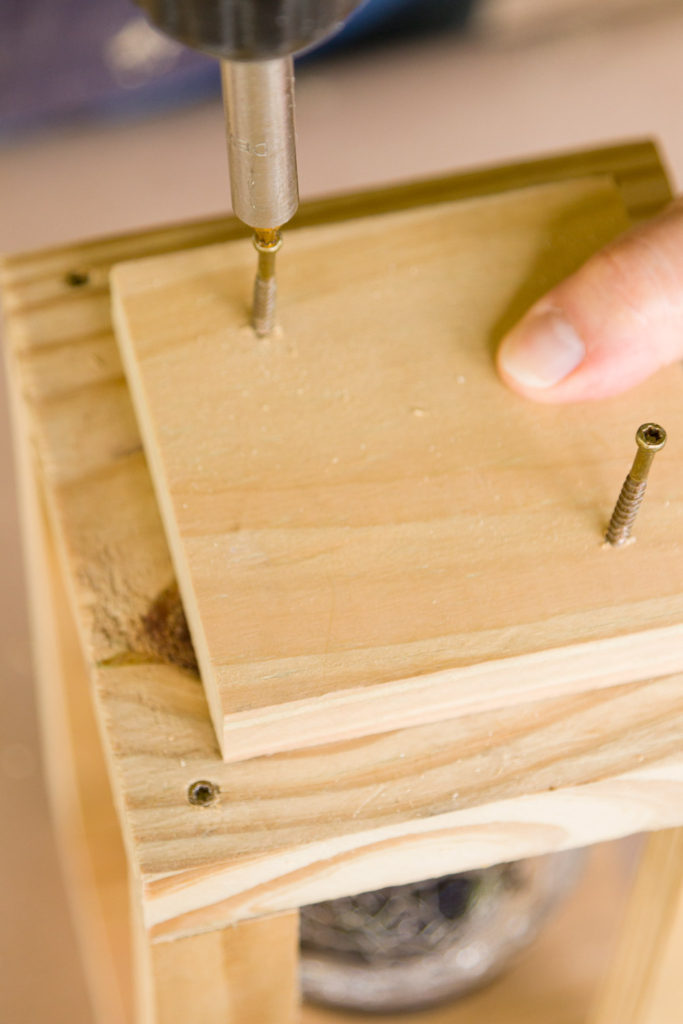
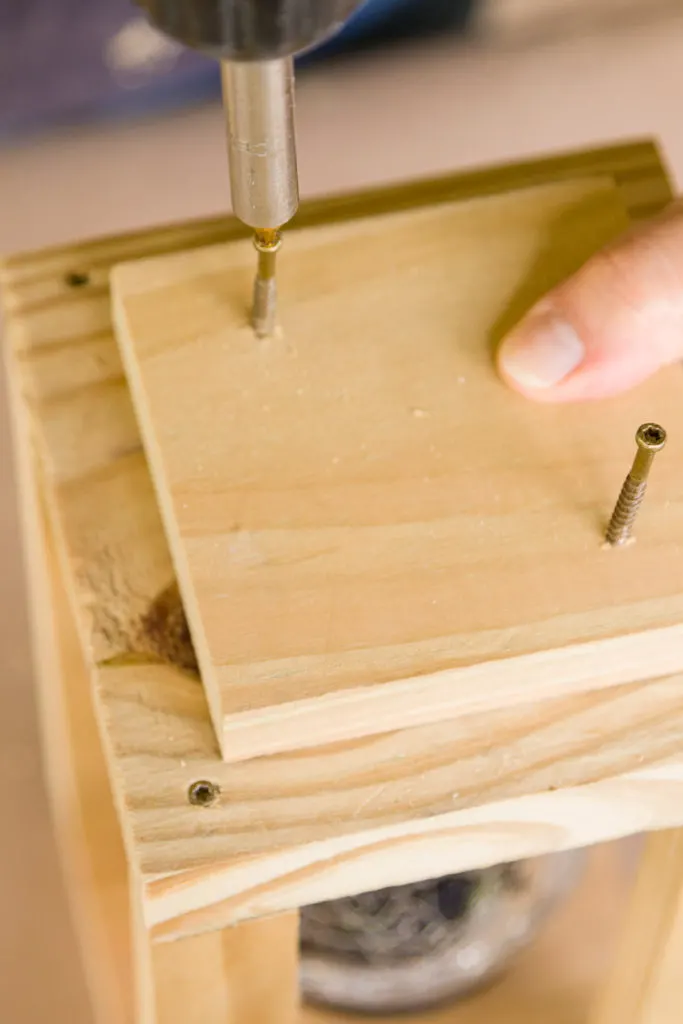
- Wood (I used pieces leftover from the trellis) pressure treated 3/4″ wood, 1 by 6 deck-board
- Screws 1.5″ trim screws 10 per lantern
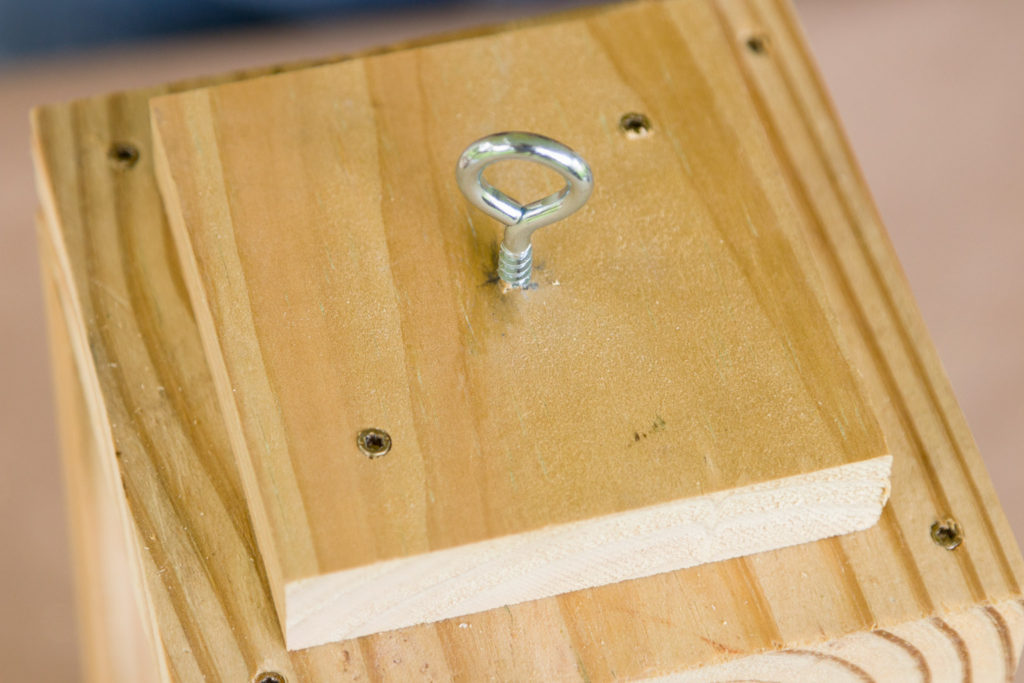
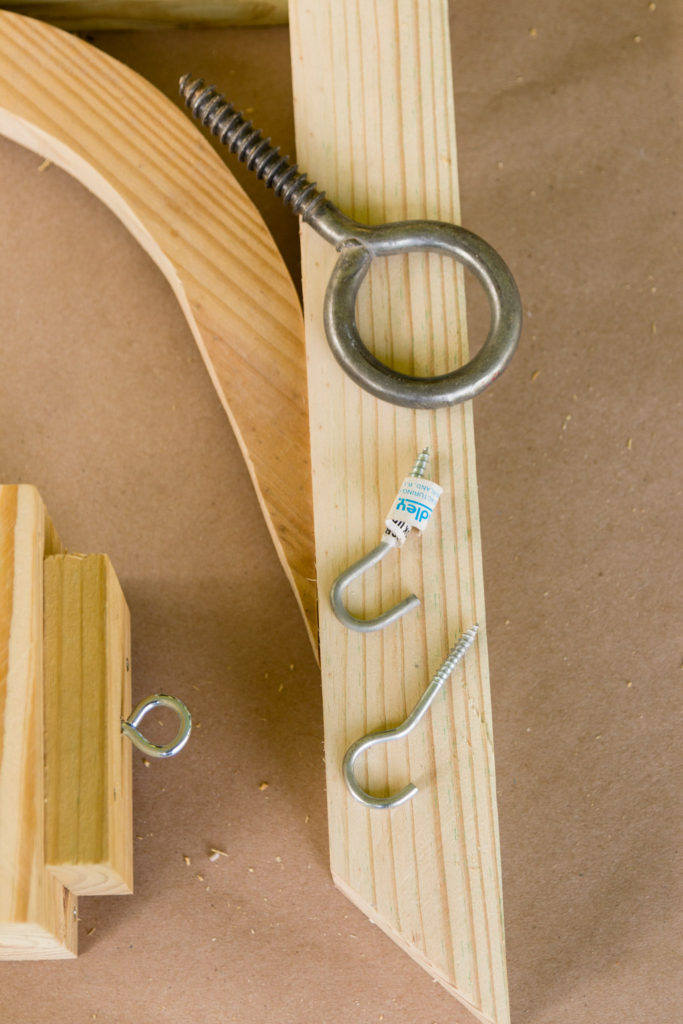
- Eye hook 1″
- Solar light (this is the one I used)
- Pencil
- Measuring tape
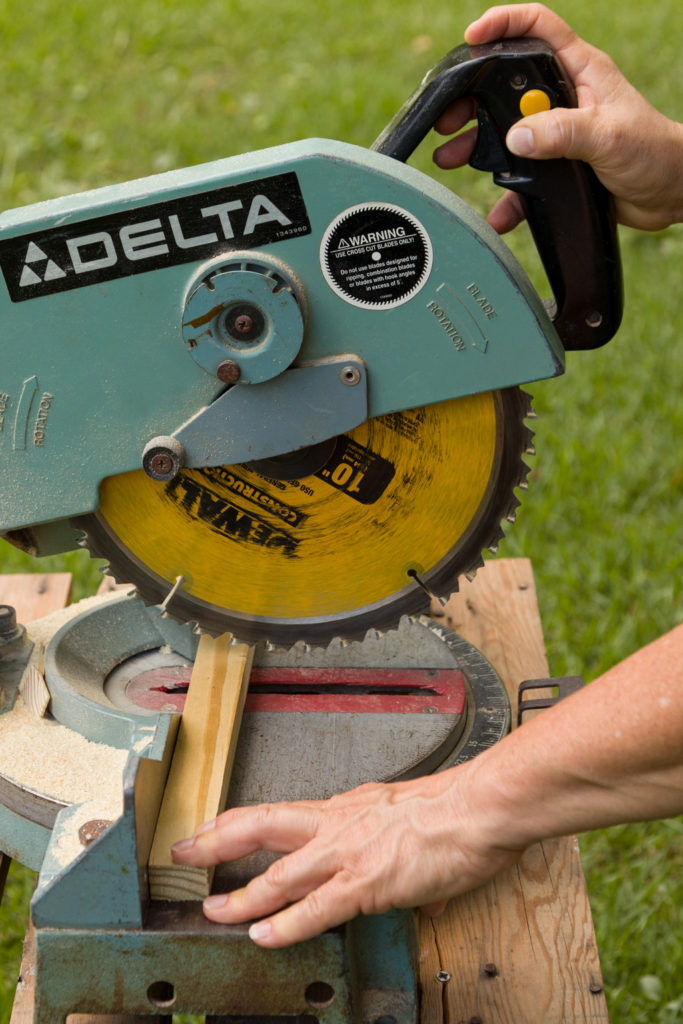
- Miter Saw
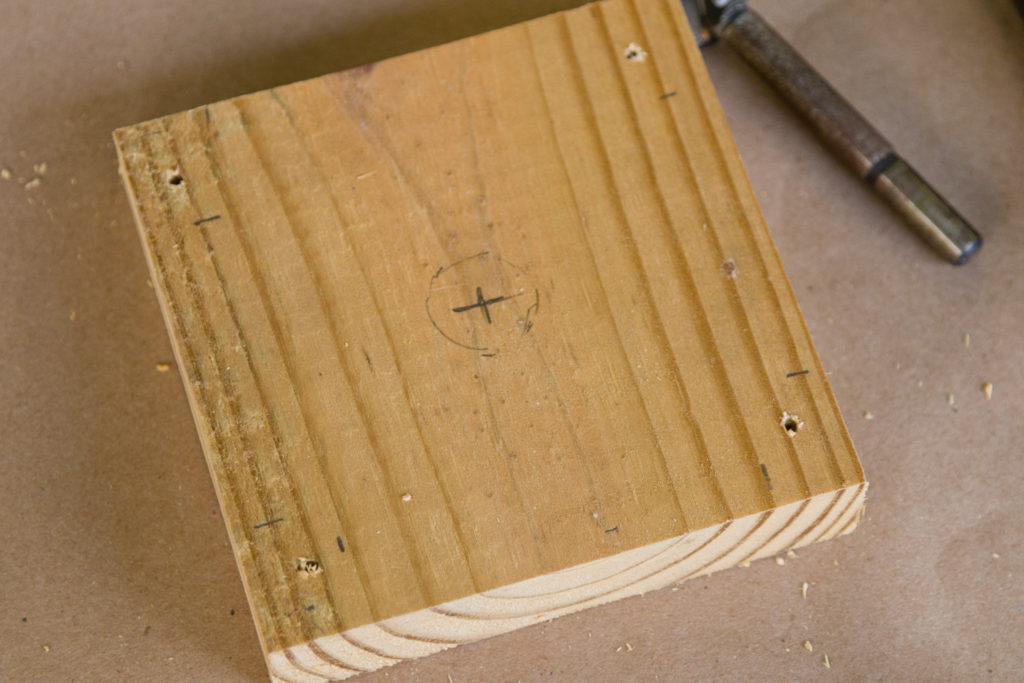
- Cuts (deck board cut 2 pieces at 5″ by 5″, 3/4″ woodcut 4 pieces at 1″ by 8″ and one-piece cut at 3.5″ by 3.5″)
- How to build the trellis


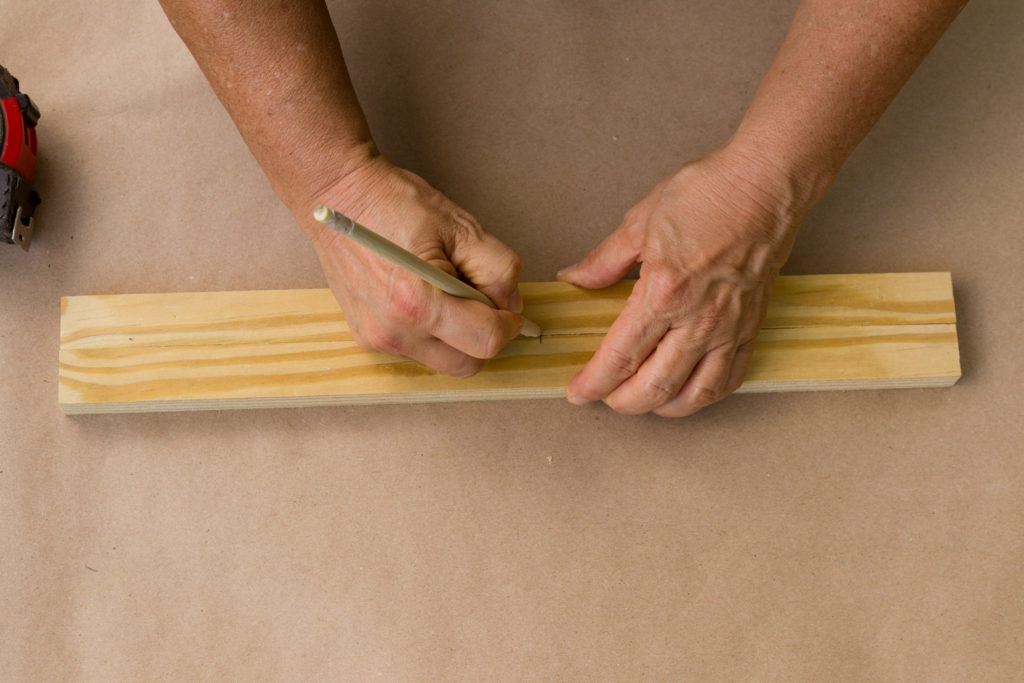
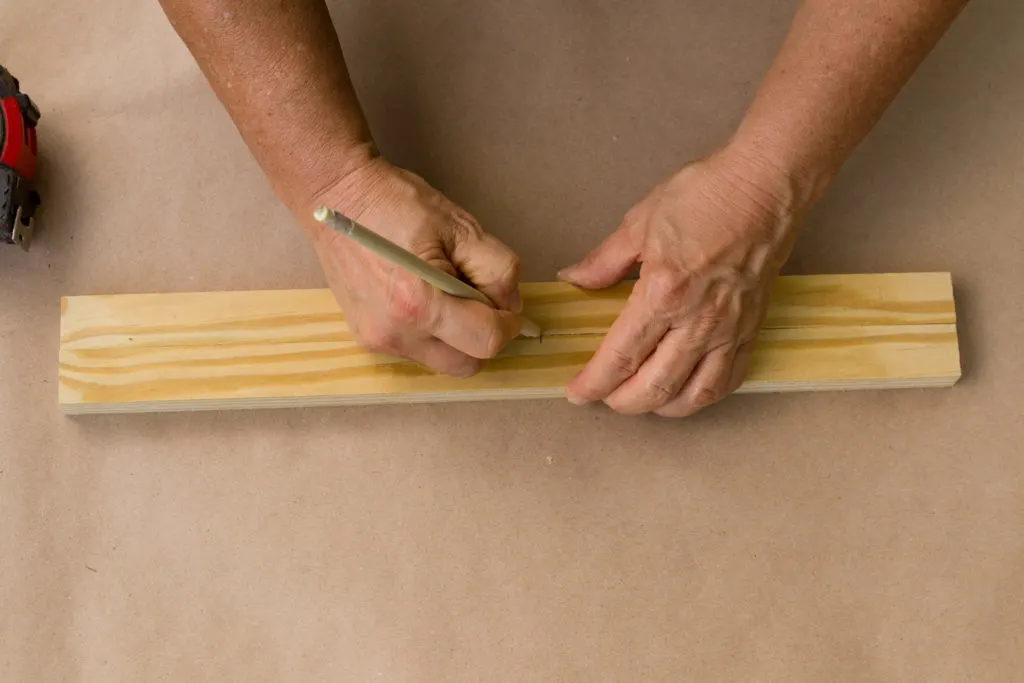
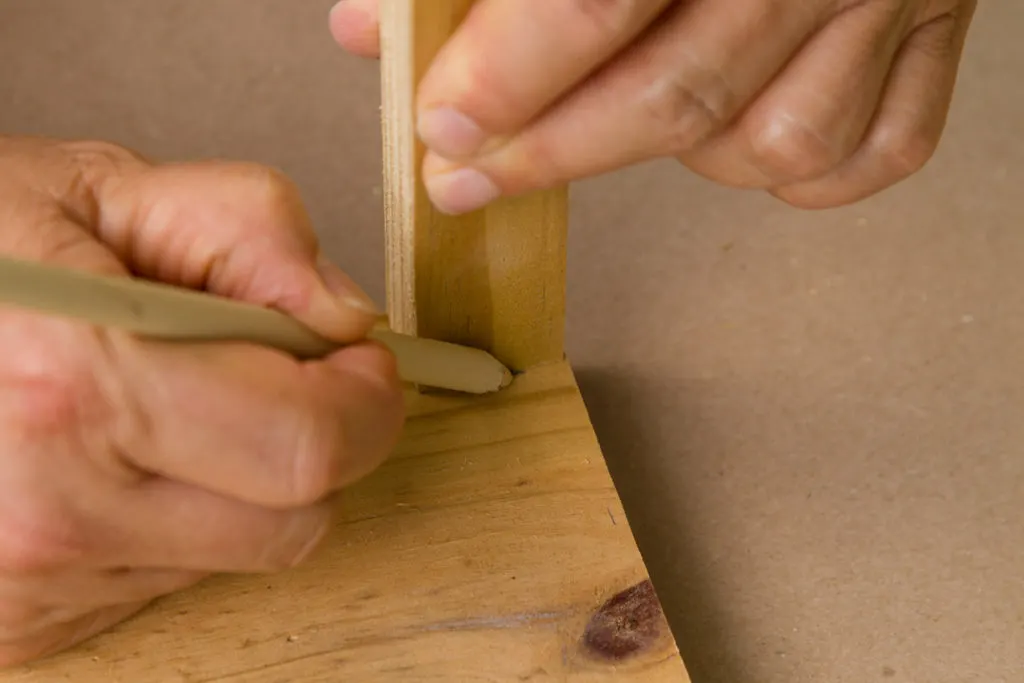
Marking Scrap Wood for Lanterns


Adding Solar Lighting to DIY Lanterns


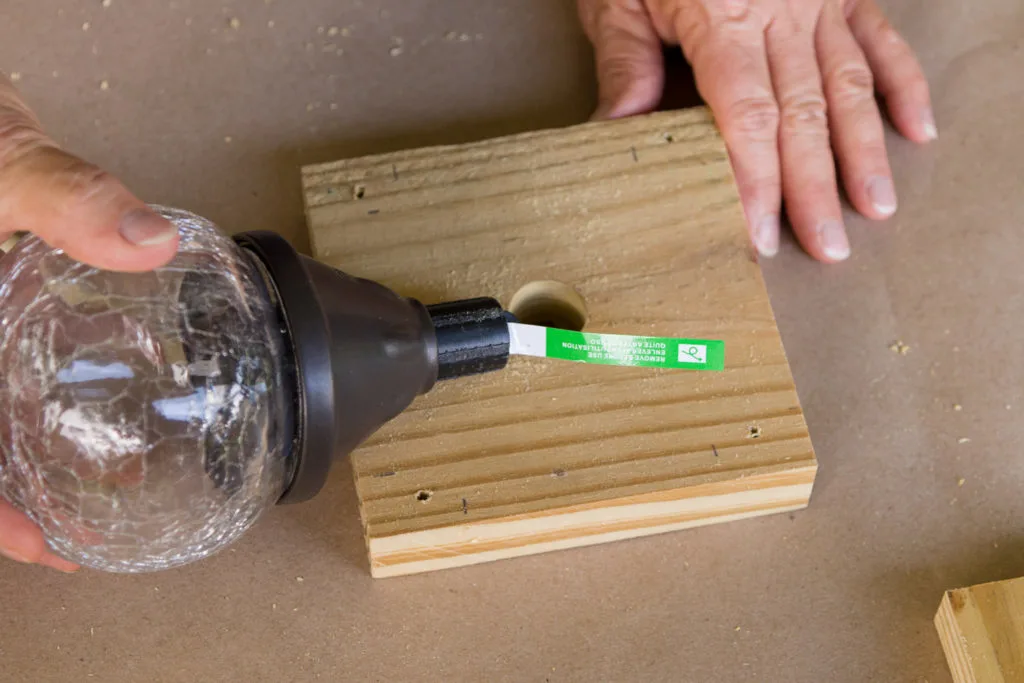
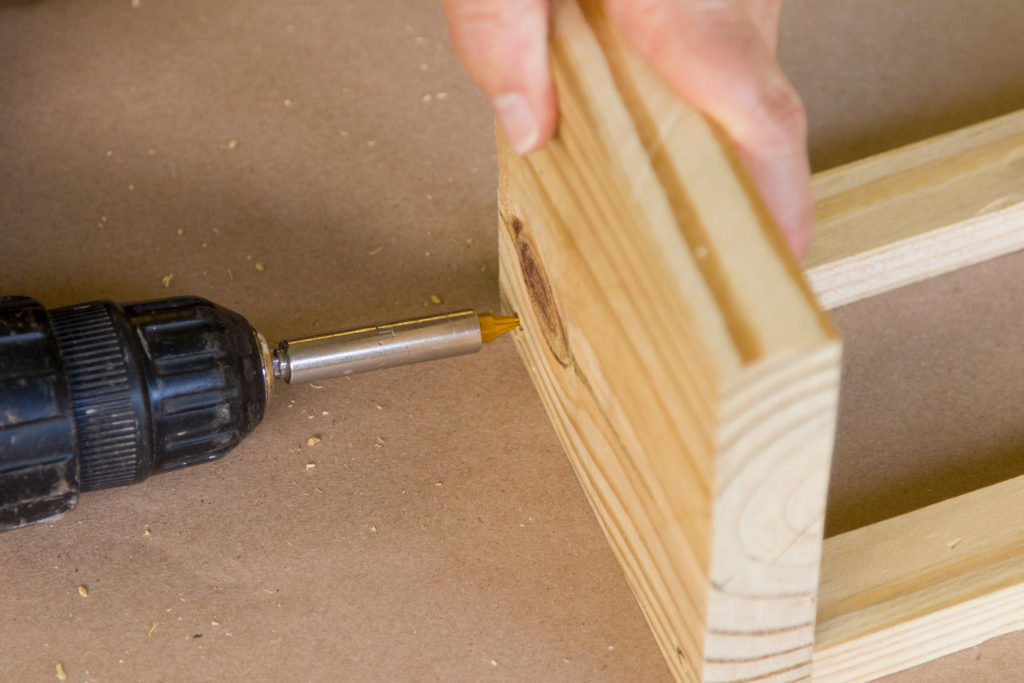
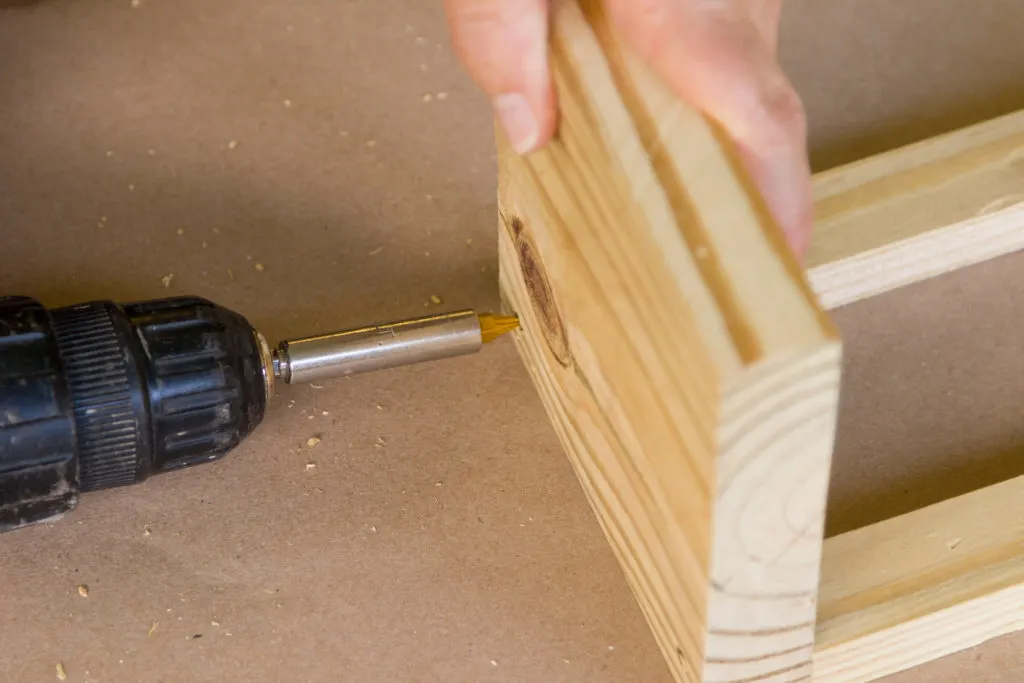
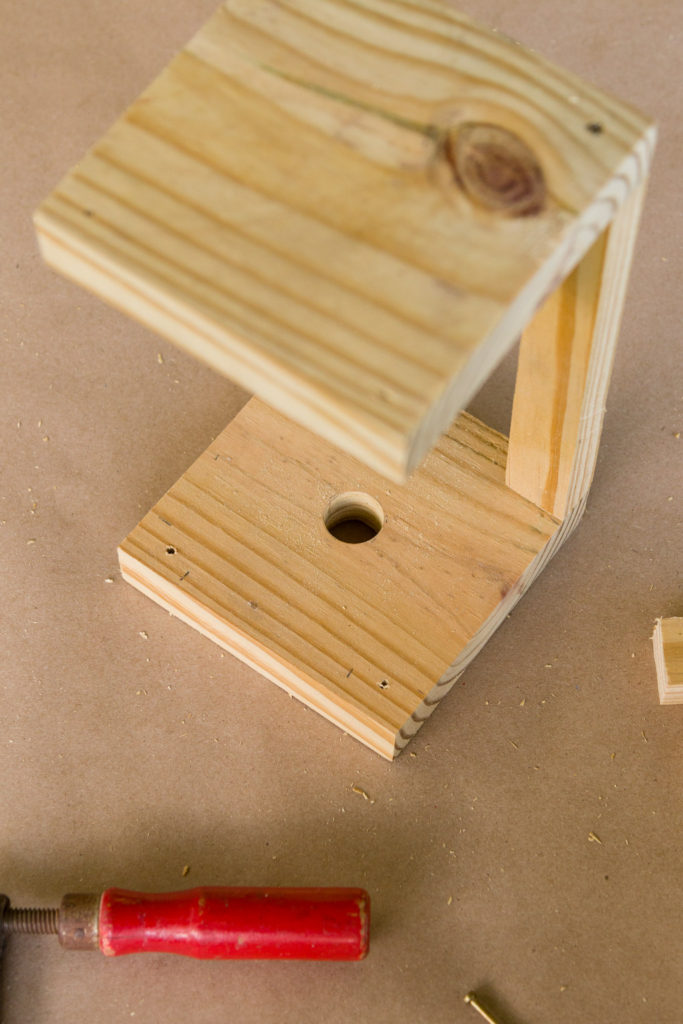
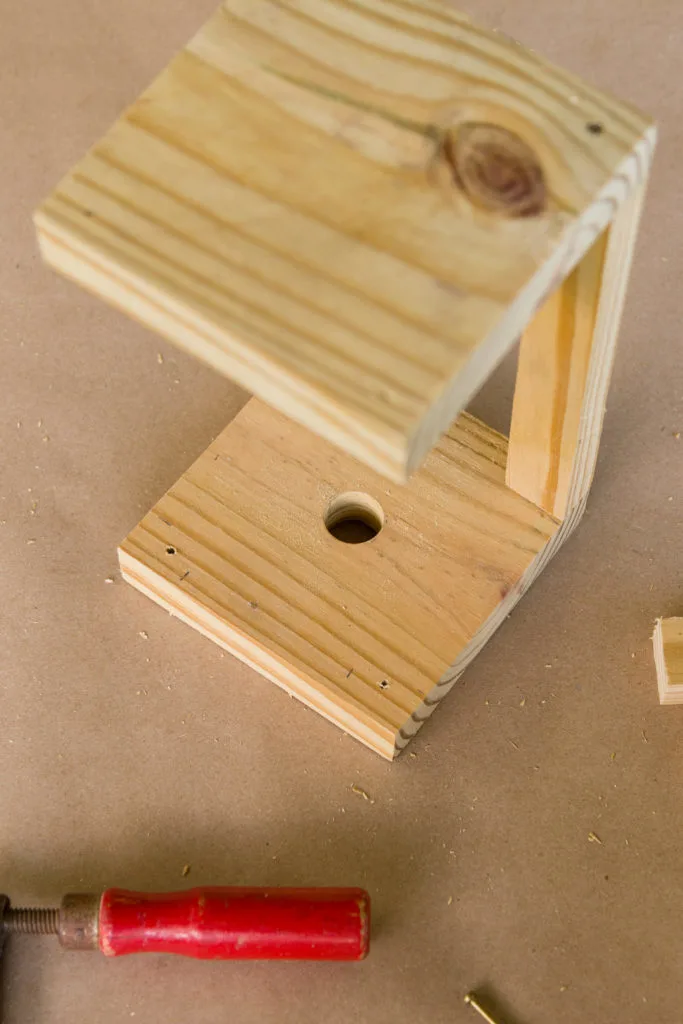


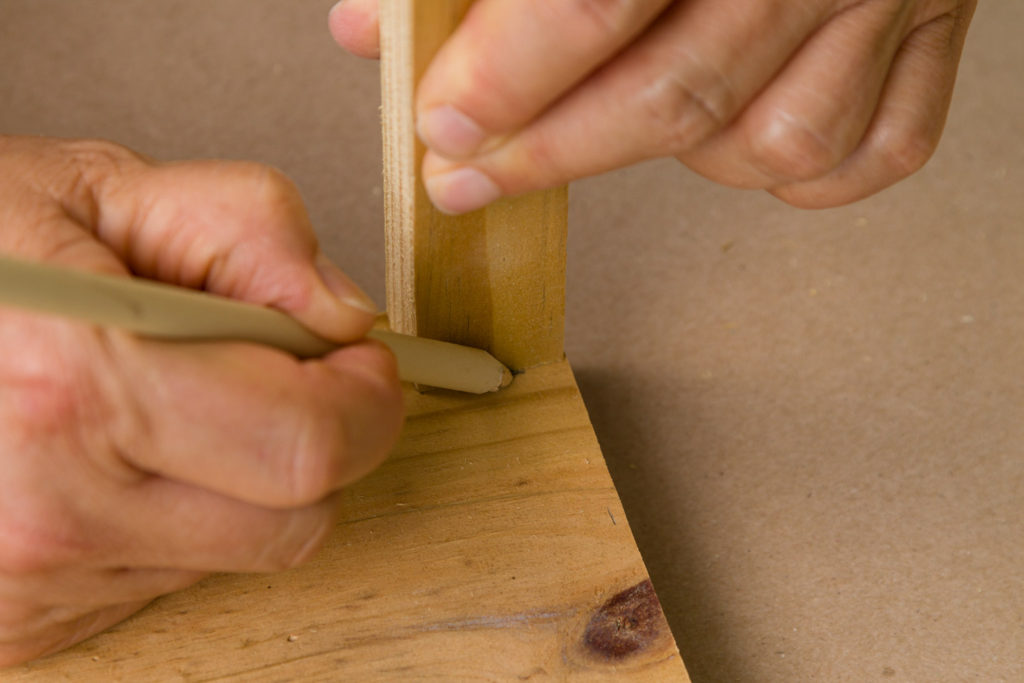
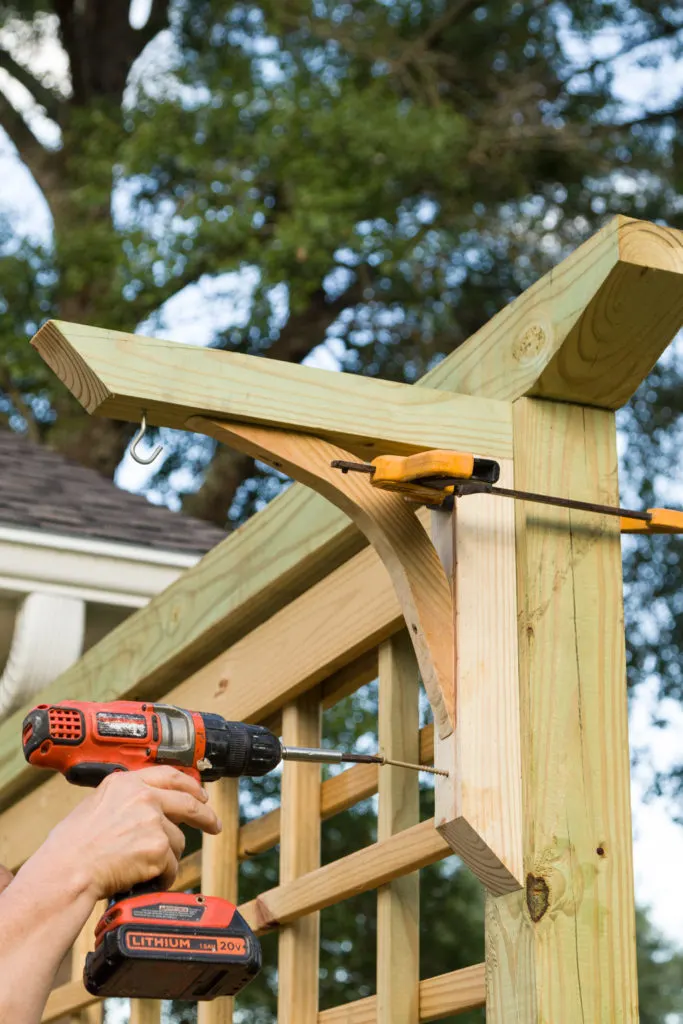
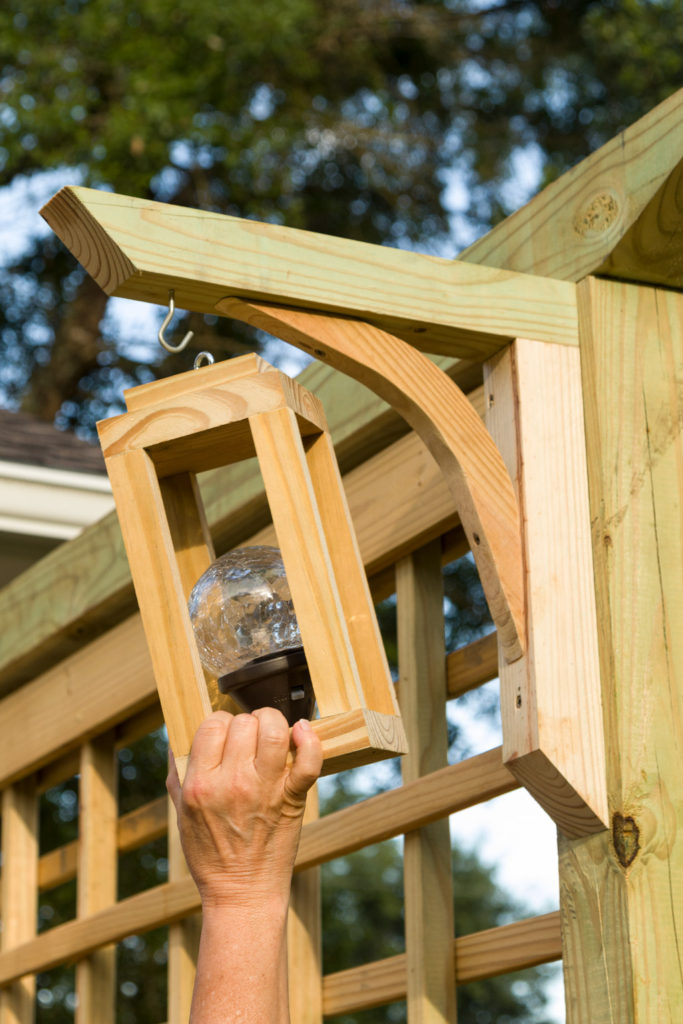
Installing the lantern


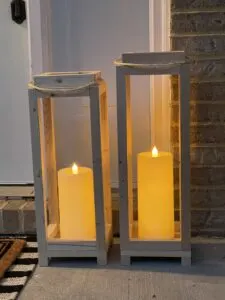
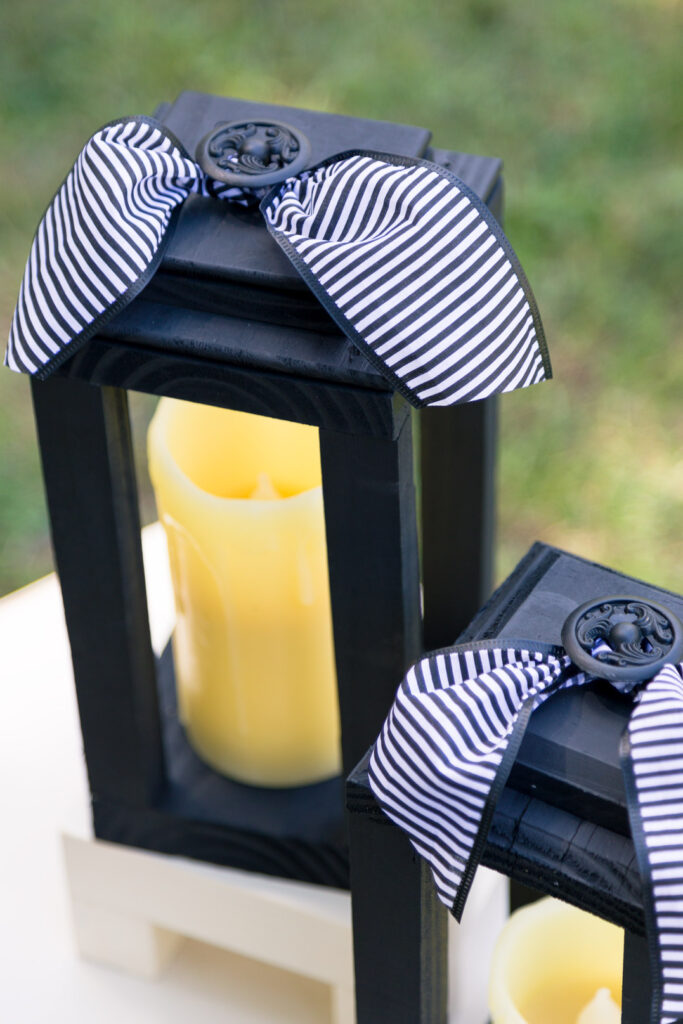
Easy Rustic Wooden Lanterns
You can build beautiful DIY Wood Lanterns using the same techniques. These gorgeous DIY lanterns are perfect for any event, holiday, or for parties.
Hint: For the centerpiece lantern, you can use wood glue to attach the pieces. You can also make them different heights and add a knob (like these knobs).

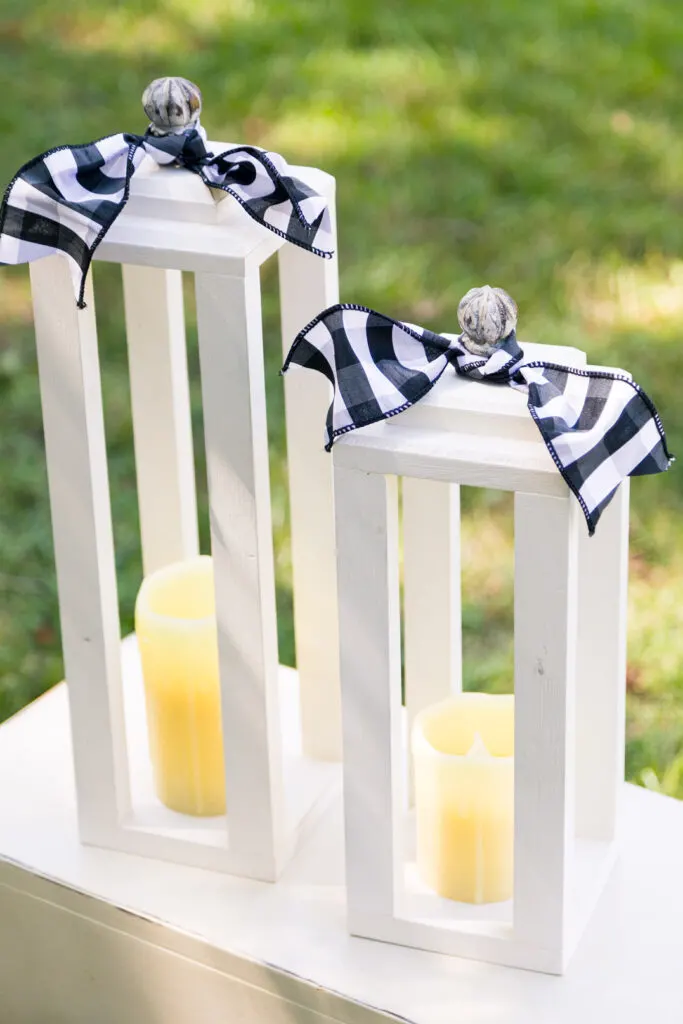
These simple DIY lanterns can be used as home decor or on your front porch. They are gorgeous, a centerpiece. For visual interest, add ribbon and floral to your lantern centerpiece. They make the perfect wedding table decor.

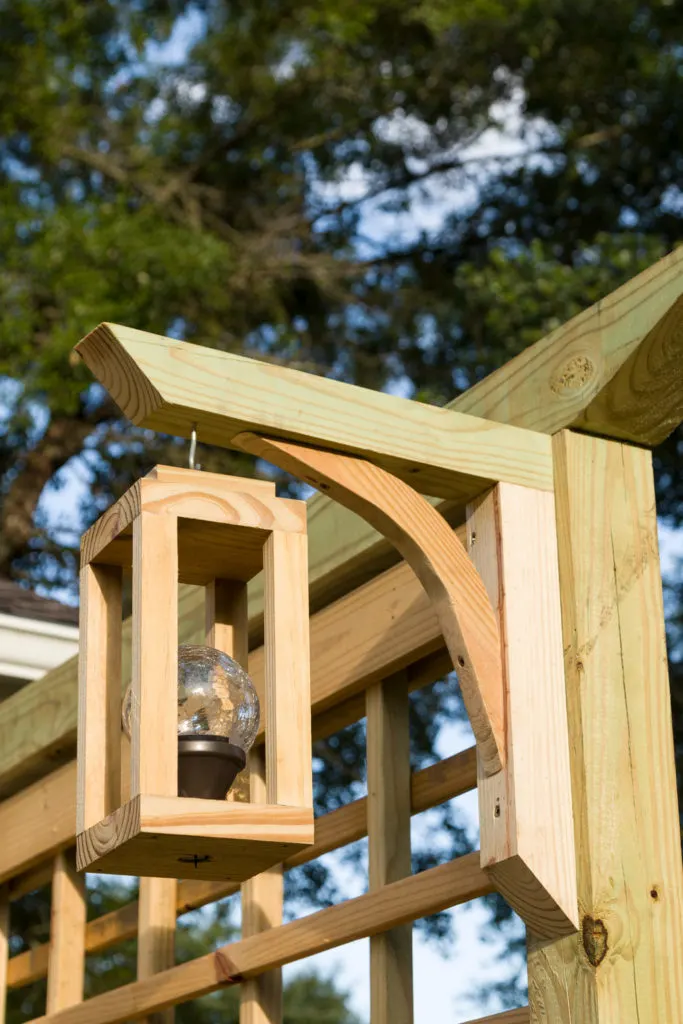
Lanterns on Garden Trellis

If you would like the step-by-step plans to build a gorgeous garden trellis, fill out the form below, and I will email them to you.
You will be amazed and delighted to see how easy this lantern is to make. It took minutes to construct, and it is a real showstopper when added to my trellis (see how to make a trellis HERE), and at night they cast a beautiful glow.
🌸Do you enjoy a beautiful garden and yard? Please join me HERE for everything you will need to create a beautiful garden/yard one project at a time.
More DIY Projects
Emory Farm shows us How to Make a Wooly Sheep Toy


Joyful Derivatives teaches How to Frame a Canvas Painting


Sand Dollar Lane made a Dog Leash Holder


1905 Farmhouse made a DIY poster frame for vintage prints


The DIY Nuts made a DIY word canvas art


I hope you enjoyed learning how I made these wooden lanterns with solar lights. I adore them, and my neighbors have enjoyed them too.
Thank you for stopping by; please say hello in the comments below.
Merry Christmas,
Kippi
Cara Weigeshoff
Friday 12th of March 2021
I love your projects! I am making 12 of these lanterns for my trellis that i have built. I noticed that you have used rope to hang your lanterns, how did you attach the rope to the bracket? I know it's not part of your tutorial, but I love that look!
Amy
Sunday 6th of December 2020
The lanterns are beautiful, and that trellis is AMAZING! Love them both! I can totally see how you would fall in love with those globe lights. I think I would have, too! And the shadow that they cast is lovely. Thanks so much for sharing the how-to! I'm going to go scope out my yard to see where I can maybe use some of these. ;)
Kristin
Sunday 6th of December 2020
These are stunning Kippi! I love them so much. And I love them as lanterns in black and white too! So inspiring!
Kim | Shiplap and Shells
Sunday 6th of December 2020
I LOVE this project! I would really like to try this for next year. Thank you for the inspiration. Happy to be hopping with you today!
Chas Greener
Sunday 6th of December 2020
Such a stunning project and I can't wait until I get to start building more solar light creations for our yard. Thanks for sharing and wonderful hopping with you!