Creating a DIY necktie angel ornament is easy and fun.
These ornaments make thoughtful memory keepsakes.
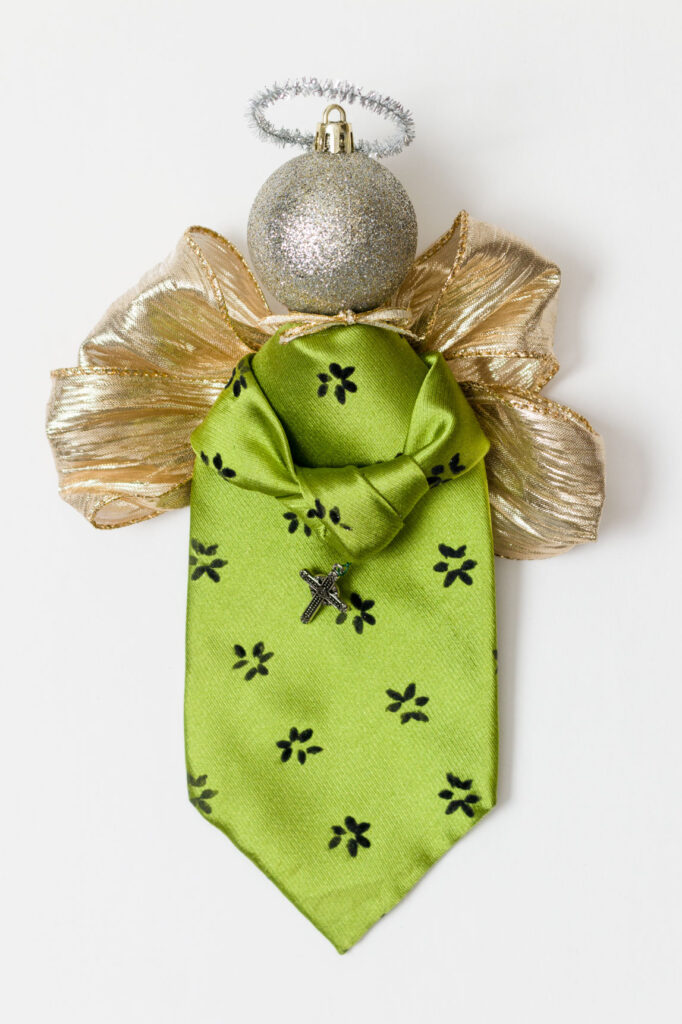

I love to upcycle items; making something pretty from a loved one’s used necktie is a bonus.
The holiday season is fast approaching, so let’s get creative. You might also enjoy making wood bead, felt, and gnome ornaments.
This post contains affiliate links. If you purchase from one of these links, I will make a small commission.
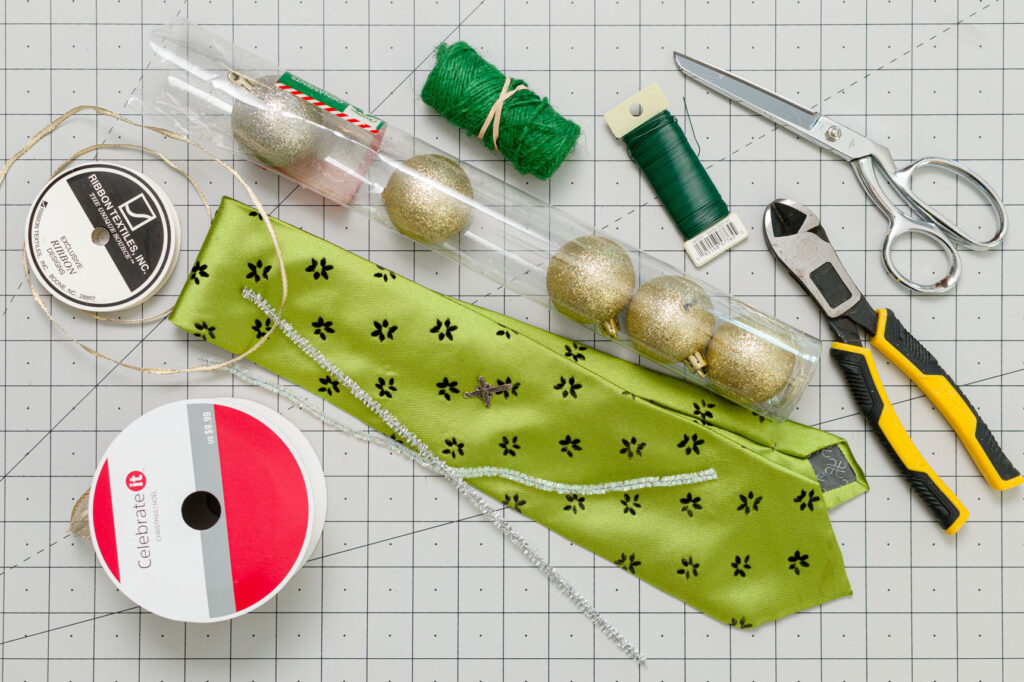
Necktie Angel Supplies
- Scissors
- Necktie
- Twine
- Wire
- Wire cutter
- Round ornament
- Hot glue and glue sticks
- Ribbon
- Charm
- Pipe cleaner

Necktie Angel Ornament Step-by-Step
Step 1 Cutting the Necktie
Place your tie on your work surface with the right side facing down. Measure from the point at the widest area (the bottom of the tie) up to about 10.5″ and cut straight across the tie.


Step 2 Turning Down the Necktie
Next, open the cut end of the tie and remove about one inch of the fabric in the middle (stiffener), being careful not to cut the outer fabric. Then, straighten the folded tie to a flat position.
Turn the cut corners into a point and glue them into place.

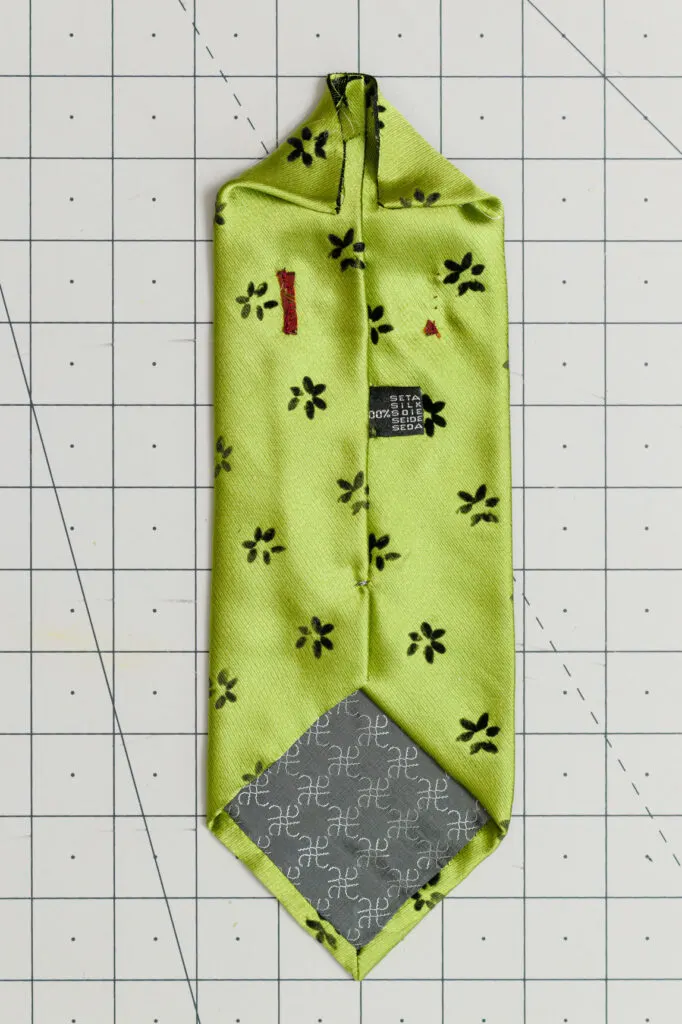
Then, turn down the cut end point towards the back of the tie.
To secure glue around the bottom edge. Leave a space at the top to feed a piece of twine through.
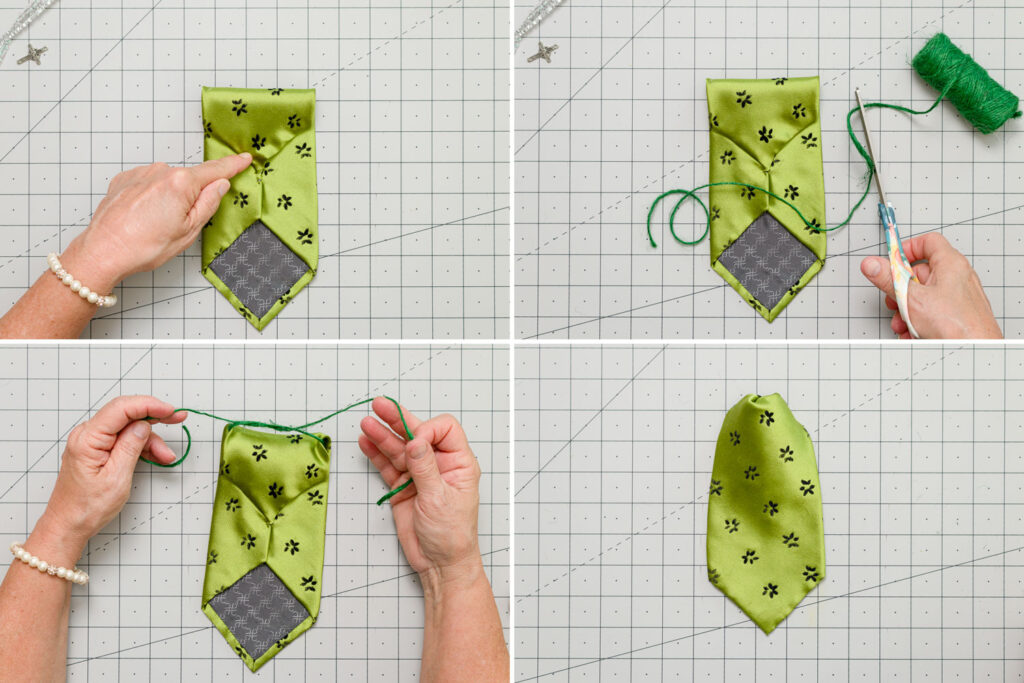
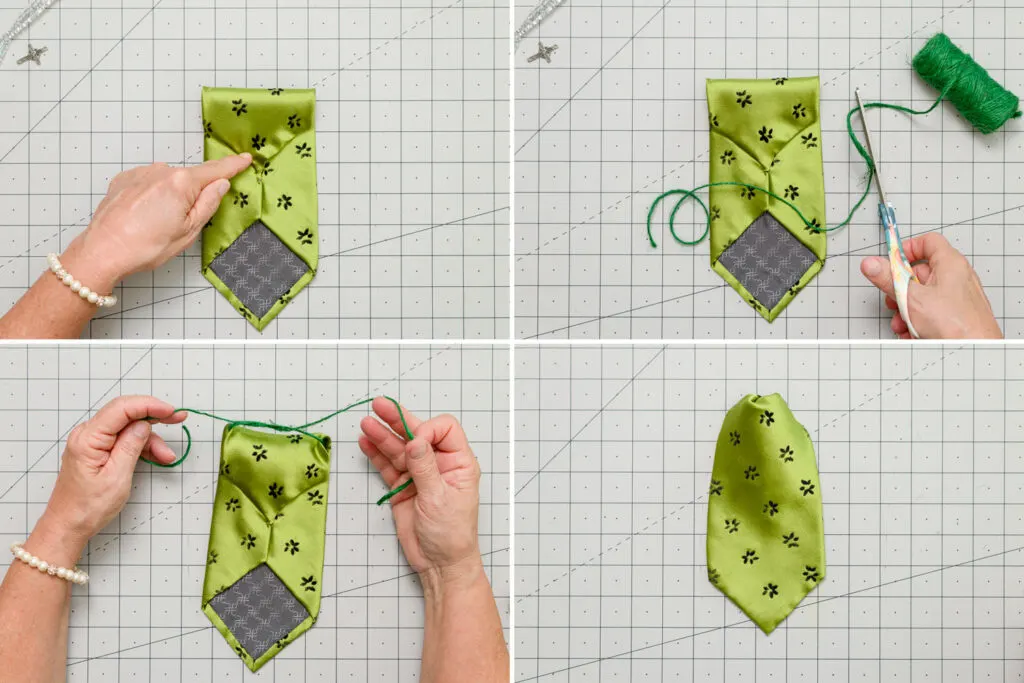
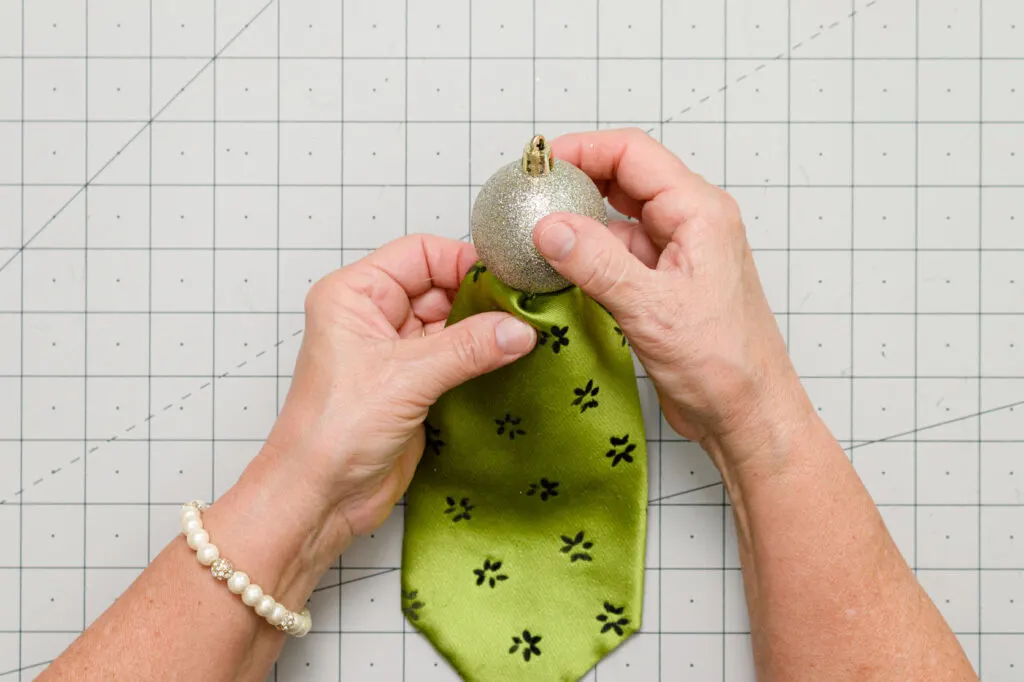
Step 3 Necktie Angel Head
To form the neck area, thread a piece of twine through the opening at the fold. Pull the twine tight to gather and knot, then cut off excess twine.
Next, apply hot glue to the top of the gathered area and set the ornament on the “neck.”.

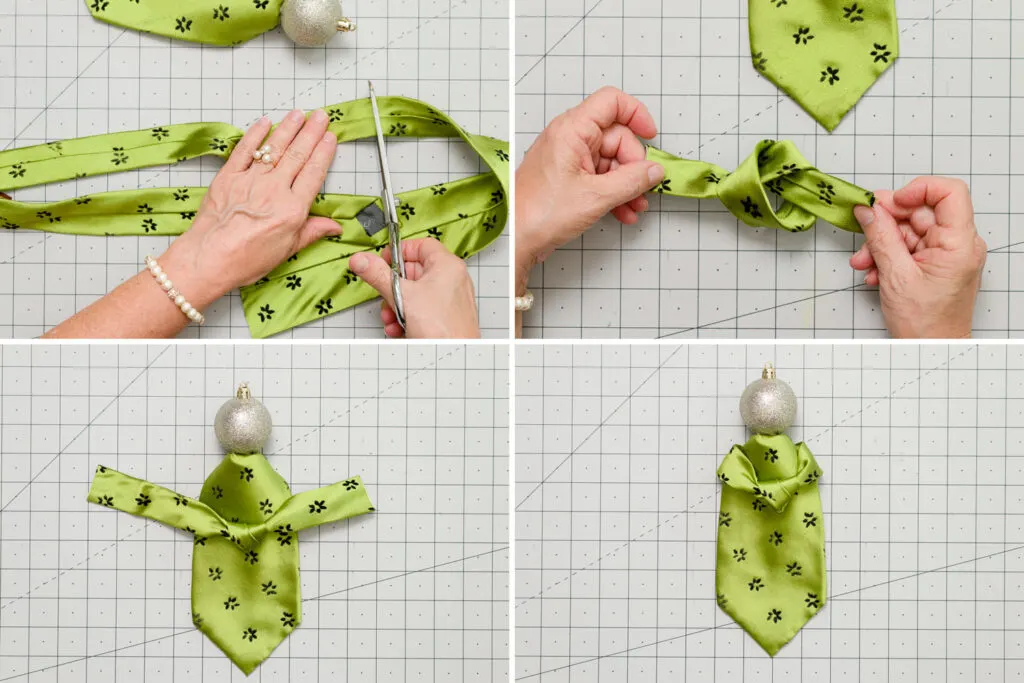
Step 4 Necktie Angel Arms
The skinny half of the tie will become the arms. Find an area that is about the same width and cut it at least nine or more inches long.
Next, make a simple knot in the center of the armpiece. The knot will become the hands of the angel.
Position the hands on the center front of the angel. Wrap the arm ends around each shoulder and glue them into position.
Trim any excess arm fabric.

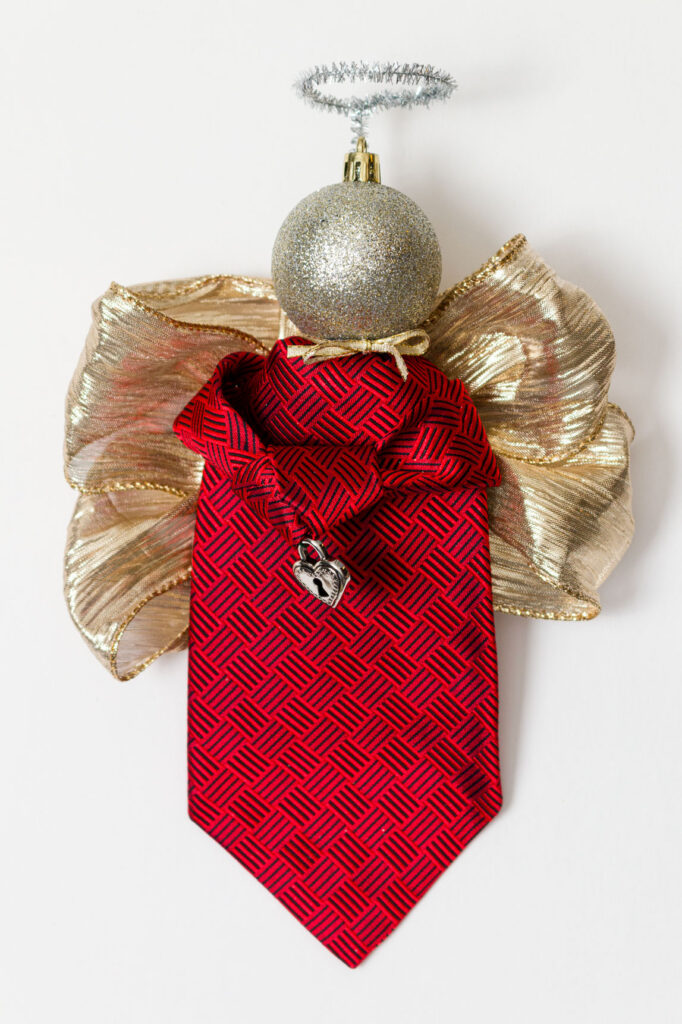
Step 5 Angel Wings
Use ribbon to form the wings. A two-inch ribbon works best.
The wings can be one, two, or three ribbon loops on each side. Test the wings before adding a wire in the center to hold the wing loops; once you like the size and amount of loops, glue ribbon wings to the back of the tie.


Step 6 Necktie Angel Halo
Use a pipe cleaner to form a halo. Attach the halo to the ornament head with glue.
Then, make a bow around the angel’s neck using 1/4 inch ribbon.
You can add a charm, jingle bell, or flower to the angel’s hands.


Use an ornament hook to hang.


More keepsakes created from old clothes you might like: fabric pumpkins and ornaments made from old shirts.
Merry Christmas,
Kippi
Ps. This post was shared on Between Naps on The Porch.
Melissa
Monday 26th of August 2024
What size of christmas ball was used for the head?
Lynette Ebbitt
Tuesday 20th of August 2024
These are adorable and I plan on making them for all the guys at work. I had the ties for a quilt but this is too good to let them sit in a bag...Thank you Thank you Thank you. I now am off to get the rest of the things I need.
Ernesto Predovic
Wednesday 15th of November 2023
Easy to make with supplies you have on hand. Make sweet personal gifts or memories of loved ones. Merry Christmas to geometry dash and your family.
Nancy
Tuesday 7th of November 2023
Very cute idea! Why not use a tie tack instead of a charm. Extra sentimental!
Kippi
Tuesday 7th of November 2023
@Nancy, That's a fantastic idea! I am going to add that idea to this craft post.
Harriet
Monday 6th of November 2023
Great directions.... And the photos!!! Such a nice idea.... Especially made from a tie from one who has passed away to have to hang on the tree....!!! A wooden ball would also work for the head...non breakable..😊
Kippi
Tuesday 7th of November 2023
@Harriet, Thank you for your visit. It's a great idea for the head. I used a plastic Dollar Tree bulb, which was easy to hang. If you can paint on a sweet face, I would use a large wood bead and paint on an angelic face. Since I cannot draw stick people, I have to cheat.