Our sunny garden needed a shaded area for some plants and a little break area. Therefore, we needed to complete our shade sail installation before it got too hot.
It is the easiest and fastest way to create a shaded spot.

This post contains affiliate links. That means I will make a small commission if you purchase from one of these links.
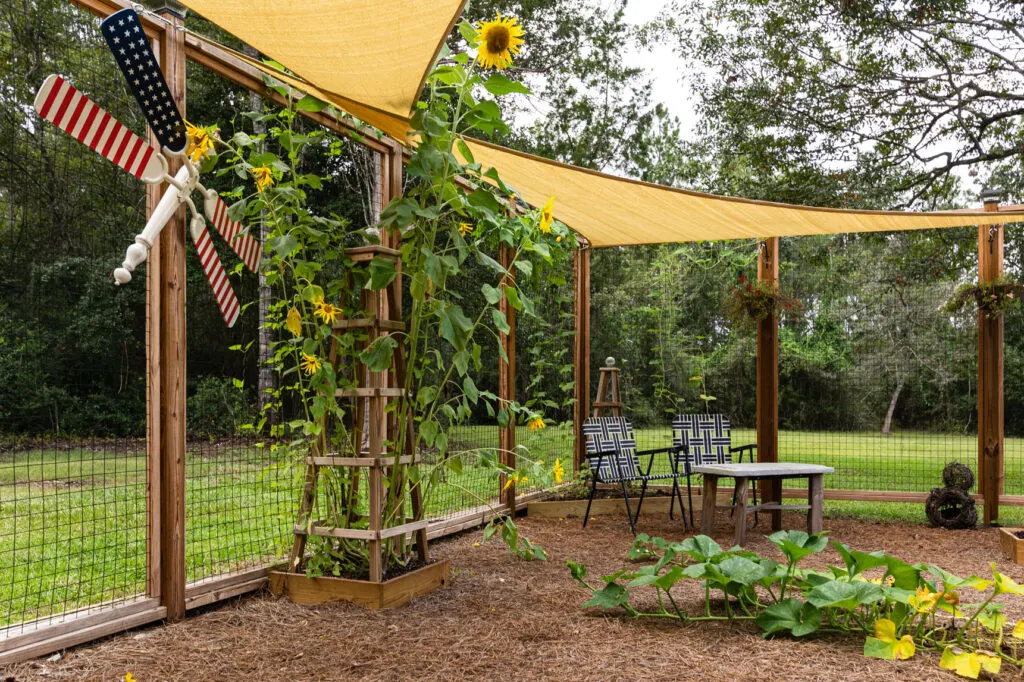
We love to be outdoors, and the garden is our outdoor heaven. We created gorgeous planter boxes with a flower garden flank on either side of the custom garden gate. We built the obelisk with solar lights that support tall sunflowers, tomato plants, moon flowers, etc.
Sail Shade Installation Step by Step
Installing your sail shade should take less than an hour after you have gathered your supplies and tools.
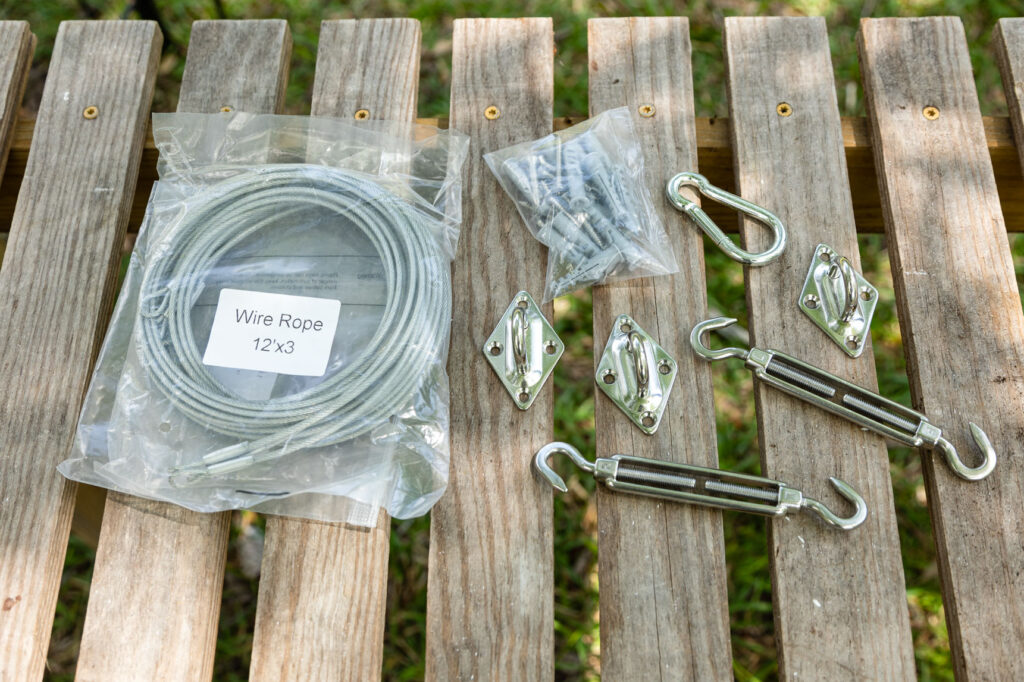
First Step: Order Sail Shade Supplies
Before ordering a shade sail, measure the location and determine where you can install the shade sail.
Places you may be able to attach your sail shade are tall fence posts, fascias, and or trees with a diameter of 10” or greater. The shape of the space and the area where you can anchor will dictate how you can install your sail shade.
- Shade Sail
- Pad eyes
- Snap hooks
- Screws
- Turnbuckle
- Cable
- Impact Driver with Tip
- Measuring Tape
- Drill Bit

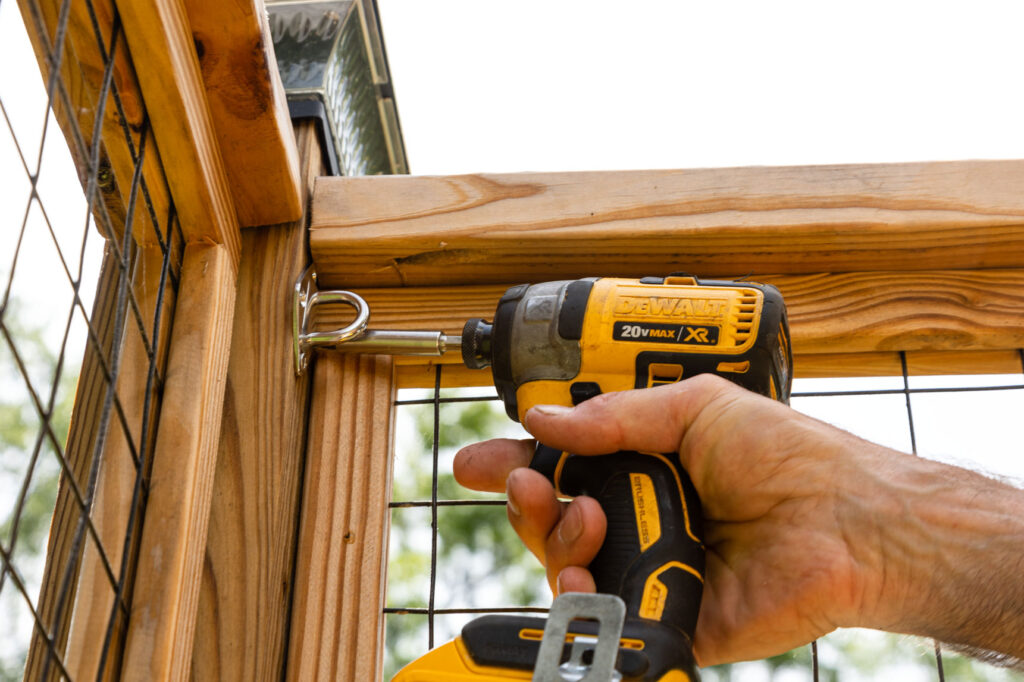
Second Step: Install Shade Sail Hardware
Before installing the hardware, consider the sail’s height; will you install additional shade sails on the same post, fascia, or tree?
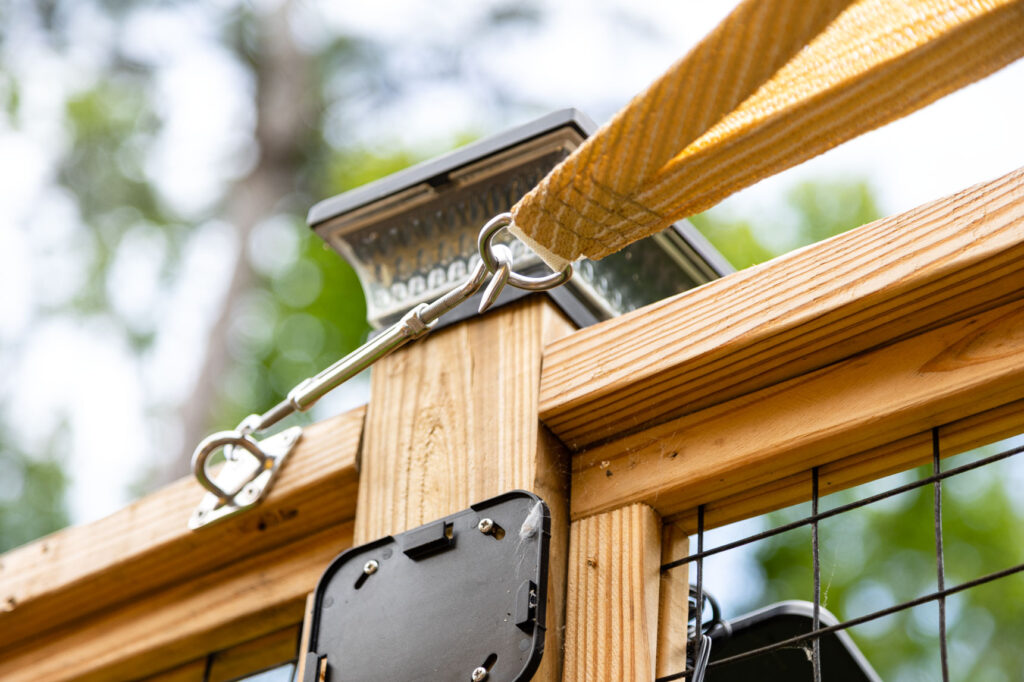
Next, use a pencil to mark the placement of the pad eye in the center corner. This center corner is the starting point, so it does not need a turnbuckle.

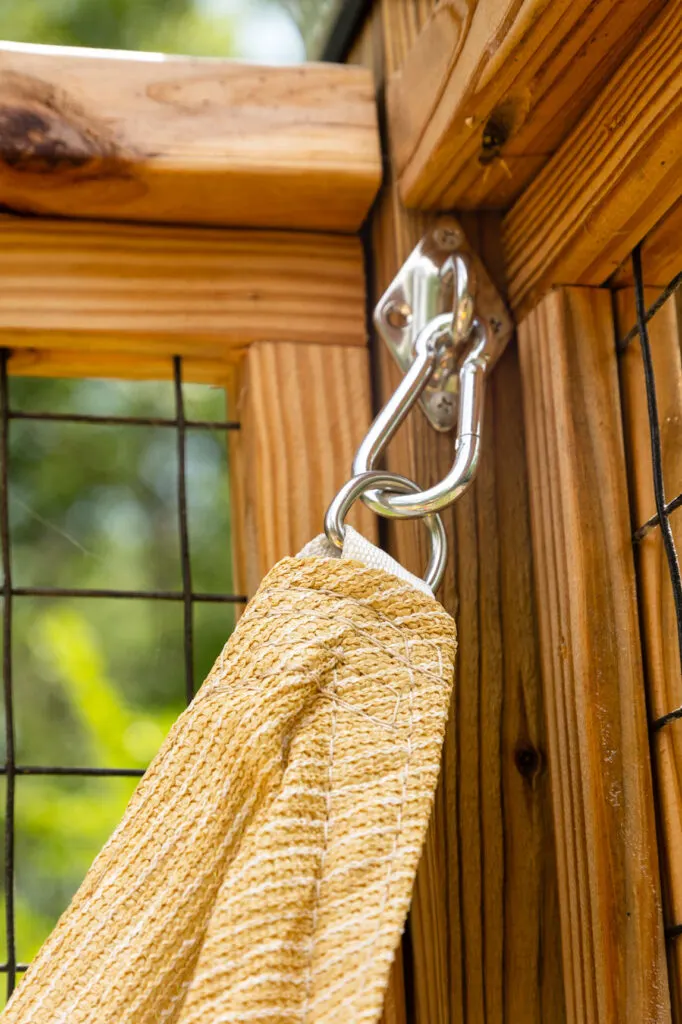
Attach the snap hook to the center (first) pad eye. Note: This is the anchor for a triangle shade sail.


Next, clip the shade sail’s D-ring to the snap hook.

To determine the location of the rest of the pad eyes, measure the length of your sail shade and the fully extended turnbuckles. This measurement will be the location of the other pad eyes.
Next, install the following two pad eyes and attach a turnbuckle.
Note: You must do the final tensioning when all corners of the shade sail are hung on the pad eyes with either a turnbuckle or snap hook. Additionally, you may need a cable to extend to a distant anchor location.

Attach the final corner of your shade before tensioning.
Note: consider water runoff when installing the pad eyes.

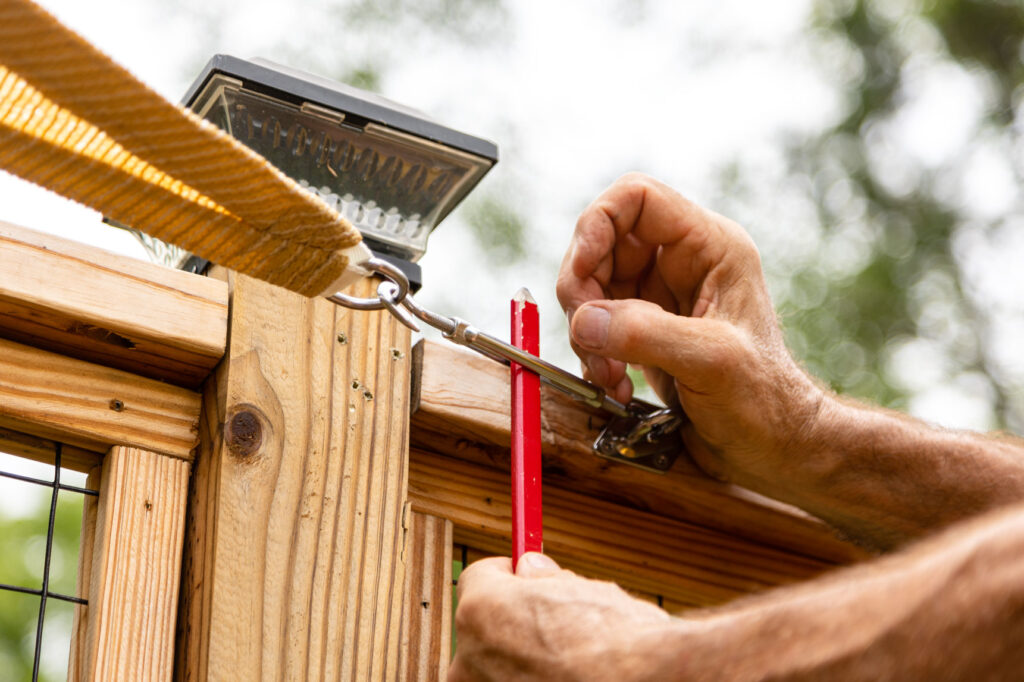
Third Step: Tensioning the Shade Sail
Next, tension the shade using a tool (a woodworking pencil works excellently) until the shade is taught.
Note: occasionally, you must re-tension your turnbuckles to keep your shade taught.

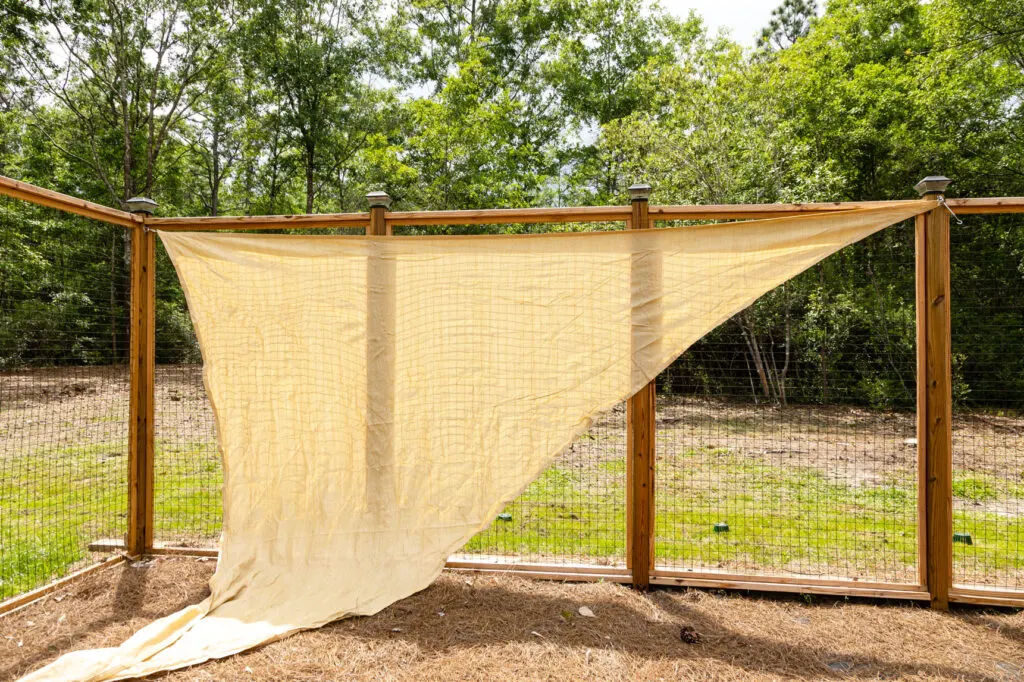
The first shade was installed without any problem.

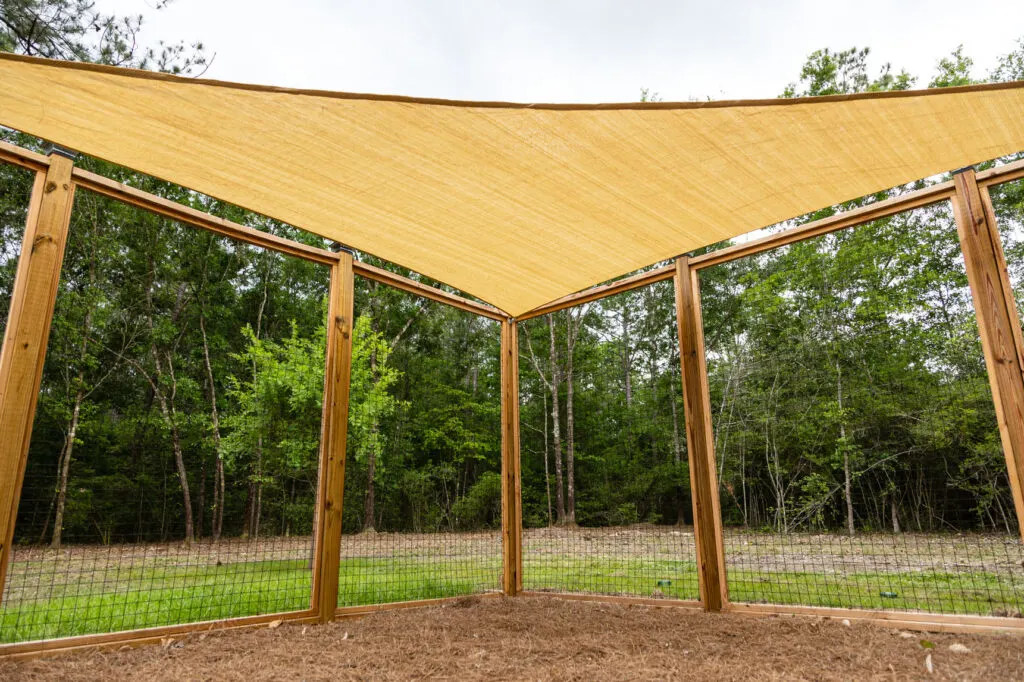
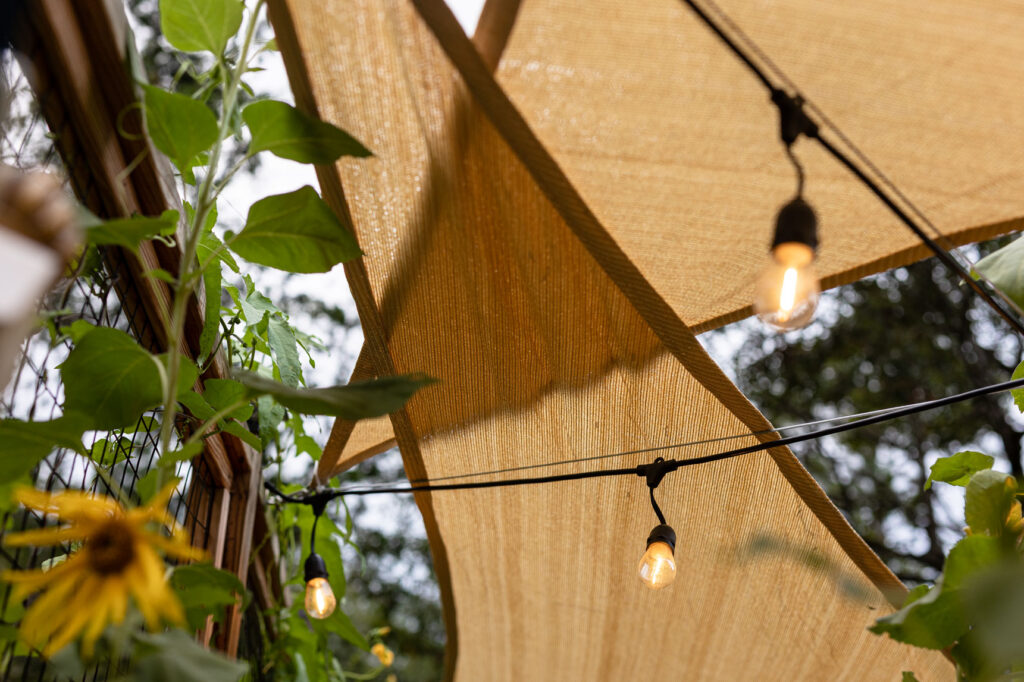
We decided to install another shade and crisscrossed it in the garden’s center.
Then we installed outdoor solar cafe lights. Our garden turned into a dreamy nighttime space.

Why Install a Shade Sail?
Installing a shade sail will give your yard a UV-protected outdoor space to relax.
They are the easiest and least expensive option for creating shade in your yard.
Choose a waterproof shade sail for areas that do not need rain.
If you are ready to plan your outdoor dream space, please join me to create the “Best Life Now” in our gardens (join HERE).
See you soon,
Kippi
Ps. This post was shared on Between Naps on The Porch.
eirajeremy
Wednesday 6th of December 2023
Great to see that you're planning a shade sail installation for your garden! It's a smart choice to create a shaded area for your plants and a relaxing spot. Before ordering the shade sail, make sure to measure my location and identify suitable anchor points like tall fence posts, fascias, or trees with a diameter of 10" or greater. This will help you determine how to install the sail shade effectively. Happy gardening!
Alejandro Rose
Monday 15th of May 2023
We appreciate you contributing to Farmhouse Friday with this. This is really charming, and it inspires me to dream of designing a similar room in our future farmhouse. Your article will be featured tomorrow! 8 ball pool
Leanna
Friday 5th of May 2023
Nipping these are just amazing. I came to look for vertical garden stands and now I need these as well. Fabulous idea
Cindy@CountyRoad407
Thursday 4th of May 2023
Thank you for sharing this with us on Farmhouse Friday! I love this and hope to create a beautiful space like this at our farmhouse. Featuring your post tomorrow! Pinned
Kimberly Snyder
Monday 24th of April 2023
This is such a great project! I wish I had something like this when we still lived on the farm! thanks for sharing your great tips!
Kippi
Monday 24th of April 2023
@Kimberly Snyder, thank you so much for your visit today. Have a great week.