The first time I saw a DIY Gnome made with socks, I fell in love with them! My friend made them. They were too adorable, so I asked if she would teach me to make them. She taught me how to make a DIY Sock Gnome in three steps in under five minutes.
Traditionally they are seen among winter decorations, but not anymore. Instead, they can add a touch of whimsy to any décor or occasion at any time of the year.
Why not make some to greet your holiday guests? They will bring plenty of smiles. I could not wait to share this Easy DIY Gnome tutorial with my readers. So, if you have five minutes, then let’s make some of these delightful creations.
How to Make a Gnome


DIY Gnome Decor
If You Don’t Have Time to Make One Now You Can Pin This Tutorial for Later
If you don’t have time today but want to make one later, you can pin this to your crafting board on Pinterest. While you are there, please follow Kippi at Home on Pinterest.
This post contains affiliate links. This means that if you purchase from one of these links, I will make a small commission, but rest assured, you will not pay more for any products.


DIY Sock Gnome
What Supplies Do I Need to Make a DIY Gnome?
The supplies are easy to find, thus making gnomes is a breeze, and they are also habit-forming. Hence, the 100 gnomes + my friend and I have created. We had a blast making these together as we laughed and smiled until it hurt.
***For your convenience, I have gathered everything you need to make Gnomes in my Amazon Gnome Shop.
Ideas for Gnome Noses
I have used wood beads (these are my favorite), small pompoms, handmade clay noses.
If you are using air dry clay for your nose, make a 1.25″ ball and allow it to dry (according to the manufactures instructions) before making your gnome.
You can purchase mini pompoms, or you could make your own using a mini pompom maker and yarn. If you need a super easy pompom tutorial, you can find one in this earlier post.
My preferred gnome nose is the small wood ball without holes in them.
Gnome Beards, Hair, and Hat
Faux Fur
The most expensive part of making a gnome is the beard, so I recommend looking for faux fur fabric alternatives, such as pillows, throws, rugs that you might already have on hand and can repurpose for a gnome beard.
My favorite fur is the long pile faux fur and the soft faux fur with a shorter pile.
Mongolian Fur
Beards made with Mongolian fur look luxurious. The gray Mongolian fur has a deeper ground cloth with pale gray fur tips; this variation creates an ombre effect.
The Mongolian fur beard is the most interesting; consequently, it is the most expensive beard option.
Yarn
The most economical beard option is to make it with yarn. There are two ways of making a yarn beard. The first way is to cut yarn pieces to the length of the beard and then glue yarn pieces onto the body. The other way to make a yarn gnome beard is to make yarn tassels then glue them to the body (you can see how in my Gnome ornament post).
You can also make braids for a girl gnome (you can see how to make braids in this earlier post).
Socks
You can use any size, color, or style of socks for your gnome’s body. I prefer to use men’s ankle socks (these are my favorite) since they are the perfect size for making a gnome.
Note: you can make 2 gnomes from each pair
Body Filler Ideas
To make a gnome, you will need a filler for the sock (body). You can use either rice or Poly Pellets for the filling.
The Poly Pellets are expensive and are not as easy to source as plain rice. However, the Poly Pellets do not rot or attract bugs.
Rice filling makes a stable gnome, and it is easy to find and inexpensive; therefore, it is my preferred filling.
How do I Make a Gnome?
This is one of the easiest crafts I have ever done. These adorable gnomes turn out perfect every time, so they are definitely addictive.


Supplies for Easy Gnomes DIY
1. Filling the Gnome Sock Body
After your supplies are ready, you can print out the hat and beard pattern.


Rice for stuffing
To make the gnome’s body, place 48 ounces of plain rice in a cup (we had to fill up this cup 1.5 times) and stretch the sock over the cup to fill.
After filling the sock with the rice, gently gather the opening to secure it with a rubber band.
After securing the top opening with a rubber band, add a little hot glue to be double sure it stays closed.


Glue opening closed
2. Cut Out Gnome Beard
Cut out the beard from the fur fabric using the PDF pattern available above. Then decide on the beard placement, remembering that you will add the nose in the center front, and the hat will cover the opening and down over the nose just a little.


The underside of the beard
After deciding on a placement, glue the beard in place.
Glue it to the sock body.
3. Glue on Gnome Beard and Nose
Find the center front and glue the wooden bead nose on.
After the nose is glued on, I use a fork to fluff the beard around the wooden ball nose.


Fluffing up bread
4. Making the Gnome Hat
The final step is making the gnome hat. First, cut the hat out of felt using the PDF pattern available above. Once the hat is cut out, there is a trick to “rolling” it to get the correct cone shape and size. Start rolling and shaping from the shorter side towards the longer side and glue or hand sew the hat closed.


Rolling the Felt Gnome Hat
5. Attaching the Hat and Pom-Pom
Test fit the hat on the gnome body to see where the glue needs to be laid to attach the hat. Next, lay down a bead of hot glue where it is needed to attach the hat. Finally, take the completed gnome hat and seat it onto the gnome body and press firmly down to make sure good contact is made between the hat the hot glue.


Putting Hat on Gnome
Tie a pom pom to the tip of the hat, as shown below. Or glue the pom-pom to the hat.
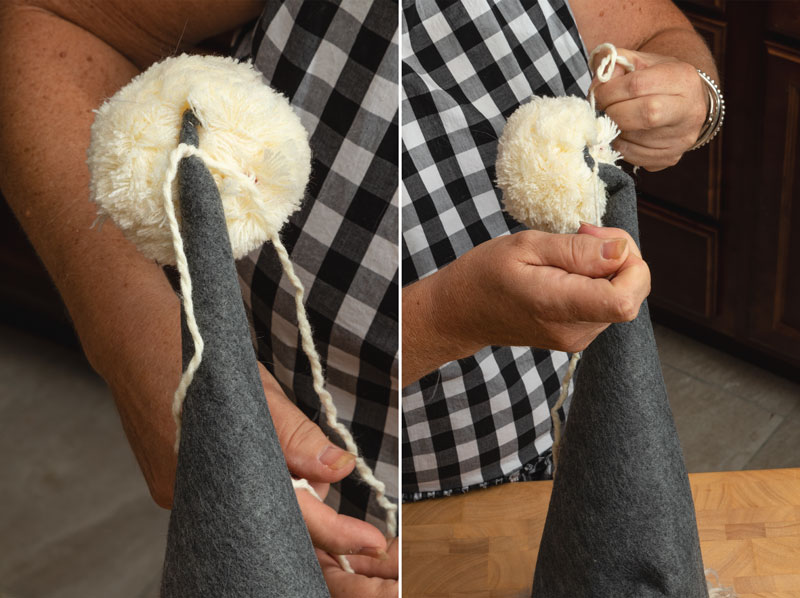
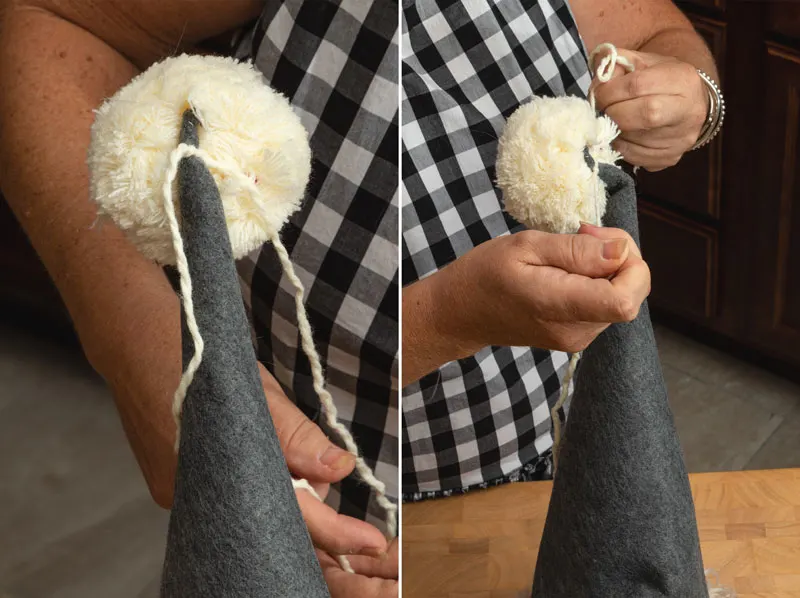
Putting Pom Pom on Hat
Now, glue the tip of the hat to the base of the hat to give the gnome’s hat a relaxed appearance.


Gluing Down Hat


DIY Gnome {Sock Gnome}
Materials
- Sock (body)
- Felt (hat)
- Faux fur (beard)
- Wooden ball (nose)
- Pompom (tip of the hat)
- Rubber band (close the sock)
- Rice or plastic pellets
- Beard Pattern
- Felt hat pattern
- Hot Glue
- Xacto knife
- Fabric hat pattern
Instructions
How to Make the Gnome (sock) Body
- Measure out 48 ounces (dry measure) of your filler (I used rice). Then fill the sock with the rice.
- Place your sock over a large cup filled with rice and turn the cup upside down and fill the sock with the rice.
- Gather the top of the sock and secure it closed with a rubber band. For extra security, you can tie a piece of twine over the rubber band. No need to cut off the sock if you use an ankle sock. However, if you use a longer sock, you may need to cut it off about 1.5" above the rubber band
How to Make a Faux Fur Gnome Beard
- After printing out the beard pattern, I use it as a cutting guide on the backside of the faux fur. Before cutting, make sure the fur is in the right direction, or your beard will not lay correctly.
- To cut the faux fur, you will only cut the ground cloth. Therefore do NOT cut the fur. Instead, I like to carefully cut through the backside of fabric using a Xato Knife.
- Next, I glue the beard onto the body about 1 to 1.25" below the rubber band. I like to angle it down from the front to the back to sit close to the body.
How to Make a Felt Gnome Hat
- Print out the felt hat pattern. Or you can use the fabric hat pattern (see the pattern information in the notes.
- Using your hat pattern to cut out the gnome hat. Once the hat is cut out, there is a trick to "rolling" it to get the correct cone shape and size. Start rolling and shaping from the shorter side towards the longer side and glue or hand sew the hat closed.
DIY Gnome Nose
- Glue your wooden ball nose on the center front of the beard just below the top edge. Now place your hat on the gnome and glue it in place. Next, I place a little glue around the top and sides of the nose to help form the hat around it.
Hat Pom-Pom
- The hat is not complete without a cute pom-pom on its end. I like to make my own pom-poms. Making my own saves money, and I can also customize them to match my gnome hat and decor. They can be attached with hot glue.
Notes
Gnome Patterns
I find it is much easier to make all my gnomes the same size, so I made patterns to change the hats with the seasons, and they will all fit my gnomes.
Hat Patterns
The first gnome hat pattern I made was for a felt hat. I wanted to use printed fabrics, so I made a fabric pattern too.
Beard Pattern
The beard fur is expensive, so I made a beard pattern not to make mistakes and waste the fur fabric.
Now put these gnomes everywhere. These gnomes are perfect for holiday decor or everyday decor.
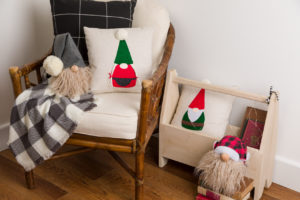
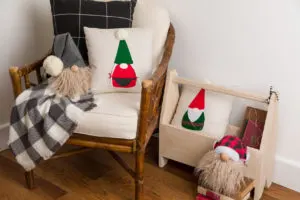
Gnomes and pillow gnomes
Some other DIY Gnome ideas you might like:
These adorable Christmas Gnome Ornaments are the cutest, easiest Christmas ornament crafts to make for this holiday season. They were made with scraps, so they are budget-friendly too.
Santa Christmas gnome is the perfect quick Christmas craft made with items from the dollar store and craft stores.


Christmas Gnome
These Gnome DIY Christmas Ornaments are adorable and easy to make.


DIY Gnome Ornaments
My daughter, Olivia, picked up some pinecones in our yard and decided to make some DIY Christmas Ornaments with them.


DIY Pinecone Gnome
These adorable gnome ornaments are made with yarn tassels.


Gnome Ornaments DIY
Mr. & Mrs. Gnome pillow appliques are a breeze to see how to make them, and these cute gnome hats with handmade pom poms.
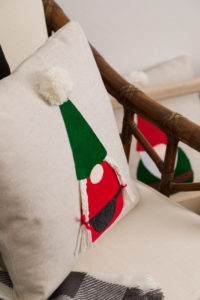

Gnomes and gnome pillows
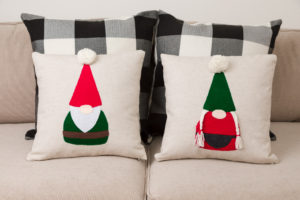
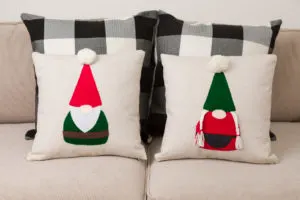
Gnome pillows
You might also like these handmade felt Nordic Christmas ornaments of gnomes, gingerbread-man, hearts, stars, hearts, and more. Grab your free pattern for these gnome tutorials and learn how. Easy sew gnomes, Scandinavian Christmas gnomes, and more.


Please join me (HERE) as we craft up some fun. You can look forward to receiving new inspiration every week. As well as special online crafting events, seasonal and holiday crafting too.
Happy Crafting,
Kippi
Ps. Please feel free to share this post and all these free sewing patterns with your crafting friends.
ciko
Saturday 16th of March 2024
Thank you for the article, it is very useful for us. Don't forget to also visit us below https://pengirimanlewatkapal.com/2023/05/16/ekspedisi-barang-surabaya-ke-kupang/ https://www.ekspedisidisurabaya.com/2022/12/23/ekspedisi-logistik-surabaya-medan/ https://www.pengirimanalatberat.com/ekspedisi-pengiriman-tiang-pancang-ke-sulawesi/ https://www.jasapengirimanbarang.com/jasa-ekspedisi-pengiriman-barang-surabaya-jayapura/
Emy
Friday 5th of January 2024
Crafting gnomes with your easy DIY guide is a delight! For unique crafts, check out some exceptional materials on unique products sites like ThingsFromMars — they might add an extra touch of charm to your adorable creations.
Wendy Benton
Monday 13th of November 2023
I love the gnomes pattern with rice but is it possible to use some rice and then a lighter filler so I could give them as ornaments?
sam
Monday 30th of October 2023
how do you make the red plaid hat with the ear flaps?
Rhonda
Saturday 15th of July 2023
Cute & will love making one.
Kippi
Monday 16th of October 2023
@Rhonda, I hope you enjoy making them too.