It’s almost here — my favorite time of year! Since I am a DIY’er, that means I have a ton of creating to do before fall, and to that end, I have already begun making a Christmas wreath I can use to decorate for both fall and winter. In addition, my front door will have a new wreath for the holidays.
Christmas wreath closeup

If you are like me and have been using the same Christmas wreath for years and want to mix it up, this wreath is perfect since it only takes minutes to make it; it looks and feels cozy too. In addition, it is the ideal indoor Christmas, fall, and winter wreath since you can change the bow for each season and holiday. I have included some more gorgeous DIY Christmas wreath ideas at the end of this post for your ultimate wreath inspiration.
Easy Loop Winter and Christmas Wreath DIY
This post contains affiliate links. That’s means that if you purchase from one of these links, I will make a small commission, but rest assured, you will not pay more for any products.
This wreath is so quick and easy you will want to make a ton of them, I guarantee it!
Supplies for Wreath
**Since supplies are limited, I have gathered all my crafting must-haves for your convenience HERE.
To find all my favorite Christmas crafting supplies, please visit my Amazon Store HERE.


Foam wreath form
First, gather supplies and a pair of scissors, and that’s it!


Loop yarn


Pins for the wreath
I used white-headed pins I had on hand from my sewing stash.


Pin the loop yarn in the foam
I pinned the yarn’s loose end to the form and started wrapping the yarn around and around the form, pushing each row together to get the best coverage.


Wrapping the loop yarn
In 2 minutes, I had this much covered, and it was so pretty already. When I needed to join one yarn ball to the next one, I tied them together and kept wrapping until the form was covered.


Ending the loop yarn
Once I finished wrapping the yarn, I cut the yarn a little longer to make sure I could find my pin.


Pinning the end of the yarn
Stick the pin in the yarn’s last loop and hide it, and it’s a wrap!!! Of course, you could use hot glue instead of a pin.
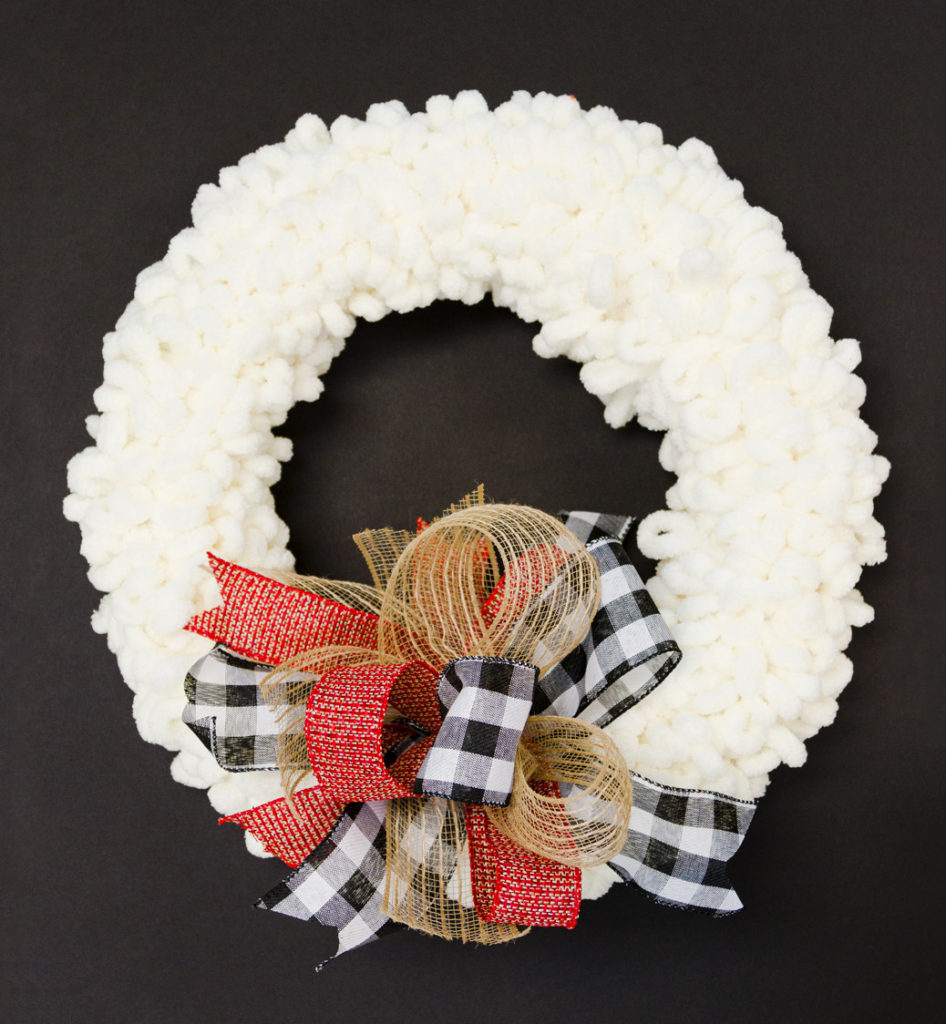

Loop Christmas Wreath
How to Make a Bow
Bow-making is one of my favorite parts of crafting; however, whenever I teach a class, it is the one thing that most folks want help with; therefore, I made a quick video on this foolproof bow.
Bow Supplies and Tools
- Three different ribbons (widths can vary)
- Floral Wire
- Scissors
- Wire cutters (these are my must-have wire cutters)
- Yardstick


Wreath Bow Ribbons


Ribbon for Christmas bow
Cut all your ribbons to the same length. For this bow, I used three different ribbons, so I cut 2 of each ribbon in 26″ lengths for a total of six ribbon loops with 12 ribbon tails. I cut two burlap ribbons, two buffalo check ribbons, and two red ribbons for this easy bow.


Underside view of the bow
Use the wire ends that you tied the ribbons together to secure the bow to the Christmas wreath.


Bow before trimming streamer ends
My favorite part is the fluffing of the bow and trims the ribbon streamers after I have wired the bow to the wreath; however, I could have done it before attaching the bow to the wreath.
You Might Also Like These Posts:
Learn how to make The Easiest Bow Ever HERE.


How to make a bow
DIY Gorgeous Christmas Wreath and Bow (see that post HERE).


DIY Christmas wreath and DIY bow
You might also like:
You can find more about this wreath HERE.
The added embroidery hoop Christmas decoration makes this wreath special.
It is so easy to make following my step by step. I have a how-to video to make it a breeze to learn how to make this gorgeous bow.
I changed the bow to coordinate with the decorations in my dining room. You will not believe how pretty this color scheme turned out (you can see it HERE.)

Christmas Wreath with Multi Ribbon Bow
Want a Stress-Free Holiday???
Want to enjoy all the holiday season has to offer? Are you feeling overwhelmed?
Join me as we enjoy a stress-free holiday season with a ton of inspiration, money-saving ideas for decorating, gift-giving, and so much more.
Join HERE! And have the best of everything this holiday. Have a Merry Christmas, and enjoy all the blessings of the season!
Wreath Inspiration
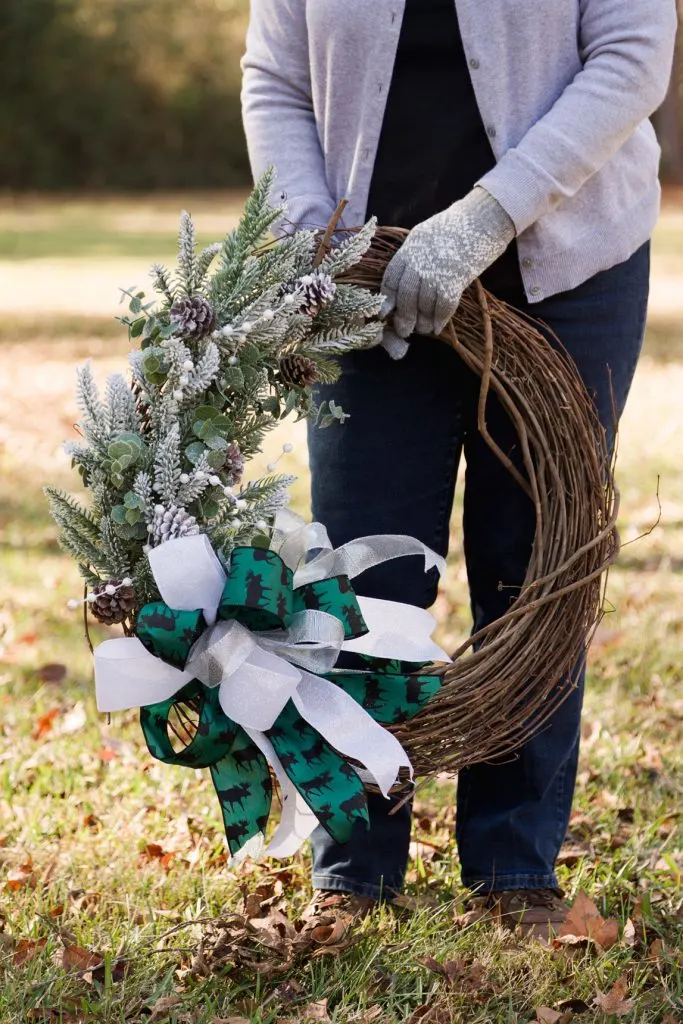
How about something to delight your guests? My friend Lia from Southern Yankee DIY has created this lovely wreath, so hop over and see how Lia made this one.


Grapevine Christmas Wreath
You might also enjoy these easy Christmas DIY crafts too.
Gnome Decor DIY


You might also enjoy these easy Christmas DIY crafts:
I made these adorable Christmas ornaments with felt and embroidery floss. You can find the instructions and free pattern HERE.
Christmas felt ornaments


Stree-Free Holiday
Want to enjoy all the holiday season has to offer, but it all seems overwhelming? Then, join me as we enjoy a stress-free holiday season with a ton of inspiration, money-saving ideas for DIY Christmas decorating, gift-giving, and so much more.
Join me (HERE)! And have the best of everything this holiday.
Thank you so much for your visit today. I hope you found some inspiration.
Merry Christmas,
Kippi
Ps. Please feel free to share this post and all these inspiring ideas with your crafting friends.
Marie
Monday 19th of December 2022
Love the fluffy wreath! Feels cozy :)
Leslie Woolsey
Thursday 12th of November 2020
I followed a link from Pinterest to this page. It was entitled "How to Make a Wreath Bow - DIY Loopy Wreath Bow." Your bows are absolutely gorgeous. I scanned through the steps to making the loopy wreath and thought that was very thorough and I appreciated it. Then I get to the bow and I see a picture of the ribbons you used, the directions to cut three ribbons (2 of each) into 26" lengths. Then I see the instructions to cut the wire to use to attach it to the wreath. You can delete this comment if you want, but I just wanted to say that I think you skipped a step or two. I still have no idea how you made your bow, which is totally why I followed the length. I'm not trying to be rude or mean... I just thought you might want to put in a step or two on what you did with the ribbon. It was a little frustrating.
Kippi
Thursday 12th of November 2020
Thank you for your comment. That is crazy that some of my post has disappeared. What else will happen in 2020? I will work on fixing it, but until I do please watch the how-to video where I show you how to make that bow using orange ribbon. Have a great day, Kippi
Annette
Saturday 26th of October 2019
How do you hang these? I am making one for a gift. So beautiful and simple. Thank you.
Marilyn Lesniak
Wednesday 7th of August 2019
Thank you for sharing at #ThursdayFavoriteThings. Pinned and shared.
Our Hopeful Home
Tuesday 6th of August 2019
This reminds me of a white pom pom wreath I made last Christmas -- only way EASIER!!! Love it. Thanks for sharing at Vintage Charm. xo Kathleen