Window flower box planters add charm and character to your home. I have been dreaming about how to decorate my window planters for each holiday and season. However, before I get ahead of myself, I would like to share how to build window boxes quickly.
I knew I wanted to make my little studio so charming I would like to spend all my time out there. It had woodpiles, bags of Quickrete, empty flower pots, and tools on the porch and stacked up along the outside walls. It was an eyesore.
Window Flower Box

How to Build a Window Box
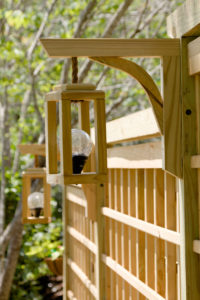
Mr. Kippi built me an Adirondak chair and an obelisk for my little secret garden next to my studio. I stood back and looked at the prototype obelisk and chair with the window and old rain gutters. At that moment, I knew the window needed some finishing touches to add beauty. I wanted everything to coordinate with these other outdoor home improvement projects; trellis, lanterns with solar lights, garden hose holder, so the white window got natural wood shutters, and a window box to add to the home’s curb appeal.


My inspiration for the window box was the chair and obelisk.
This post contains affiliate links. That means that if you purchase from one of these links, I will make a small commission, but rest assured, you will not pay more for any products.
I searched for inserts for the window boxes. Those inserts would determine the size of the window boxes could be. I choose this window box insert since they had a drip tray. My friend Rachel build this cute window box, that I adore, so I wanted one too.
Supplies and Tools
- 1 x 6 x 8 pressure-treated lumber
- 5/4 deck board pressure-treated
- Nails 1.5″ galvanized (box assembly)
- Nails 3/4″ galvanized (trim installation)
- Glue Titebond
- Window box insert with a water reservoir
- Wood sealer
- Paintbrush
- Sandpaper (100)
- Screws 2.5″ cabinet screws with washers
- Chop saw
- Table saw
- Drill (3/8″ bit for drain holes and 1/8″ bit for pilot holes)
- Clamps
- Nail gun
- Watering can
- Solar light
- 🌻 You can find all my gardening must-haves HERE
Planning
The first thing you will need to do is measure your insert and write down the height, width, and length. Note: take the measurements just under the upper lip of the insert if yours has one. Cut your (1 x 6 x8) lumber to accommodate those measurements.


Cut lumbar, and the flower box insert.


Box lumber cuts


Glue the end pieces


Glue on ends


Nail ends in place


Glue the front panel


Nail front panel
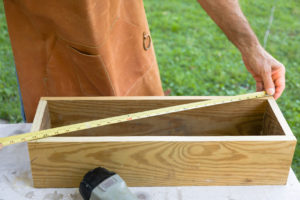

Measuring to be sure the box is square


Adding the first piece to the bottom


Adding the second piece to form the bottom
Installing Trim


Taking measurements for trim


Use a chop saw to cut trim pieces


Glue on trim


Nail trim pieces in place


Finished DIY flower box with insert


Checking the insert before water sealing and filling
-

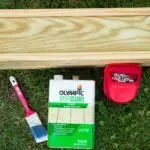
- Water Seal, paintbrush and Handy Cup
-


- Apply Water Seal
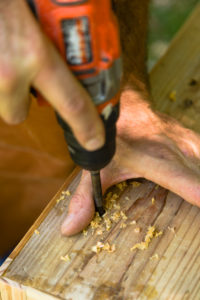

Drill drain holes in the bottom of the box


Three drain holes
Installing Window Flower Boxes


Pre Drill 3/4 by 1-inch spacer board for hanging


Install spacer


Holding the flower planter box to be sure of the placement


Marked and pre-drilled holes for mounting screws


-
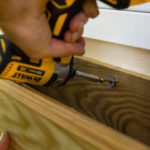

- Install hanging window planter with screws
Inserting the Flower Box Liner
The window flower boxes are on opposite sides of the studio, so they needed different plants since one was in the shade and the other one got a ton of sun (Florida sun). You can see how I choose the flower plantings HERE.


Adding the insert with flowers


Watering the planter after I filled it with flowers and plants
You can see the area behind the obelisk; it needs a trellis with a garden planter and lanterns. You can see how we built those gorgeous trellises HERE. I will be sharing how to make shutters, Adoranik chairs, and the obelisk with solar lights.
The new custom rain gutter looks so much better. I did not notice how awful the rain gutters looked until I installed the window box and shutters. I called and ordered the rain gutter and downspout over the phone and had them delivered. It was the right decision to replace them.


Studio garden area
This window box adds beauty both indoor and outdoor since I can see the flowers from inside too.
🌻Do you enjoy a beautiful garden and yard? Please join me HERE for everything you will need to create a beautiful garden/yard one project at a time.


My custom made chair with a fresh mojito
I created a DIY side table from a fallen tree. We also made some super groovy live edge hairpin leg tables you are going to love. You can see them in this post. The vintage-style pot with the transfers can make one, too, in this earlier post.


Side table made from a fallen tree


DIY Adirondack chair


DIY Chair, table, window box, and obelisk
If you love flower boxes and window box planters, you will enjoy building some and installing them on your home too.
You might also enjoy these other outdoor projects:
DIY Shutters

DIY Garden Trellis for your garden.

Lantern and Garden Screen Trellis
Learn how to Build DIY Lanterns with Solar Lights.
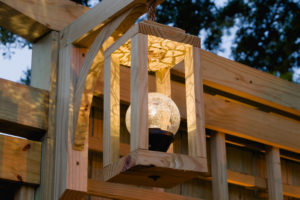
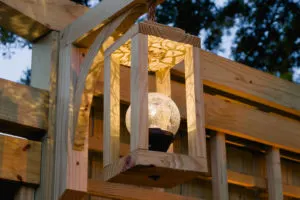
Handmade solar lanterns at night
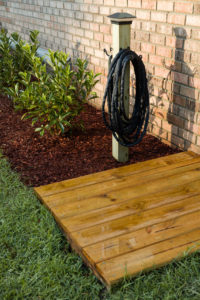

Finished deck and garden hose hook post
Learn to craft concrete outdoor projects with Quickrete.

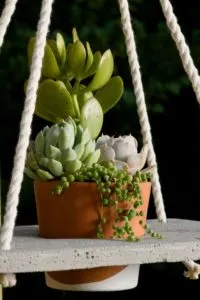
Boho chic hanging planter
Step by Step, hanging planters.


Hanging Basket Step by Step Guide
Thank you so much for our visit today.
See you soon,
Kippi
Annie
Monday 22nd of May 2023
Inspiring ideas. Always a pleasure to receive your ideas, recipes etc. Annie 🇨🇦
Leanna
Friday 3rd of March 2023
The front of our house is just so very plain. I wonder if this would help it? Pinning to try later.
Marie
Wednesday 2nd of June 2021
This is adorable! I have been contemplating adding a window box to a window on our backporch, but worry it will look weird to only have the one.
Danny
Saturday 10th of April 2021
Excellent execution! Beautiful work. Enjoy!
Jeanne
Monday 8th of March 2021
What a stunning before and after!