While working on my bedroom makeover (read the full story here) I decided to make Farmhouse curtains. What Farmhouse would be complete without handmade curtains?
I wanted the carefree look and ease of using a drop cloth. However, the drop cloth’s color did not fit into my design (even after bleaching it). I needed white curtains, so I decided to use canvas instead.
Window treatments are always a good idea! They soften the hard lines of your windows and provide privacy, light control (room darkening), and insulation.
You can make your no-sew curtains from fabric or drop cloth. They don’t require any special skills.
Farmhouse Curtains

This post contains affiliate links. If you purchase from one of these links, I will make a small commission, but rest assured, you will not pay more for any products.
The photo below was taken before we installed the canvas drop-cloth curtains and French pole. The room seems bottom-heavy.


Before window Farmhouse Curtains
Notice how your eyes travel all over the room once the window treatments are installed. Our DIY Blanket Ladder tutorial is in this earlier post.


DIY Farmhouse Curtains – No Sew Panels
The DIY Wingback Headboard is another one of our DIY projects with a step-by-step tutorial.
How to Make Easy No Sew Curtains
Before making your farmhouse-style curtains, plan your curtain hardware (curtain rods). I did not want to use drapery hooks or make my curtains rod pockets, so I chose to order French Poles with rings and clips. Furthermore, I wanted my farmhouse-style curtains to get an updated look with my Boho meets farmhouse bedroom design.
Hardware – Decisions, decisions…
Our nightstands are from the ’70s, incidentally. They are solid wood and well made. I looked for new ones, but the cost was prohibitive.
The next best thing was to update the ones I had. I wanted them to disappear, so I painted them the wall color (read more here) and changed the hardware to match. The hardware had a rustic brown finish, so I spray painted it black.
This helped me choose the color for my window treatment hardware (read more here).
-
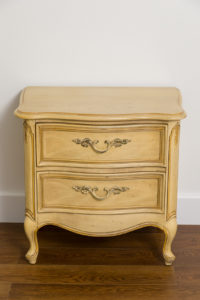
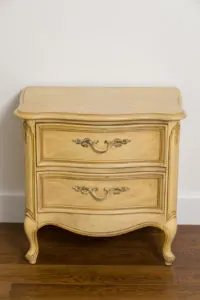
- Before photo of nightstand
-

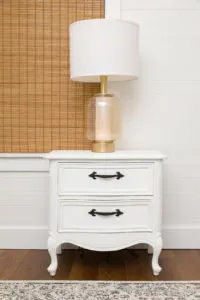
- After painting the nightstand
-
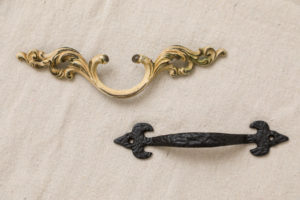
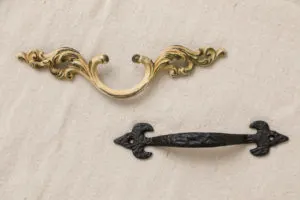
- Old and new pulls for the nightstand
The choice was easy after considering all the options. The French Pole with clip rings in black would draw your eye up and tie the elements in the space together.
I used a similar rod for our shower curtain (you can see it here). If you don’t want to use clip rings, you can add simple Farmhouse curtain ties instead.


Custom-Made French Pole for Farmhouse Curtains
Measure and Make a Cut Plan
If you have decided to make drop cloth curtains, you must figure your yardage according to the sizes of the drop cloths available. These are the best drop cloths I have found online. At my favorite home improvement store, Home Depot, I found painter’s drop cloths.
This is the canvas fabric I used and the BEST canvas for the money.
Since I used 60-inch-wide 10-ounce cotton canvas, it was easy to calculate my yardage. Since my panels will be stationary (not opening and closing) and I have woven wood Roman shades, I only need one width of fabric to look full. However, when I make these curtains for the living room, I will use 1.5 widths per panel.
Please note: My windows are 34.5 inches wide, and the window trim is 3.5 inches (each side, so 7″ total). I planned to install the French pole 4 inches out from the side trim. Therefore, I needed to order a 49.5-inch pole with 10 clip rings.


No-Sew Farmhouse curtains supplies and Canvas fabric
DIY Curtains Supplies and Tools
Gather your supplies, tools, and cut plan to make your DIY curtains from either canvas or drop cloth. The best part is no sewing machine necessary to make these easy curtain panels.
Supplies and Tools
- Fabric or drop cloths
- Seam tape
- Fabric Scissors
- Paper Scissors
- Iron (steam)
- Fabric marker water soluble
- Measuring tape
- Yardstick
- Drapery weights
- Stapler with staples
Marking and Cutting Canvas Drop Cloth
At this point, you should have already installed your hardware or French pole (window treatment hardware). Using the clips on the rings as your top measurement measure from there to the floor for the final length before adding the ruffle. The width is determined by how full you want your panels to be. Are you going to close them?
Please note: my canvas fabric was 60″ wide so I used one width.
Using your size final measurements work backward and add hems to those measurements (mine curtains have a finished length of 89″).
Side hems are 1″ so add 2″ to width.
To determine the length add 8″ for the bottom hem and 1″ for the top hem and the length of your ruffle (mine is 8″ long). In other words with a finished length of 89″ plus hems and ruffle you need to cut your fabric at 106″ lengths.


Measuring canvas fabric for curtains
Side Seams
To form the side seams, you will use a 1″ seam then folded that over into itself, whereas to form a 1/2″ seam, and pressed it in place.


Ironing in the side hems
.


Turning under the hem allowance again
To form the ruffle measure down 9″ from the top of the fabric and made a mark. Next, add the seam tape (open the seam to add tape) starting just below the ruffle mark to about 8″ from the bottom and steamed it in place on both sides. In other words, you are only gluing down the areas that are not part of the bottom or top hems or ruffles.


Ironing on the seam bonding


Steaming the side hem into place
Once the tape is pressed in place remove the paper from the top and turn the seam over and steam it to glue the seam in place.

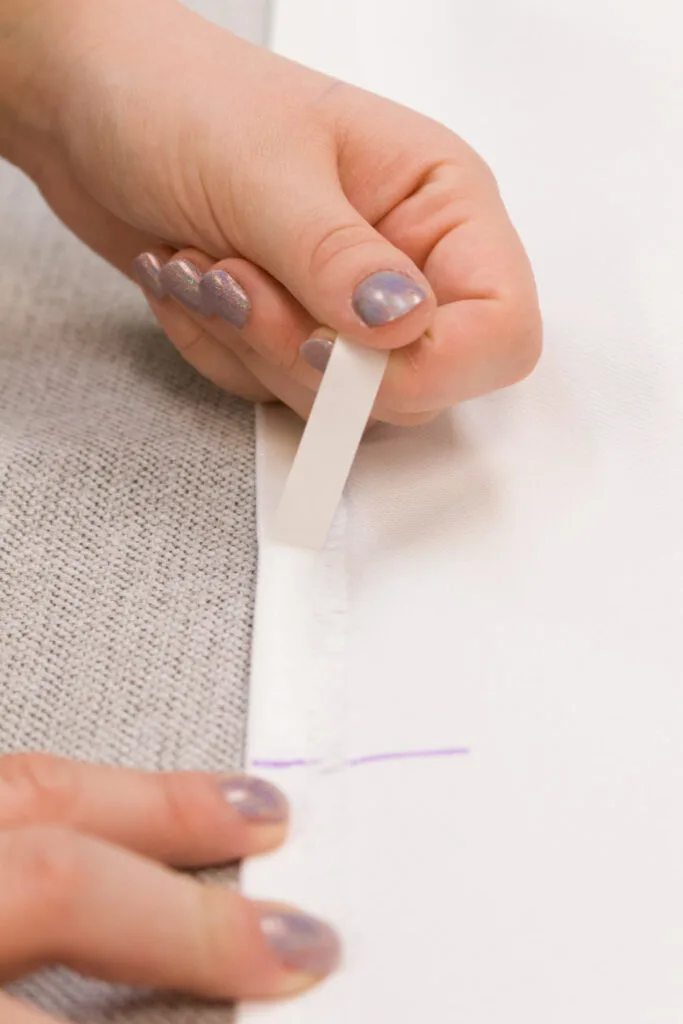
Peeling the paper off the bonding tape
How to Make a Curtain Ruffle


Cut a slit in the side hem at the ruffle


Turn the side hem the opposite way at the ruffle


Using a water-soluble fabric maker


Miter at Slit in the side seam at the top ruffle turn over raw edges to form a clean edge and press in place.


Turn the under the hem
Pro Tip:
To form neat professional side hems at the ruffle mark and slit in the seam turn the ruffle side hem the opposite way (this ensures the side hem will not be seen when the ruffle is formed).


Add a drapery weight to both sides of your panels making sure they are in the correct place before closing the hem


Staple the weights to the inside of the bottom hems the weights should appear to be upside down (check by folding the hem over before closing the hem)


Iron on seam tape to bottom hem


Clip Easy Curtain Panels to the curtain hardware for installation.
Pro Tip:
To install your Farmhouse curtains draw a line across your fabric at the foldover that will form your ruffle and divide the area by 9 spaces to determine the clip positions and mark that too. To hang or install the curtains start clipping it on at one side seam and every purple mark until you reach the other side seam.


Canvas Curtains Easy Install clip at the purple fabric marker marks.


To dress the window treatments adjust the ruffle and pleats to form even pleats.


Easy No Sew Window Treatments installed and dressed.


Farmhouse No-Sew Curtains
If you love this idea you might also enjoy:
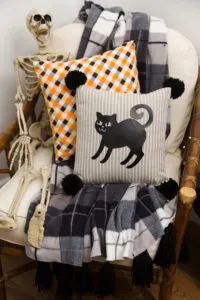
How to make a gorgeous DIY Llama Pillow.


Mixed layered pillows and pillow sham – DIY Llama Pillow
Easiest Envelop pillow tutorial you can find in this earlier post.
-

- Envelope pillow DIY
-
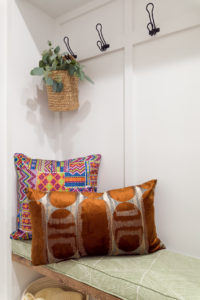

- Mudroom Bench Cushion and Pillows
-

- chair with pillow and throw
Grab Your Ultimate Home Transformation Step by Step Guide HERE! And get started now.
I have been working on some easy gorgeous fall decorating projects you are going to love so if you don’t want to miss any inspiration join The Fall Inspiration Newsletter and get it delivered to your inbox.
See you soon,
Kippi
Robin
Thursday 4th of January 2024
Creating no-sew farmhouse curtains is simple. Measure and cut fabric to fit your window, then use hemming tape or fabric glue to secure the edges. Add rustic charm with burlap or linen, and customize with embellishments like ribbons or lace for a personalized touch. Siem Reap Tour
Dorothy
Monday 15th of August 2022
I would like info on ordering the French poles.