Creating wooden pumpkins for fall, Halloween, and Thanksgiving is easy, fun, and super budget-friendly.
I used scrap wood from building our garden trellis, paint on hand, and sticks off a tree in my yard.
Wooden Pumpkins

This post contains affiliate links. This means that if you purchase from one of these links, I will make a small commission, but rest assured, you will not pay more for any products.
The adorable gather sign in the photo above I made in an earlier post.
Wooden Pumpkin Tutorial
This craft project is so easy you can invite the kids to join in the fun.
If you don’t have time to create some gorgeous pumpkins right now you can save this pin on your Pinterest fall craft board.
What Supplies Do I Need to Make a Wooden Pumpkin?
The first place to look for “free” wood is in your wood scrap pile. You can use 2×4 or 4×4 for this project. Your local hardware store also has a scrap pile, so be sure to ask them about it.
🎃 For your convenience, I have gathered my favorite fall crafting must-haves in my Amazon store.
Wood
To create my pumpkins, I used 4×4; however, you could use a 2×4 as well. The heights I liked the best are 3″, 6″ and 9″. You can cut your piece of wood to your desired height.
The pumpkins in the trio look so pretty for your dining room or mantle for fall. If your woodcuts have any rough spots, use sandpaper to smooth your wood.
These whimsical pumpkins have a non-traditional pumpkin shape that will be a great addition to your fall decor. You do not need to use high-quality wood for this DIY craft project, so use whatever you have on hand.
Paint
My favorite craft paint is chalk paint! I always it on hand since it requires no prep before painting (you can read more about it in this earlier post). However, you can use any craft paint or spray paint to paint your wooden pumpkins. You can find chalk paint at most craft stores.
Stems
For the pumpkin’s I used sticks I cut from a tree. However, you can make a stem from airdrying clay, use cinnamon sticks, or purchase some.
Leaves
I made a pattern to make some of my leaves (leaf pattern) and cut them out of old book pages. However, you can use burlap, craft paper, or fabric for your DIY leaves. For a few of my pumpkins, I used silk leaves.
Raffia and Ribbon
I added a ribbon, lace, or raffia to add a little fun to my finished pumpkins. However, you could use a cord, twine, rope, yarn, etc., for your bow. Also, you could add bling if you like or sand off some of the paint and them more rustic.
Glue and Scissors
You will need glue to attach the stem to the pumpkin. I choose hot glue since it dries instantly, so I could quickly finish decorating my pumpkins. However, other types of glue will work, such as wood glue, craft glue, or school glue. Also, I used “paper” scissors for cutting the leaves and my “ribbon” scissors to cut everything else.
How Do I Make a Wooden Pumpkin?
This is one of the easiest and most inexpensive crafts I have ever made. You are ready to begin as soon as you decided what paint, stem, leaves, and bow you will be using.
1. Sanding and Painting the Wood
I like to give my unfinished wooden pieces a quick sanding before painting.


Paint supplies
It is fun to make your pumpkins in non-traditional colors, and you could add polka dots, stripes for a unique look.


Painting the wood pieces
2. Cut Out Pumpkins Leaves
When making these DIY wood pumpkins, I wanted to make a neutral tiro; therefore, the orange, yellow and green silk leaves would not work. I had to make the leaves from something I had on hand that was in the same colorway.
For this reason, I made some of my leaves using my leaf pattern and the book pages.


Book page leaves
3. Pumpkin Stems
Choosing a stem for my pumpkins was as easy as stepping out of the backdoor. I decided to use stems from a tree since it gave my pumpkins a fun rustic wood style for the stem. Choosing a purchased or handmade stem are also a great choice.


Pumpkin Stems
4. Assembling the Wooden Pumpkin
The best part of the project is assembling the pumpkin since you can get creative and make your own unique pumpkins.
Leaves
Attaching the leaves coupled with the DIY tendril (vine) adds a “real” element to your wooden pumpkins. There are many choices for DIY leaves, such as book pages, burlap, craft paper, fabric, ribbon, etc. on the other hand, if you would rather use purchased leaves, there is a wide variety of them to choose from well. You can use this downloadable leaf pattern for your DIY leaves.
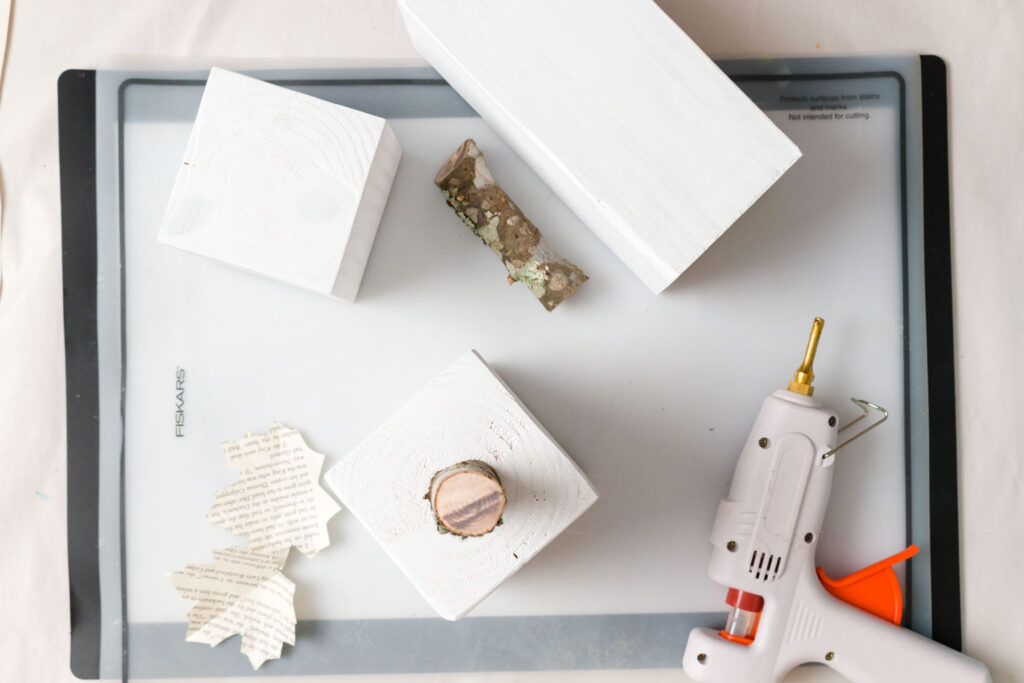

Stem Glued in Place
Apply a generous dot of hot glue to the center of the top of your painted wood pumpkins and attach your stem.
Next, attach your leaves. Note: Before I attach paper leaves, I like to fold them to make creases where the vines would be in a real leaf.


Book page leaves attached
Raffia, Lace, Twine, Rope, or Ribbon
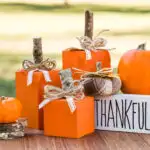
I chose the tendril or curly vine to coordinate with the other elements I used for each trio of pumpkins. Such as I used raffia for the white, for the orange ones, I used raffia and lace, and the teal pumpkins got a buffalo check ribbon.


Add Raffia bow
I found that adding the wide ribbon first was the easiest method to add them. Then I nestled a few leaves under the ribbon.


Pumpkin Ribbon


Attaching silk leaves

DIY Wooden Pumpkins
Materials
- 1 4x4 board
- 1 Raffia
- 1 chalk paint
- 1 sandpaper
- 1 leaf pattern (printout)
Instructions
- To create my pumpkins, I used 4x4; however, you could use a 2x4 as well. The heights I liked the best are 3", 6" and 9". You can cut your piece of wood to your desired height.
- I like to give my unfinished wooden pieces a quick sanding before painting.
- Paint the wood pumpkins with chalk (or paint of your choice). It is fun to make your pumpkins in non-traditional colors, and you could add polka dots, stripes for a unique look.
- You can make some of my favorite leaves using the leaf pattern and book pages, or you could use silk leaves or ribbon.
- Choosing a stem for my pumpkins was as easy as stepping out of the backdoor. I decided to use stems from a tree since it gave my pumpkins a fun rustic wood style for the stem. Choosing a purchased or handmade stem are also a great choice.
- To attach the stem apply a generous dot of hot glue to the center of the top of your painted wood pumpkins and hold the stem in place until the glue dries. Next, attach your leaves. Note: Before I attach paper leaves, I like to fold them to make creases where the vines would be in a real leaf.
- I chose the tendril or curly vine to coordinate with the other elements I used for each trio of pumpkins. Such as I used raffia for the white, for the orange ones, I used raffia and lace, and the teal pumpkins got a buffalo check ribbon.
Notes
Finished Wooden Pumpkins
I displayed the white pumpkins with some book page decoupaged pumpkins.


Painted wooden pumpkins


Orange Wooden Pumpkins
You might also like these scrap wood projects:
These simple scrap wood trees can be displayed all year round. They were made with the leftover wood from my DIY blanket ladder.


Scrap DIY wooden trees
One of my all-time favorite DIY scrap wood projects is my lanterns.


Wood Lantern DIY
Pallet Pumpkin cutouts is another fun and whimsical wooden pumpkin craft. They are the perfect pumpkin decor for your front porch.


Halloween rustic pallet pumpkins
You can find a ton of inspiration with these 20 plus DIY pumpkins in this post by Olivia Ohern.
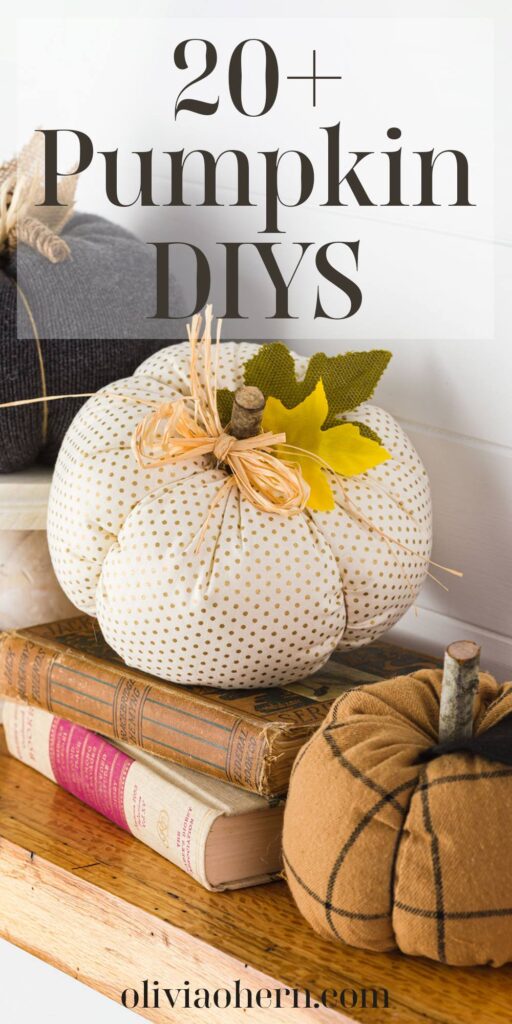

20 plus Pumpkin ideas
Thank you so much for stopping by today. I hope you found some easy and quick fall inspiration.
Would you like to join the Fall Newsletter so that you get all the inspiration delivered to your inbox?
I love keeping in touch, so please say hello in the comments below.
See you soon,
Kippi
Kate
Saturday 27th of August 2022
Hi. How do you make this tendril you speak of? What material is used? Thanks
Marie-Interior Frugalista
Friday 12th of August 2022
So cute and I love the color selection!
Leslie Watkins
Tuesday 24th of August 2021
I was loving the turquoise and then I saw the book page ones! Oh, my goodness! Swooning!
RACHEL HARPER
Thursday 19th of August 2021
Kippi, These pumpkins are so cute. I loved the paper leaves. I'd like to share a link to your post on my Sunday, Dirt road Adventures if that's oK.
Cindy@CountyRoad407
Tuesday 17th of August 2021
I can hardly wait to make some of these adorable block pumpkins! So stinkin' cute. Thanks for sharing them with us. pinned