Since we spend most of our time at home, we have been updating our house and yard this year. One of my favorite parts of the update is, of course, the yard. We built trellises, Obelisk, solar lanterns, birdhouses, shutters, and window flower boxes. Now we are planning to build a raised garden box bed.
Last year at the beginning of the health crisis, we whipped up some DIY-raised vegetable garden beds from old pallets.
They provided us with fresh herbs and a few vegetables that we enjoyed so much. This year we decided to build a bigger garden with Garden Box Beds, Straw Bales, and obelisks trellises for a ton more vegetables, herbs, and flowers.
**For more gardening inspiration and ideas, I have added some amazing gardening posts at the end of this post, so be sure to check them out too.
How to Build Raised Garden Bed Boxes
We chose local cypress lumber for our garden boxes; however, you can build your boxes from various lumbar. Since pressure-treated wood is not natural, we chose not to use it. You can find more information about wood choices here.
DIY Garden Box

This post contains affiliate links. That means that if you purchase from one of these links, I will make a small commission, but rest assured, you will not pay more for any products.
Supplies Needed
1x12x8 Four each
2x2x8 corner posts and center supports 2 each
2-inch deck screws
Tools Needed
Impact driver with driver tip
Cordless drill with a countersink bit
Measuring tape
6-inch clamps
👩🌾 For your convenience, I have gathered all my Gardening must-haves HERE.


Supplies for building raised beds
Raised Garden Box Lumber Cuts
Four Cuts 1x12x30
Cut Four 1x12x60
Cut Six 2x2x30


Cutting four boards for the long side
Assemble the Ends
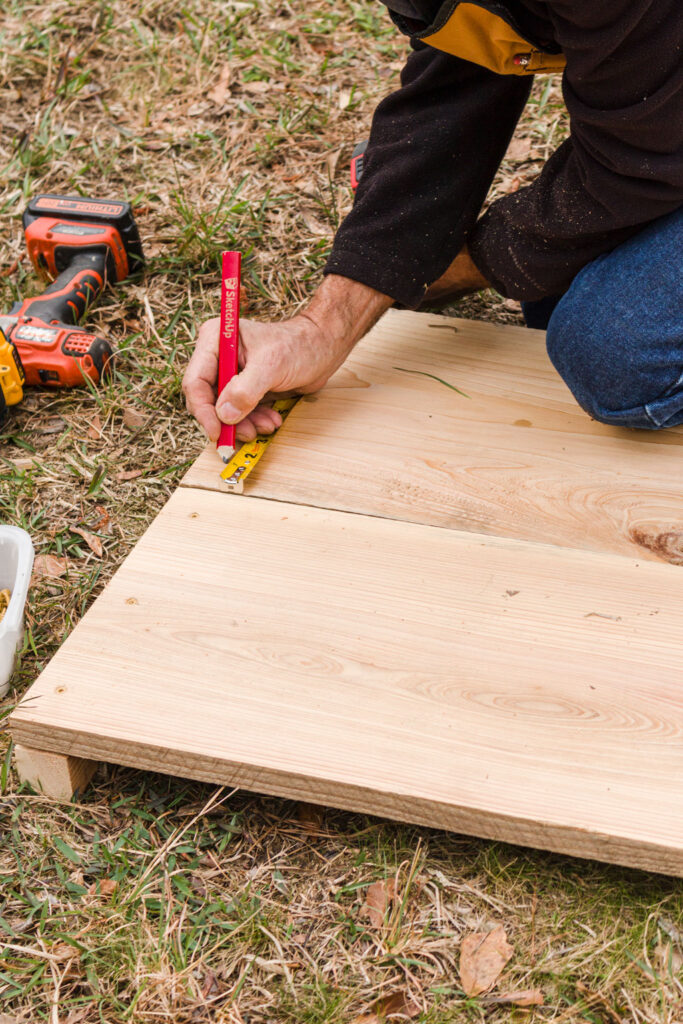
Measure the ends for placement of the screws and predrill—1 ½ inch from top and bottom and one in the center.
Place the two 2x2x30 on a flat surface.
Align the end board with the corner post and install the screws
Add the second end board tight against the first board with the pipe clamp and install screws
Make the other end section


Cut corner posts and support boards


Pre-drilling the screw holes

Marking the screw holes


Screwing the outside board to the corner support


Attach pipe clamp and mark screw holes
Adding the sides
Measure and predrill all screw holes
assemble the bed upside down. Position two sideboards even with the top and outside edge of the end-use pipe clamps to hold them in place. Install screws
Attach the second row of sideboards using pipe clamps and install screws


Clamp the sideboards to the end boards


Clamp the other end and pre-drill screw holes


Adding the second sideboards


Attaching the second sideboard
Install Center Supports
Use 6-inch clamps to hold the center supports in place, then redrill and install screws.


Mark the center on the long sides


Attach center support to long sides


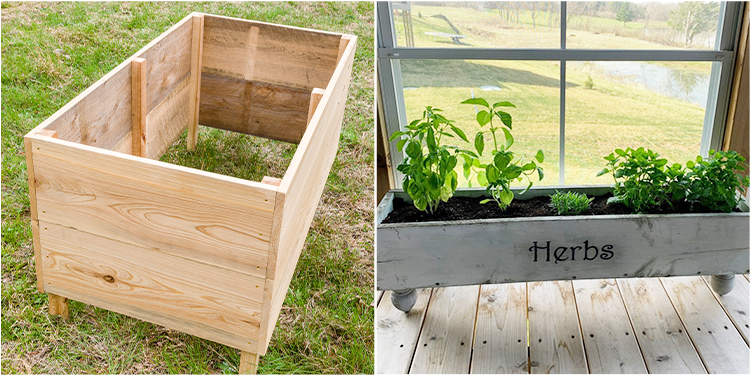
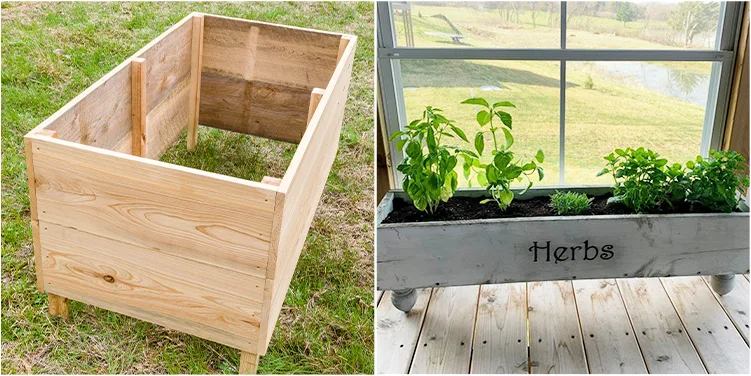
Garden box completed (upside down)


Easy to Build Raised Garden Beds


DIY Raised Garden Beds


DIY Garden Box
Our garden beds will need to be installed and filled with garden soil and other organic matter. We have saved sticks, cardboard, leaves, grass clippings, compost, and peat moss to fill our garden boxes. We checked the Farmer’s Almanac for the best planting dates.
Now that our boxes are filled with the soil, we are ready to plant our food crop.
For convenience, you can fill your bed with a purchased mix. Be sure to check your growing season before planting or sowing seeds.
You might also like to build an easy compost bin like this one for composting your kitchen scraps. Compost is like gold to a gardener.
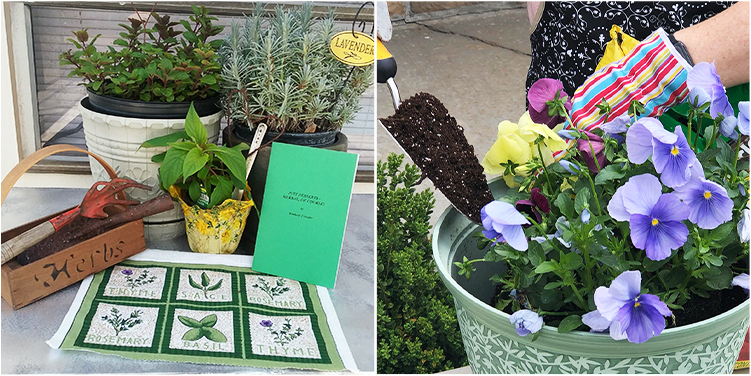
🌼🌼More Gardening Inspiration and Ideas🌼🌼
I have gathered some favorite bloggers (yours and mine!) to bring you lots of Garden Inspiration. With all these amazing ideas, you are bound to walk away with tons of ideas!
Next on tour is my friend, Niky from The House on Silverado. I love the way she decorated her farmhouse-style herb box. It would be so convenient to have herbs growing in the kitchen! Be sure to check it out along with all the other amazing bloggers below.
Kippi at Home // The House on Silverado
🌻 🌻 🌻 🌻 🌻 🌻

Do you enjoy a beautiful garden and yard? Please join me HERE for everything you will need to create a beautiful garden/yard one project at a time.
Happy Gardening,
Kippi
Carol
Sunday 12th of March 2023
I want to make a box like this but with an enclosed bottom. And higher off the ground
rob
Friday 19th of August 2022
love the step by step boxes .. do you have a video/steps on filling different layers of the box ? thanks
Peggy
Tuesday 5th of April 2022
Hi how do you close the bottom to stop the soil from coming out?
Wednesday 6th of April 2022
@Peggy, I would think u would break the ground for underneath your box, the place box over it pound box into the ground at stake ends, fill with your soil plant your plants.
CoCo
Wednesday 21st of April 2021
These raised garden beds are amazing and totally on my wish list, Kippi! I love how they came together. They look so good. Hugs, CoCo
Leslie Watkins
Saturday 17th of April 2021
I love the details you have given in this. We want raised beds..trying to navigate where to place them and deer proof them! Thanks for the inspiration!!